Azure Identity And Access Management Part 36 – Azure Active Directory – Application Management 5 – Self-Service Application Access

Hello Friends,
Hope you all are doing good !!!
In our previous articles we have discussed about how to configure Automatic User Provisioning for SaaS Application in Azure AD. Today in this article, we will discuss on how to configure Self-Service Application Access in Azure AD.
If you have missed our previous articles on Azure Identity And Access Management (IAM), please check it in following links.
Part 1 – Azure Active Directory – Overview
Part 2 – Azure Active Directory – Enterprise Users
Part 3 – Azure Active Directory – Create Custom Directory Role & Assign Role using Power-Shell
- *
- *
- *
Part 32 – Azure Active Directory – Application Management 1 – Overview
Part 33 – Azure Active Directory – Application Management 2 – Integrate SaaS Application
Part 34 – Azure Active Directory – Application Management 3 – SSO Configuration For SaaS Application
Part 35 – Azure Active Directory – Application Management 4 – User Provisioning For SaaS Application
Next Article : Part 37 – Azure Active Directory – Plan Authentication With Azure AD
Self-Service Application Access :
Self-service application access is a great way to allow users to self-discover applications. This will allow administrators to do things like:
- Enable users to request access to applications using a “+Add self-Service App” title in the Azure AD My App Access panel.
- Configure which applications users can request access to.
- Create an approval policy if needed and Specify who should approve requests for specific applications
- Configure up to 10 individuals who may approve access to this application.
- Allow to configure automatically assign self-service assigned users to an application role directly.
- Allow the business group to approve access to the requested applications.
This capability is supported for all pre-integrated apps that supports single sign-on in the Azure Active Directory app gallery, including apps like Salesforce, ServiceNow etc as shown in the following figure. Here we have tried to configure self-service before configure single sign-on and we found following information.

Lab Exercise :
We have configured single sign-on for Salesforce application as described in our previous article Part 34 – Azure Active Directory – Application Management 3 – SSO Configuration For SaaS Application. Now let’s configure self-service application access by going through the following steps.
Step 1 – In this step, let’s check, who are those users/groups has access to the Salesforce application. To check that, we need to login Azure portal => Azure Active Directory => Enterprise Applications => Choose the application for which you want to configure self-service application access and in this case we will choose “Salesforce For Manas” => select Users and Groups under Manage section. We can see here, only “Manas Global Admin” has access to the app as showing in the following figure.

So the Salesforce SaaS app can only accessible to Manas Global Admin account as the application has not shared with any other users or groups.

Step 2 – Let’s check for an other user “Uday Joshi” and as shown in the following figure, the Salesforce application is not visible to the user “Uday Joshi”.

Even when try to add new self-service app by clicking +Add Self-service apps link as showing in the following .
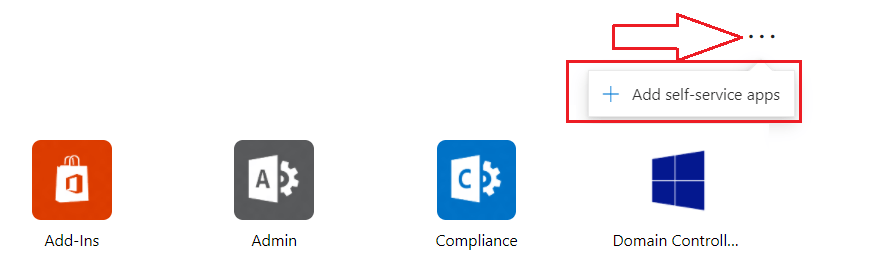
After clicking +Add self-service apps link for user “Uday Joshi”, we got following screen and there was no suggested apps available.

Step 3 – Let’s now stat with actual configuration of self-service application access for “Salesforce For Manas”. Login to Azure portal using Global Administrator Account => Azure Active Directory => Enterprise Applications => Salesforce For Manas => select Self-service from Manage section.
To enable Self-service application access for this application, set the Allow users to request access to this application? to Yes.

Step 4 – In this step we will configure the To which group should assigned users be added? field. Here select the group to which, users who request access to this application should be added as showing in the following figure we have selected MSTechs group.

Step 5 – Set the Require approval before granting access to this application? to Yes, if we want to require a business approval for the user to access the app. In our exercise, I have set it to Yes and also I have configured Who is allowed to approve access to this application? . This is to Specify the business approvers who are allowed to approve access to this app. It support 10 approves . Here I have configure one approver for this exercise as shown in the above figure.
Step 6 – The last field to configure is To which role should users be assigned in this application? field. We can select the role to which these users should be assigned. in our case it is set to Default Access as shown in the following figure.

Step 7 – Click Save button to save the configuration. in turn it will ask for confirmation. Click Yes to complete the configuration.

Step 8 – Now let’s go to My App portal and log-in with “Uday Joshi” account. As showing in the following figure, currently there is no Salesforce app visible in the window. So let’s click +Add self-service Apps link to add the required app

Step 9 – Now we can see the configured app “Salesforce For Manas” is visible on the screen. Let’s click Add to add the app. Then it needs confirmation, if we really need to add the app.


Step 10 – After confirmation , if the app is configured for business approval before granting access. Then one notification mail will go to each approver and also inform to app requester as shown in the following figure.


Step 11 – Now let’s go to approver’s mail box, to check, if there is any request mail pending for approval in side the mail box. As we can see in the following figure, approver has got one request from “Uday Joshi” to grant access to “Salesforce For Manas” SaaS Application. Click on Approve button to approve the request and grant access to the app. Approval required confirmation from approver before it complete the approval process.


Step 12 – Now let’s move back to “Uday Joshi” My Apps portal. As showing in the following figure, now the user has granted access to the ” Salesforce For Manas ” app and now it is visible to user.

With the above information, we are concluding this article as well on Application Management service provided by Azure AD. I hope this is informative to you. As I am exploring the Azure Identity and Access Management (IAM) in a detail level specially with Azure Active Directory . Please let me know if I missed anything important or if my understanding is not up to the mark.
Keep reading, share your thoughts, experiences. Feel free to contact us to discuss more.
Thanks for reading 🙂


1 Response
[…] our previous articles we have discussed about Application Management in Azure AD. Today in this article, we will discuss on how to plan the authentication of our cloud based […]