Azure – Migrate On Premise SQL Database To Azure (Cloud)
Hello Friends,
Today in this blog, we will discuss about how to migrate an on-premise SQL database to Azure SQL database (cloud). To make this possible, you must have an Azure subscription and if you don’t have an Azure Sql database yet, create one Azure SQL Database. Because we are going to import our on-premise Sql database to one Azure Sql database. We have published a blog on how to create an Azure SQL Database. We are going to use our existing Azure Sql Database.
Let’s start with our discussion through this blog. We are going to describe our points in following steps.
- Connect to your local/on-premise database and expand the database you want to migrate to Azure/Cloud as shown in following figure.
-
From here we need to export the required database and save the backup file to a file location so that we can reuse that back up file when we will import the database to AZURE. In this case my database name is “ManasLocalDatabase”, which needs to be migrating to Azure.
Right click on “ManasLocalDatabase” database and click on Tasks –> Export Data –-> tire Application… as shown in following figure. - Then select option “Save to Local disk” and save the backup file to your preferred location and click Next button to start exporting the database as shown in following figure.
- Once Export done successfully, click on Close button to finish with exporting the local database as shown here.
- Now we have the backup file of the local/On-premise database and we need to export to our Azure Sql Database server. Before doing that let’s login to your Azure portal and create a Sql Database server, if you have not created yet. We have an existing database server and now one database exists in our existing Azure database server as we can see in following image.
- We will now use the above database server to proceed with our discussion. Let’s connect to the Azure database server using SSMS as shown in following figure.
- In “Import Settings” form select “Import from local disk” option to select our backup file from our file system as shown in following figure.
- In “Database Setting” form, provide a meaning full name to your database. In this example we have given a new name as “ManasLocalDatabaseInAzure” and set the maximum size of your database then, click Next button to continue with import as shown in following figure.
- Click on Close button to finish with the importing.
- Now you can see, we have successfully imported the on-premise database to Azure Sql Database/ Cloud and we can compare both database as shown in the following figure.
- In following image, we can see the new database reflected in Azure portal as well.

Figure 1: Azure – On premise Sql Database
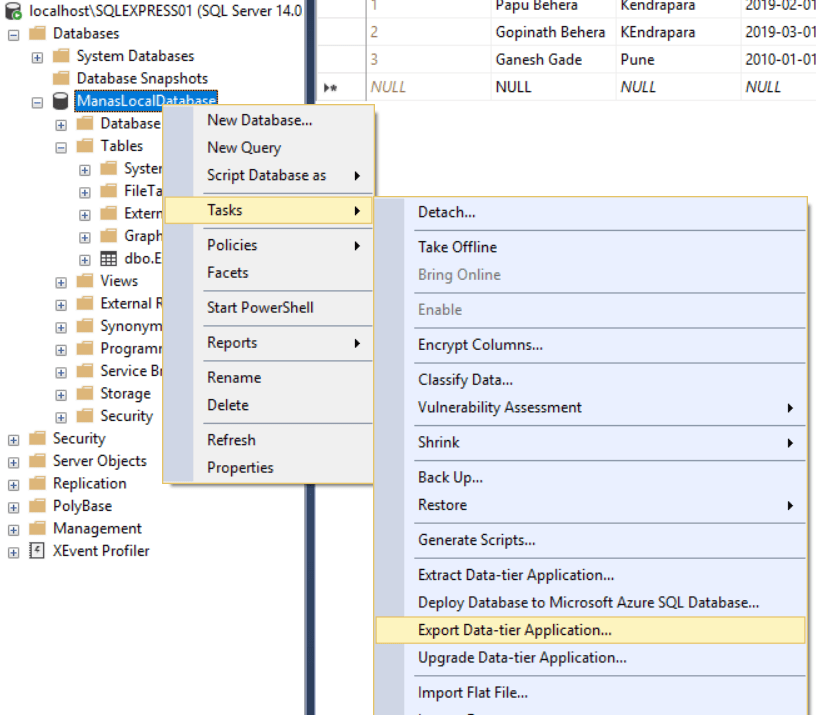
Figure 2: Azure – Export Local Database -1
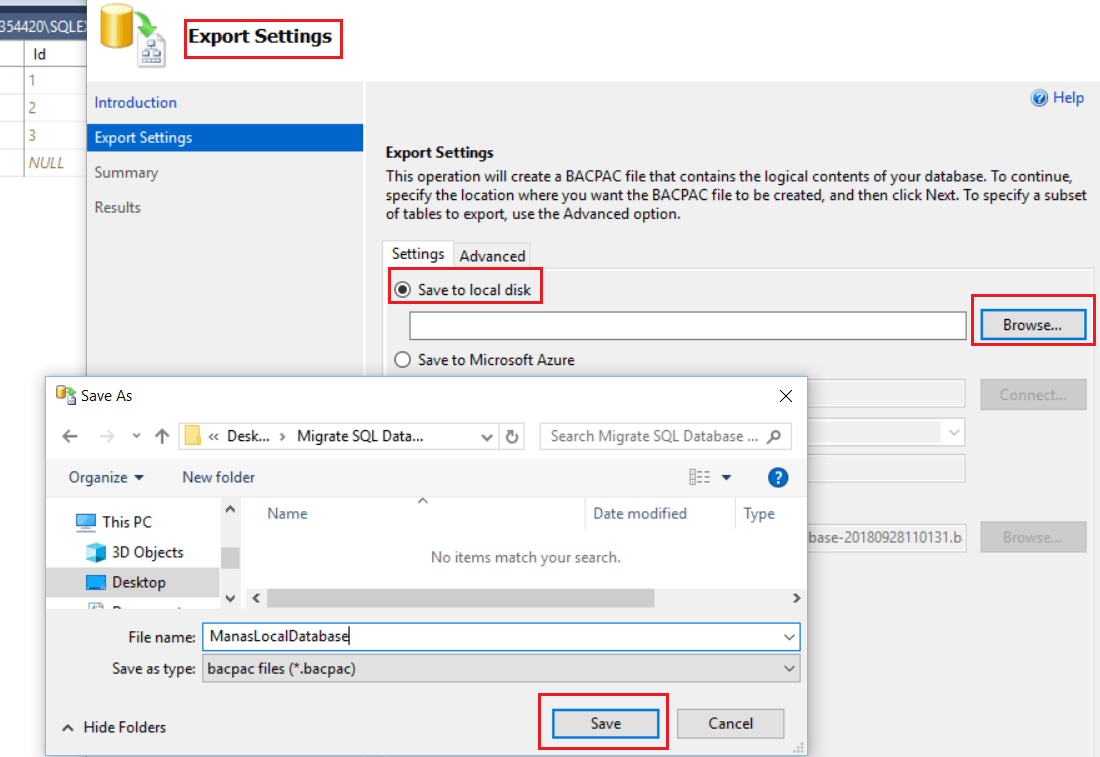
Figure 3: Azure – Export Local Database -2
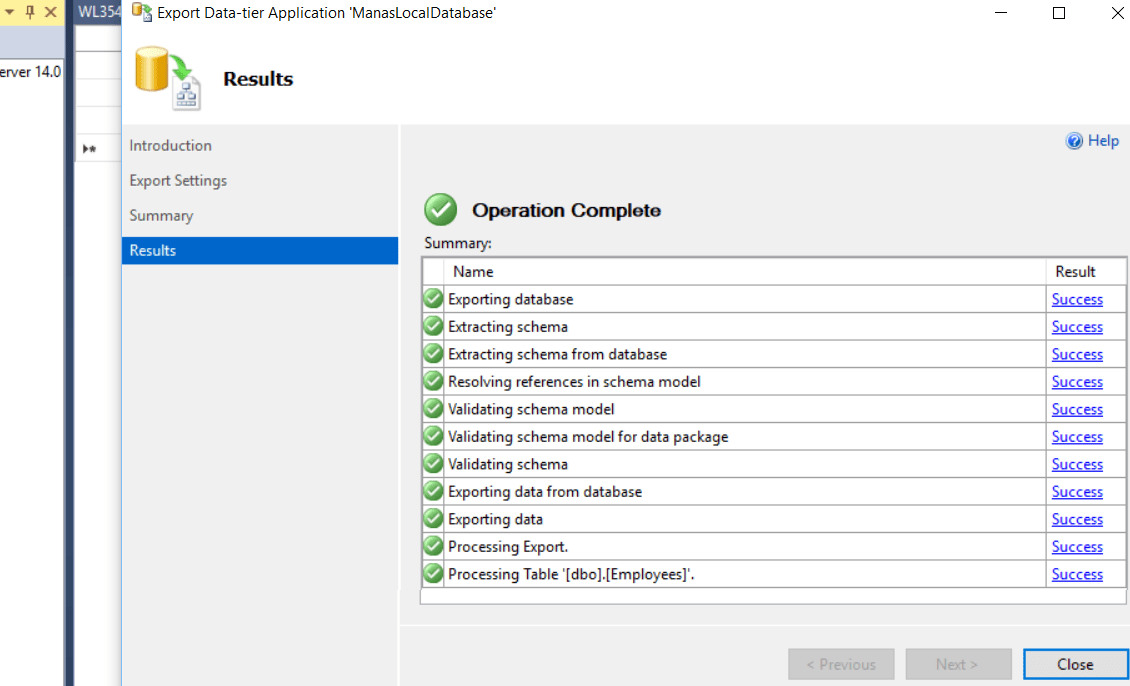
Figure 4: Azure – Export Local Database -3
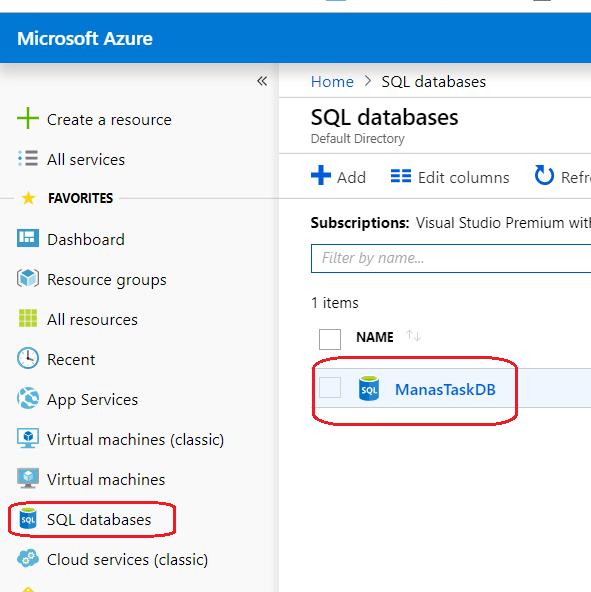
Figure 5: Azure – Azure Database Server in portal before exporting the local database

Figure 6: Azure – Azure Database Server before exporting the local database
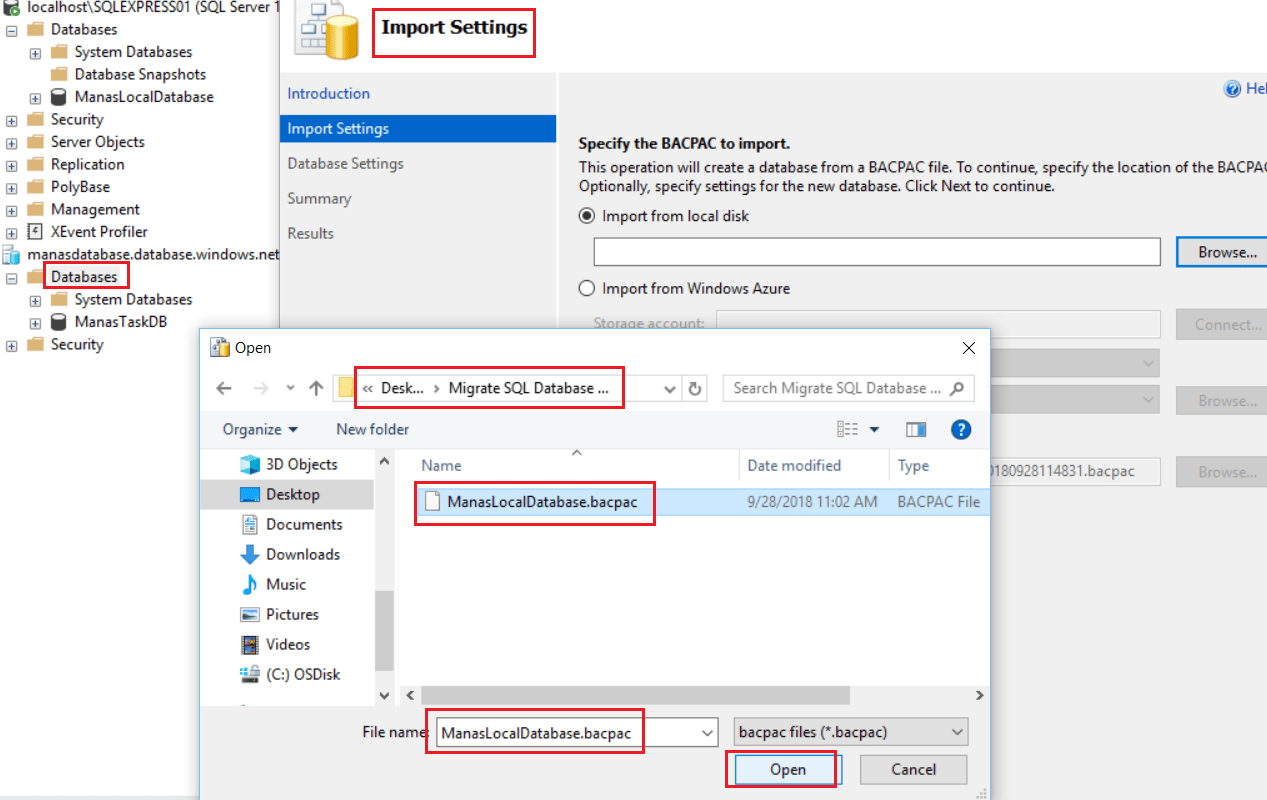
Figure 8: Azure – Import Local Database To Azure_2
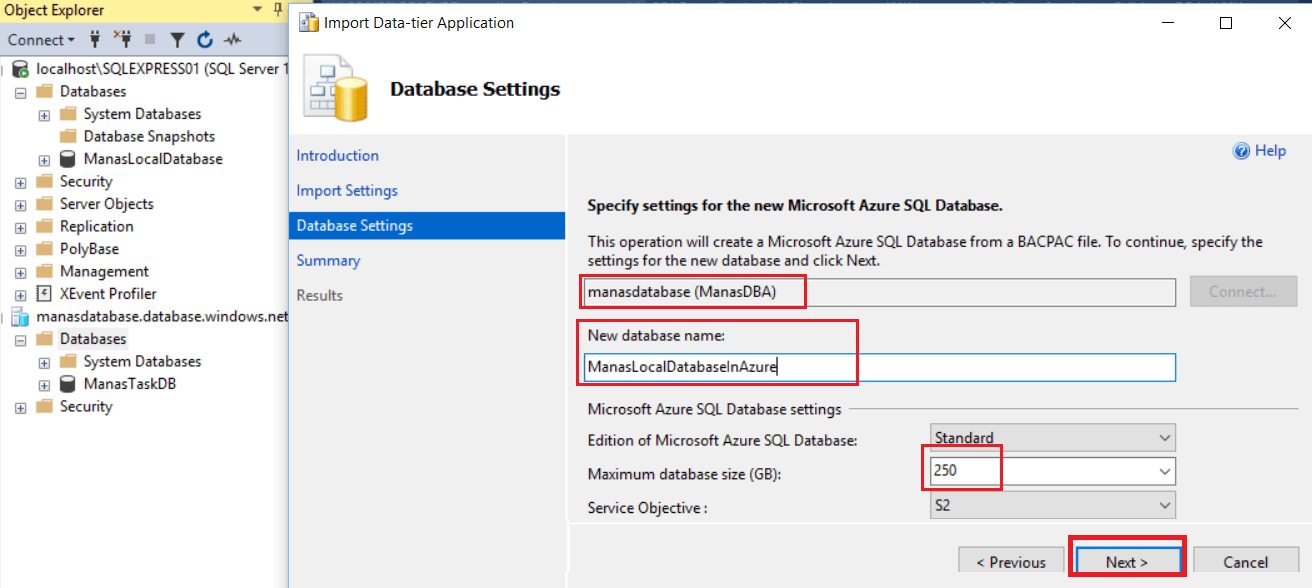
Figure 9: Azure – Import Local Database To Azure_3
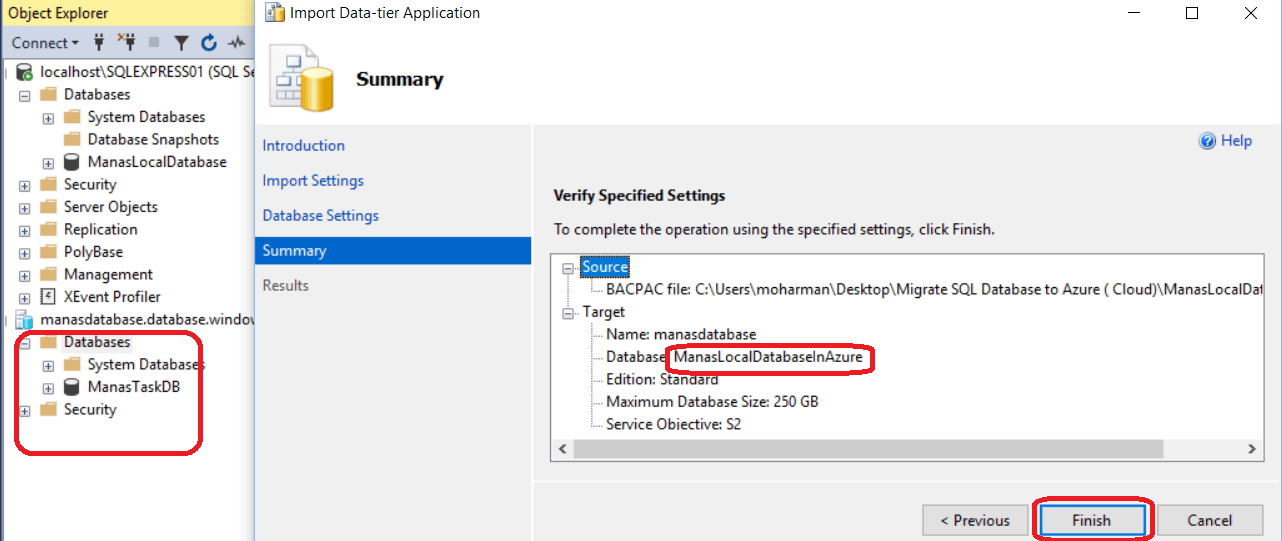
Figure 10: Azure – Import Local Database To Azure_4
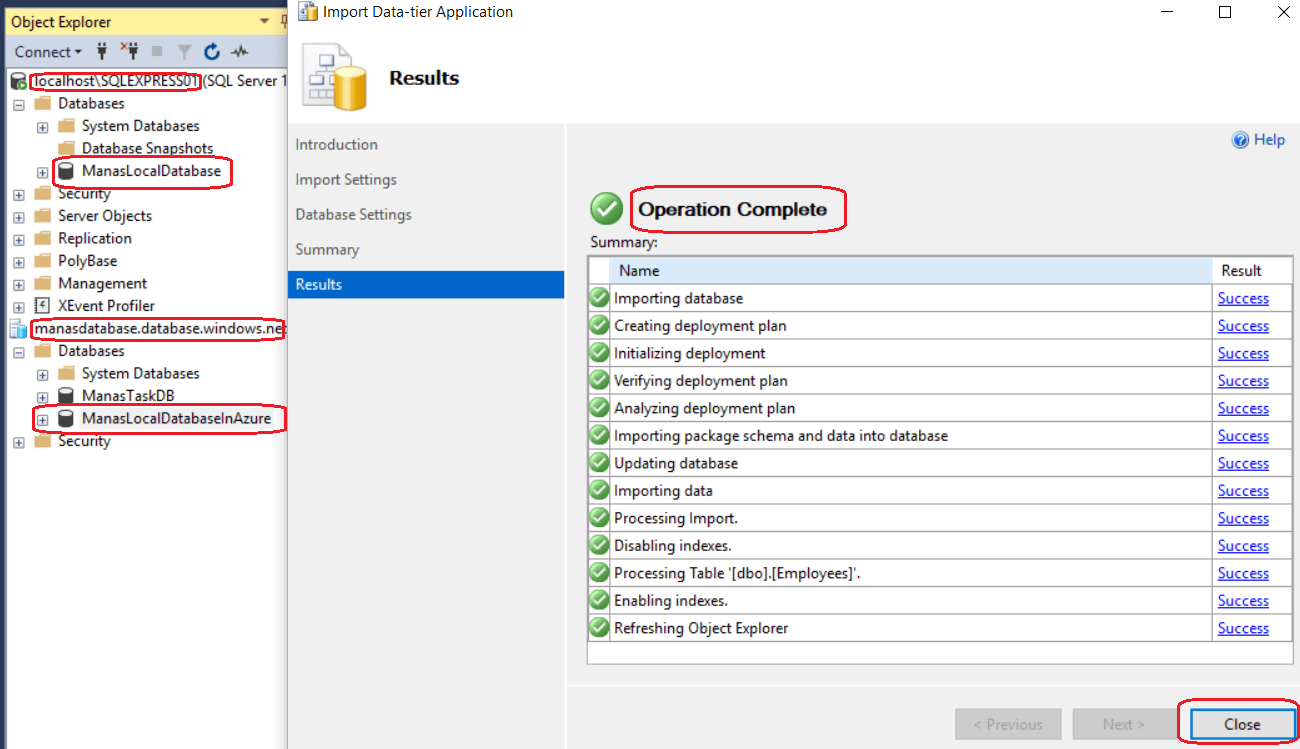
Figure 11: Azure – Import Local Database To Azure_5
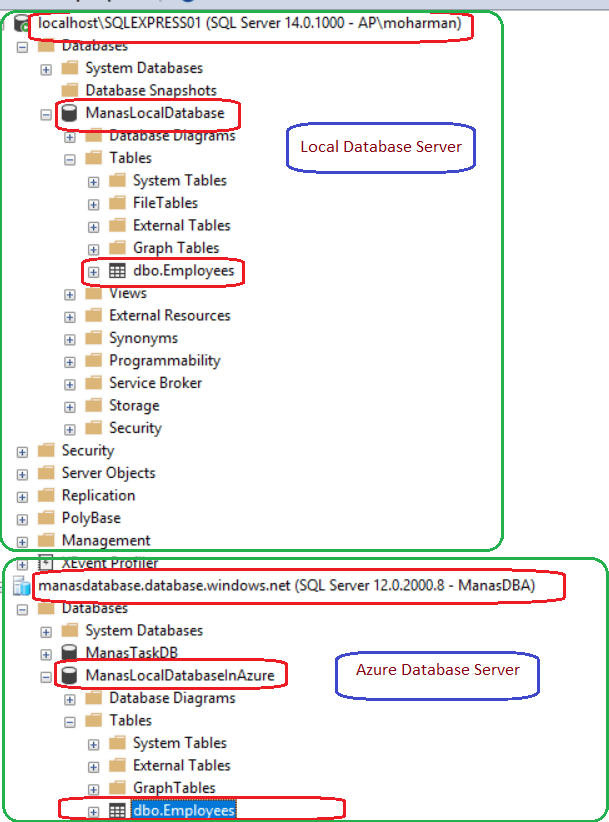
Figure 12: Azure – Import Local Database To Azure_6
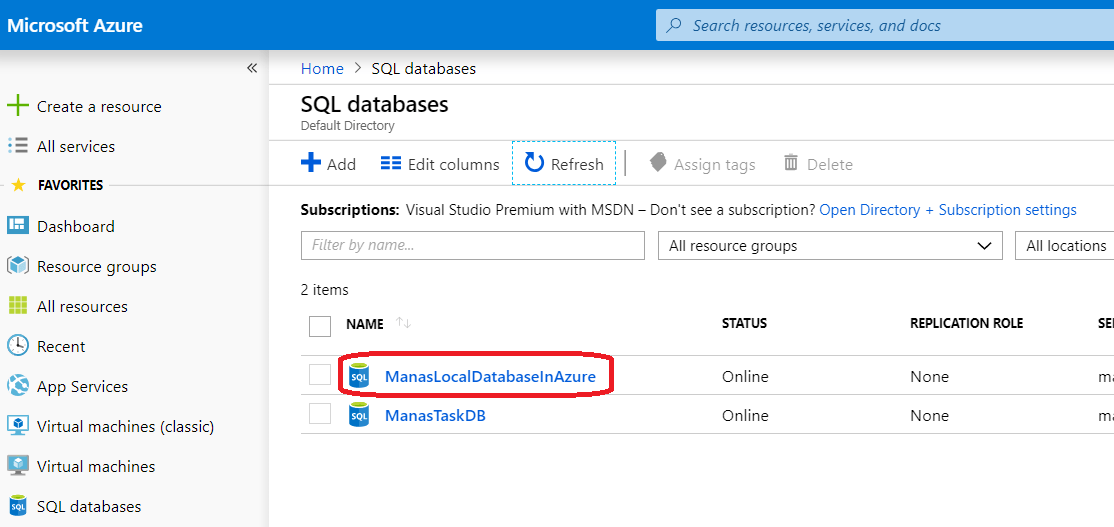
Figure 13: Azure – After Imported The Local DB
I hope this blog gives you a basic idea about how to migrate on-premise database to Azure.
Thanks for reading
Keep reading, share your thoughts, experiences. Feel free to contact us to discuss more. If you have any suggestion / feedback / doubt, you are most welcome.
Stay tuned on Knowledge-Junction, will come up with more such articles


Very helpful
nice one