Azure – Configure Azure PowerShell Desired State Configuration (DSC) Through Azure Portal
Hello Friends,
If you missed our following articles on Exam : Developing Microsoft Azure Solutions, Please have a look once here :
Azure – Create a Virtual Machine with Azure Power Shell
Azure – Deploying a Web App to Azure Virtual Machine with Web Deploy method
Azure – Remote debugging on an Azure VM
Azure – Azure Automation State Configuration
Azure – Configure Azure PowerShell Desired State Configuration (DSC) Using PoserShell
Today we will continue with our last blog Concept of Azure Automation State Configuration. As we know, it is possible to configure Azure Automation State Configuration and Azure Powershell Desired State Configuration (DSC) in two different approaches. One is using powershell, which we will cover in our next blog and the other one is through Azure Portal.Today in this blog we will configure Azure powershell DSC using Azure Portal.
Prerequisites :
An Azure Resource Manager VM (not Classic) running Windows Server 2008 R2 or later. For this example we have created one VM “DSCServer” in advance. As we can see in the following figure, we have verified that, currently IIS not installed/available with this VM. Our Azure powershell DSC, will install/configure the IIS on this server/Node for us.

Figure 1: Azure Certification 70-532 – IIS not available on this VM
Configuration :
Now we are ready to start with our first Azure DSC configuration. We will go step by step in little detail with real time figures.
- Connect to your Azure portal dashboard using your subscription account. If you don’t have any subscription, in that case you can get trial Azure subscription with one-month of validity. Then you can connect to the azure portal dashboard as in following figure.
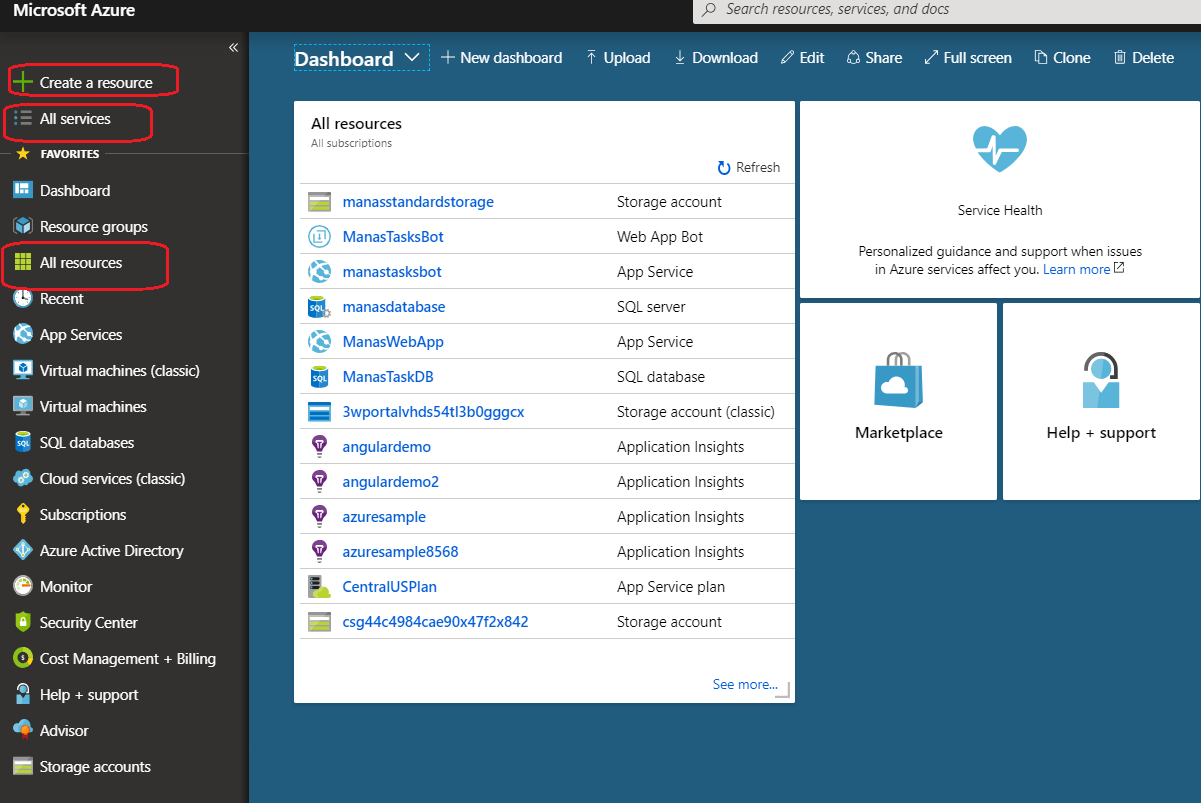
Figure 1: Azure Certification 70-532 – portal dashboard - To proceed with our configuration, first we need an Azure Automation account. So let’s create an Azure Automation Run As account. In the Azure portal, click All services. In the list of resources, type Automation. As we begin typing, the list filters based on our input. Select Automation Accounts, as shown in following figure, we need to .

Figure 2: Azure Certification 70-532 – Create Automation Account - On the Automation Accounts page, Click + Add button to create a Automation Account. Provide all required information and don’t forgot to set Yes to Create Azure Run As Account and click Create button to create the new account. While Azure creates the Run As account, we can track the progress under Notifications from the menu, as shown in following figure.

Figure 3: Azure Certification 70-532 – Automation Account - Now we are ready with our Automation Account. The next step is to create a simple DSC configuration that ensures the presence of the Web-Server Windows Feature (IIS). When we create a DSC configuration, 3 major component comes into the picture. Those are Configuration, Node and Resource. All these need to be declare in the powershell script, as shown in the following figure .

Figure 4: Azure Certification 70-532 – DSC Configuration - Once we are ready with our Azure DSC configuration file(ManasTestConfig.ps1), Let’s Import the configuration into Azure Automation.To Import the configuration, Click on newly created Automation Account and on Automation Account page,select State configuration (DSC) under Configuration Management, as shown in following figure.
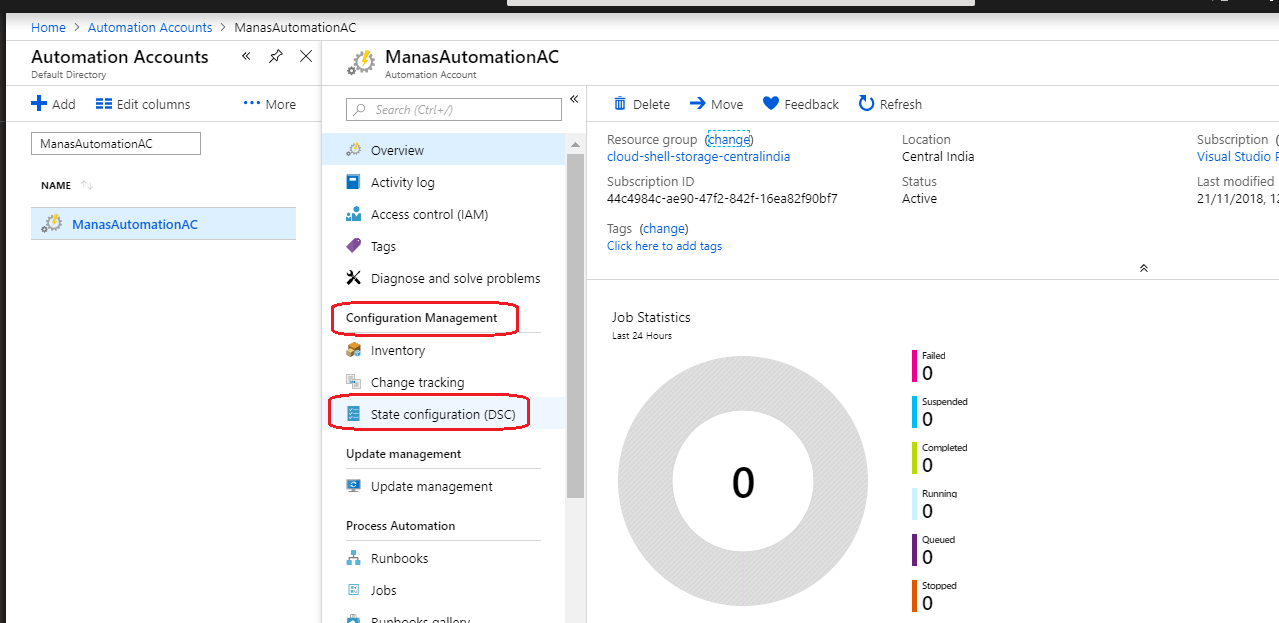
Figure 5: Azure Certification 70-532 – Inside Automation Account - Once we are ready with our Azure DSC configuration file, Let’s Import the configuration into Azure Automation.To Import the configuration, Click on newly created Automation Account and on Automation Account page,select State configuration (DSC) under Configuration Management, as shown in following figure.

Figure 6: Azure Certification 70-532 – Configuration List Of Automatic Account - As shown in above figure, on the State configuration (DSC) page, click the Configurations tab, then click + Add. This will open Import Configuration page.
- On Import Configuration page, browse to our DSC configuration file ManasTestConfig.ps1 on our computer. Provide other required information before importing the DSC configuration file and click Ok to start importing.
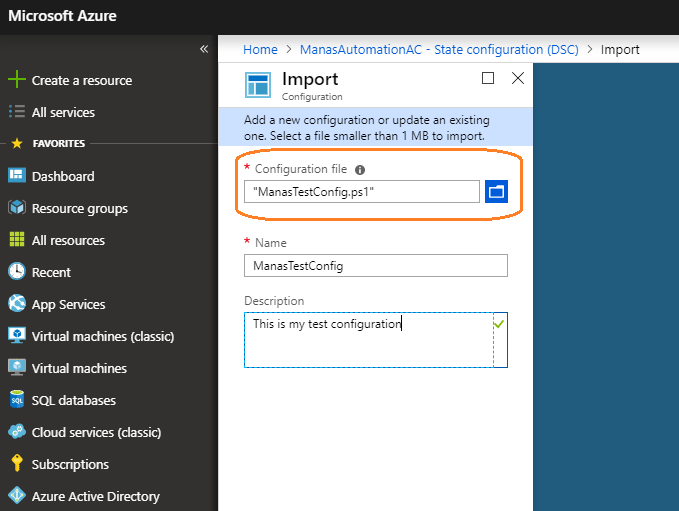
Figure 7: Azure Certification 70-532 – Importing Azure DSC Configuration - After importing the DSC configuration, we can view the configuration, as shown in the following figure.

Figure 8: Azure Certification 70-532 – Post Importing the configuration doc - Now time comes to Compiling our DSC configuration in Azure Automation. On the State configuration (DSC) page, click the Configurations tab, then click ManasTestConfig (the name of the previously imported configuration).
On the ManasTestConfig Configuration page, click Compile, and then click Yes. This starts a compilation job, as shown in the following figure.
Figure 9: Azure Certification 70-532 – Before Compilation of configuration
Figure 10: Azure Certification 70-532 – After Compilation of configuration - On boarding an Azure VM for management with Azure Automation State Configuration. Here we need a VM (not Classic) running Windows Server 2008 R2 or later. As shown in the following figure, move to State configuration (DSC) page. On the State configuration (DSC) page, while on the Nodes tab, click + Add.

Figure 11: Azure Certification 70-532 – Add new node to DSC Configuration - When we click +Add button to adding a Node, it will open Virtual Machines page. On the Virtual Machines page, select our VM and on the Virtual machine detail page, click + Connect to open the Registration section page as shown in the following figure.

Figure 12: Azure Certification 70-532 – On boarding Nodes (VM) - As shown in the above figure,In the Registration page, select the name of the node configuration we want to apply to the VM in the Node configuration name box. Providing a name at this point is optional. we can change the assigned node configuration after onboarding the node. Check Reboot Node if Needed, then let’s click OK. The node configuration we specified are applied to the VM at intervals specified by the Configuration Mode Frequency, and the VM checks for updates to the node configuration at intervals specified by the Refresh Frequency.In the Add Azure VMs blade, click Create.
- Azure starts the process of onboarding the VM. When it is complete, the VM shows up in the Nodes tab of the State configuration (DSC) page in the Automation account., as shown in the following figure

Figure 13: Azure Certification 70-532 – Node onboarded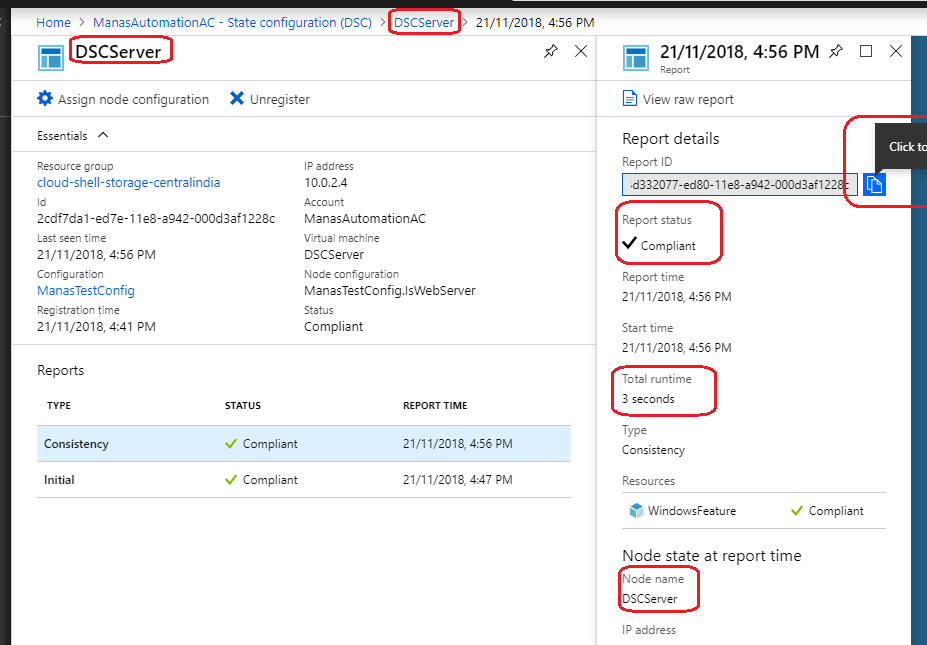
Figure 14: Azure Certification 70-532 – Configuration Reportd - After DSC configuration executed for the first time, we verified that, the IIS has been installed successfully on the Node (VM) we have added, as shown in the following figure

Figure 15: Azure Certification 70-532 – IIS installed post DSC run - Addition to the above, we can achieve the followings.Viewing reports for managed nodes, as shown in above figure 14.
- Reassigning a node to a different node configuration
- Unregistering a node
Hope this blog gives you some information about Azure Automation State Configuration.
Thanks for reading 🙂
Keep reading, share your thoughts, experiences. Feel free to contact us to discuss more. If you have any suggestion / feedback / doubt, you are most welcome.
Stay tuned on Knowledge-Junction, will come up with more such articles.


good