Azure – Deploying a Web App to Azure Virtual Machine with Web Deploy method
Hello Friends,
Hope you all had a very delightful Diwali vacation !!!
Let’s continuing with our posts on Azure Exam : Developing Microsoft Azure Solutions.
Today in this blog, we will discuss, how to configure Azure Virtual Machine to support Web Deploy. Let’s proceed with this blog in a different way like, we will do mistakes and learn from that mistake. I mean to say, we will skip few configurations and later we will see, what issues it raises and how to make it correct. Let’s move to the below steps !!!
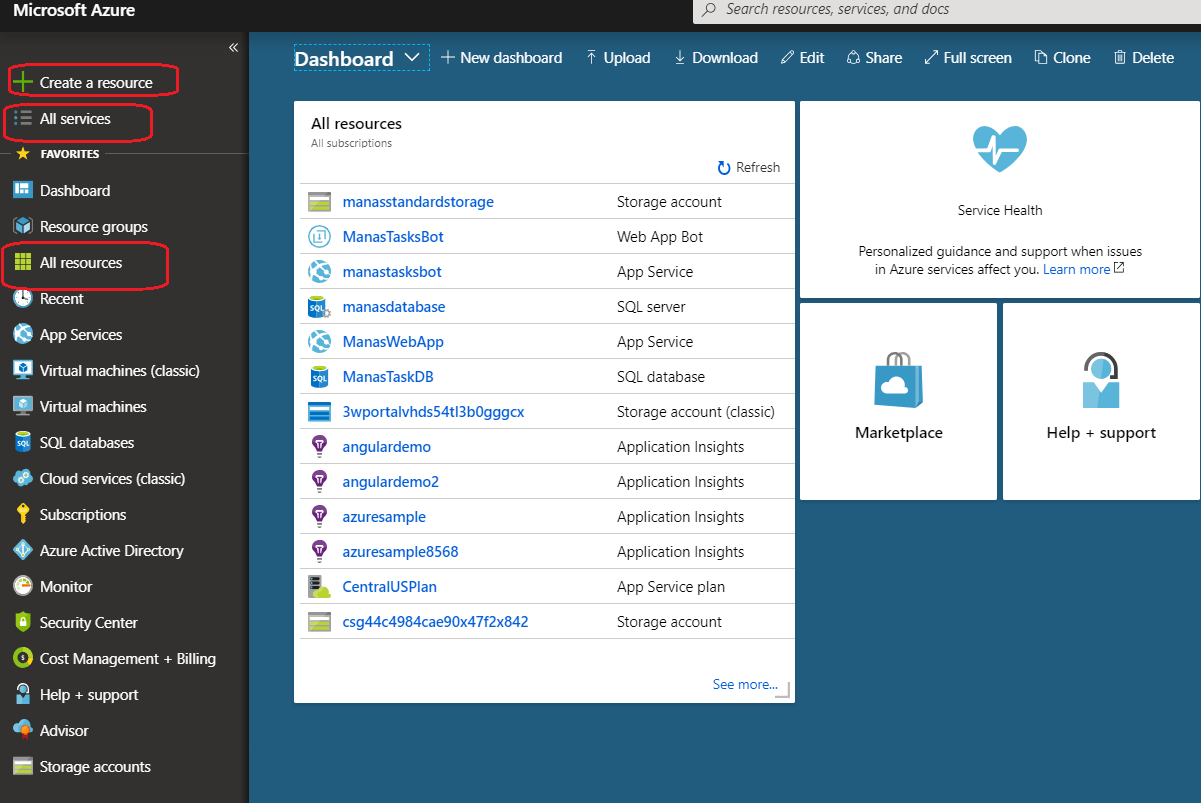
- Connect to your Azure portal dashboard using your subscription account. If you don’t have any subscription, in that case you can get trial Azure subscription with one-month of validity. Then you can connect to the azure portal dashboard as in following figure.
- Once we are on azure portal, without delaying much, let’s create our development Azure VM with Visual Studio 2017 community version as shown the in following figure.
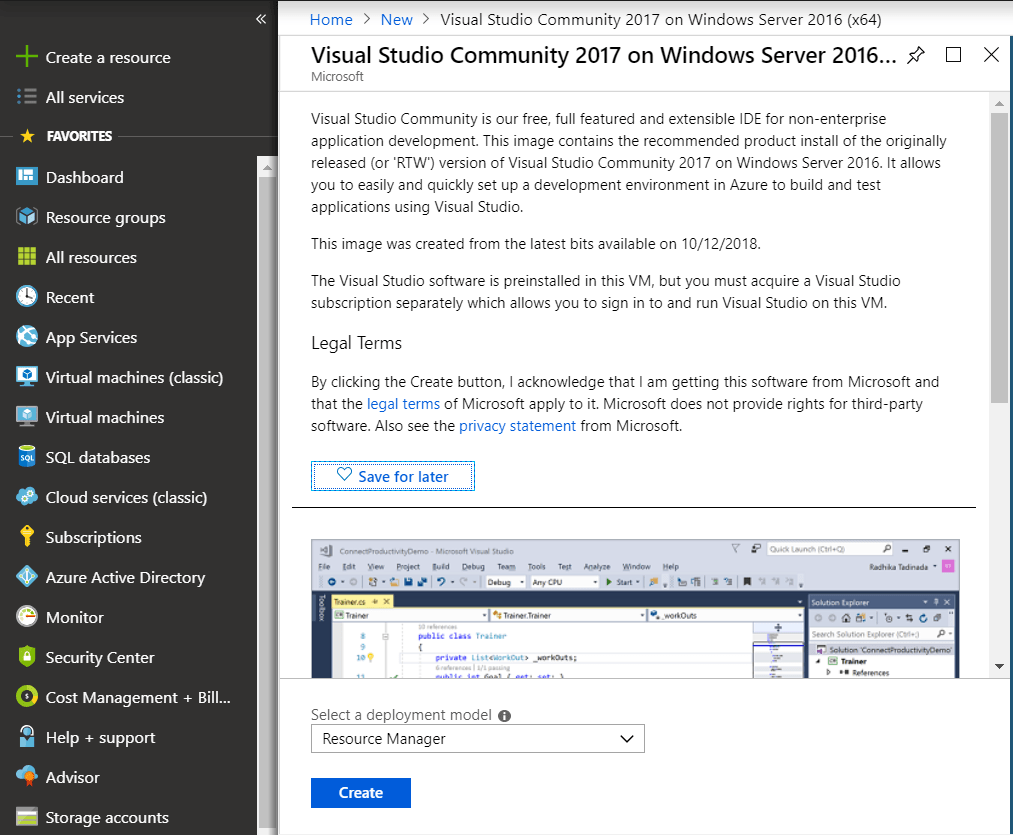
Figure 2: Azure Certification 70-532 -Create New Developer Environment - Provide the required information, including the Size and Resource Group, Region etc.. of the VM and proceed with Review and Create button, as shown the in following figure.

Figure 2: Azure Certification 70-532 – Provide required Information - Once we are done with our development VM, let’s check few details of our newly created VM. As shown the in following figure, we can see the details of public port and Resource Group details.

Figure 3: Azure Certification 70-532 – Public Id of newly created Dev VM
Figure 4: Azure Certification 70-532 – Resource Group Details - After created the development VM, when we tried to login by RDP, it seems to be very very slow and it didn’t allow me to start my Visual studio.So we decided to change the Size of the VM and scale it up. After resize my development VM, the Public IP has been changed from 104.211.162.90 to 104.211.161.58. in our last blog We have described, how to resize existing Virtual Machine. After resize the VM to a higher version, the VM worked smartly. Then we tried to check the Public IP in browser, before deploying anything on VM and come with the screen as shown in the following figure.

Figure 5: Azure Certification 70-532 – Default Site before Deploy - Let’s start Visual studio and create a new Web Application with MVC option and build it successfully. Once successfully built, as shown in the following figure.
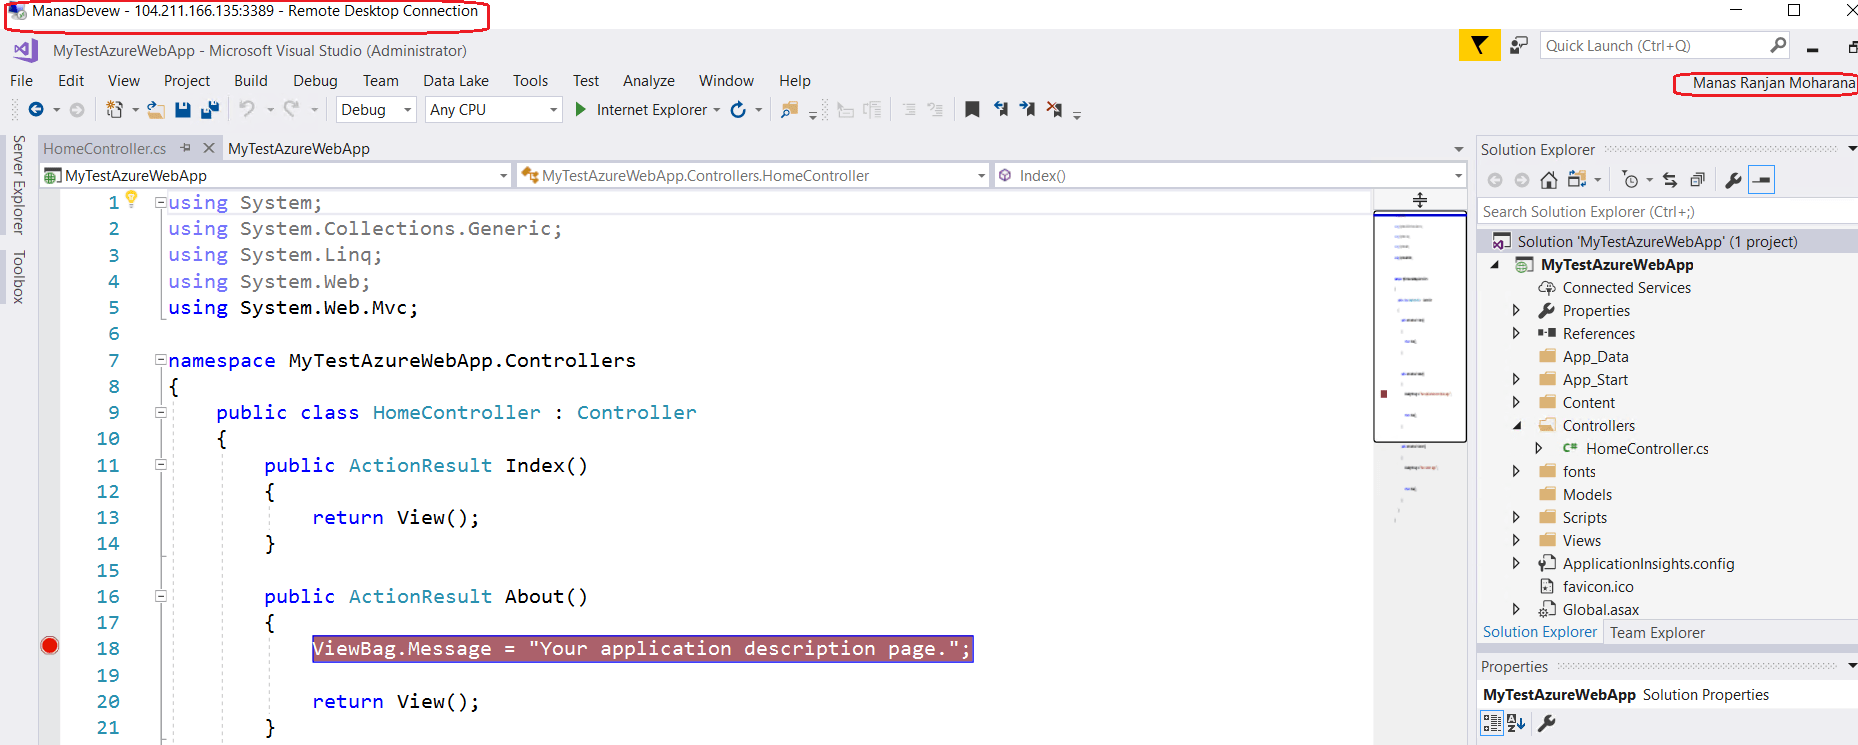
Figure 6: Azure Certification 70-532 – My Test Azure Web App - Once we successfully built the solution, the next step is to publish the solution on Azure Virtual Machine using Web Deploy method. When we choose Microsoft Azure Virtual Machines, in turn, it will ask our Azure credential to display, all available VMs. Here let’s choose our recently created development VM ‘ ManasDevew ‘ , as shown in the following figure.

Figure 7: Azure Certification 70-532 – PublishingOn MS Azure VM - After selecting our required VM, it will allow us to configure a new profile for our deployment. Here we need to provide the profile details very carefully. Once we provide all required information, click on Validate Connection button to check the connection, as shown in the following figure.

Figure 8: Azure Certification 70-532 – Provide Profile Details - After clicking Validate Connection, what we saw is the issue with validating the connection, as shown in the following figure.This means, we have missed some configurations.
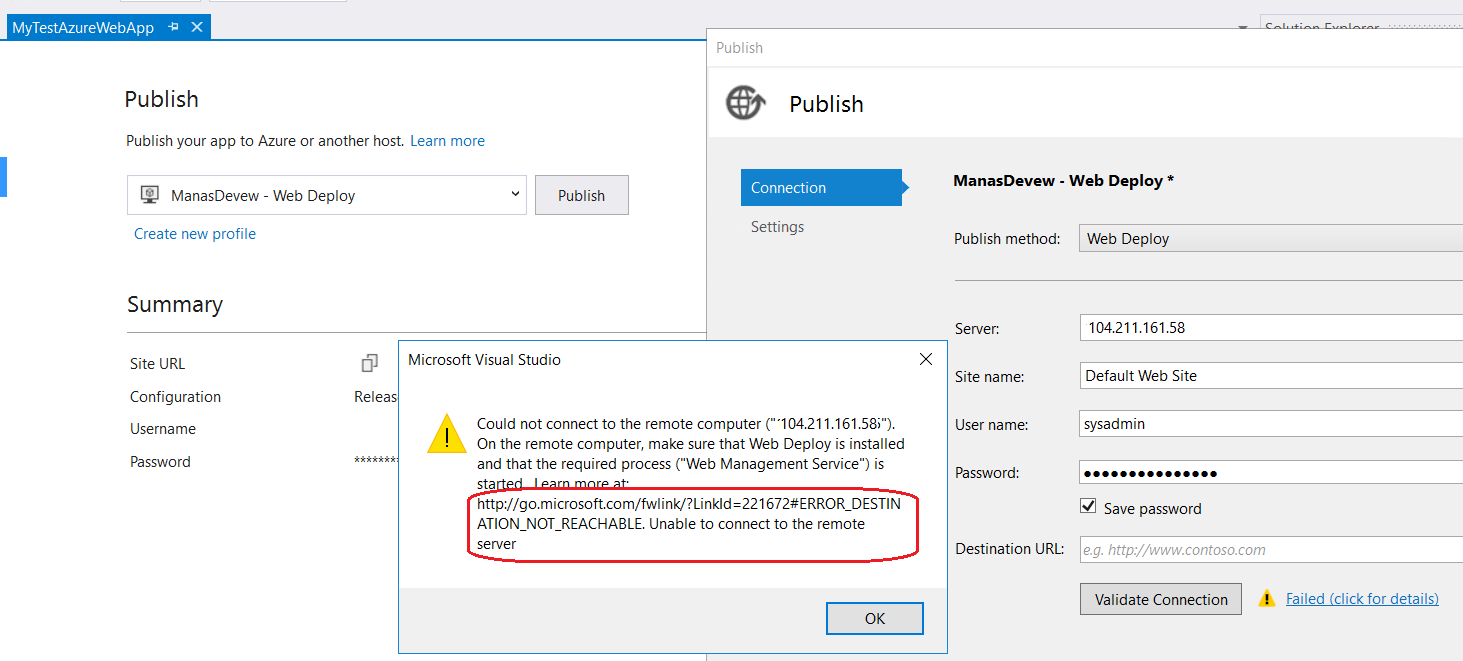
Figure 9: Azure Certification 70-532 – Issue with validate connection - Let’s check, what we have missed in our earlier configuration.I found a very good post on, Deploying a Site to an Azure VM using Web Deploy posted by Tallan. Where we can see, what we missed and how to configure those missing configurations. As per the above post, we have missed to install and configure IIS, Web Deploy 3.5 or latest, WindowsAzureVmAgent and other required features, as shown in the following figure.
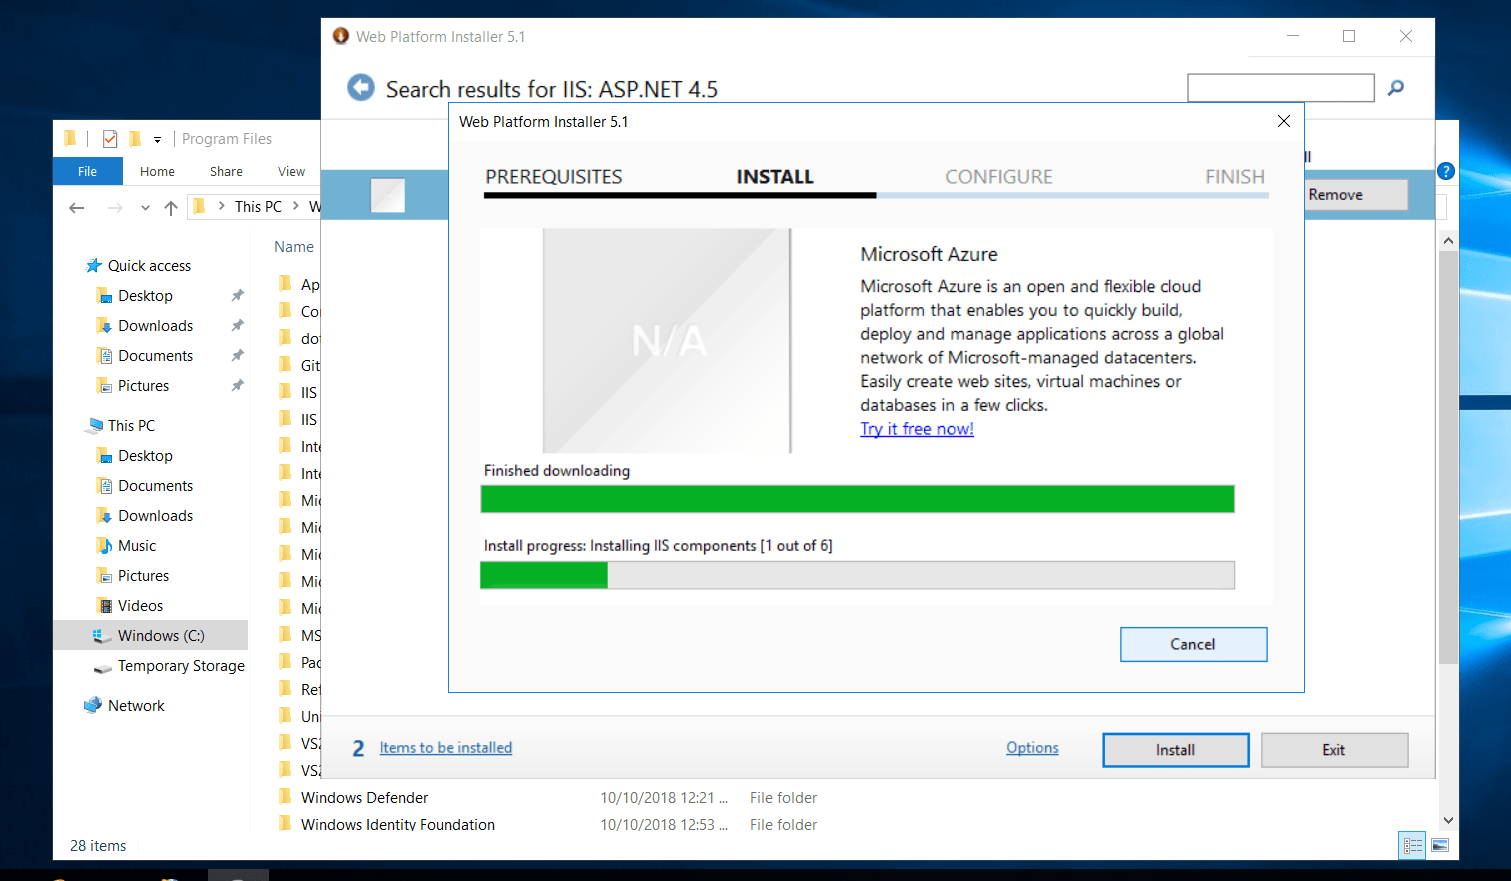
Figure 10: Azure Certification 70-532 – Installing Required features - Here we can see little different screen shot in the above blog post because Azure Portal Dashboard changing it’s look and feels frequently. We will realize that, when we will try to configure Inbound security rule for Web deploy. The following Image shows, the current version of Azure dashboard.

Figure 11: Azure Certification 70-532 – My Inbound Security Rule Configuration - After configuring everything, as suggested in Tallan’s blog, I want to make sure that, Window Azure Guest Agent and Window Azure Telemetry Service is running.But I saw, both the services are not running on the VM as shown in the following figure.

Figure 12: Azure Certification 70-532 – Before Install Azure VM Agent - After googling for some time, we came to know that, there is still one more component, “Window Azure VM Agent” need to be install as shown in the following figure.

Figure 13: Azure Certification 70-532 – Installing Window Azure VM Agent - After configuring everything, we need to make sure the following services are up and running as shown in following figure.
- Web Deployment Agent Service
- Web Management Service
- Window Azure Telemetry Service
- Window Azure Guest Agent

Figure 14: Azure Certification 70-532 – All Required Services on VM - After completing all configurations, let’s configure the publishing profile again and check if it successfully validate the connection. As shown in the following figure, the Connection validated successfully.

Figure 15: Azure Certification 70-532 – Connection Validated successfully - Once it successfully validate the publishing profile, we are ready to publish the Web App on selected Virtual Machine using Web Deploy method. Click on Publish button and it will ask for VM admin credential to publish successfully, as shown in the following figure.
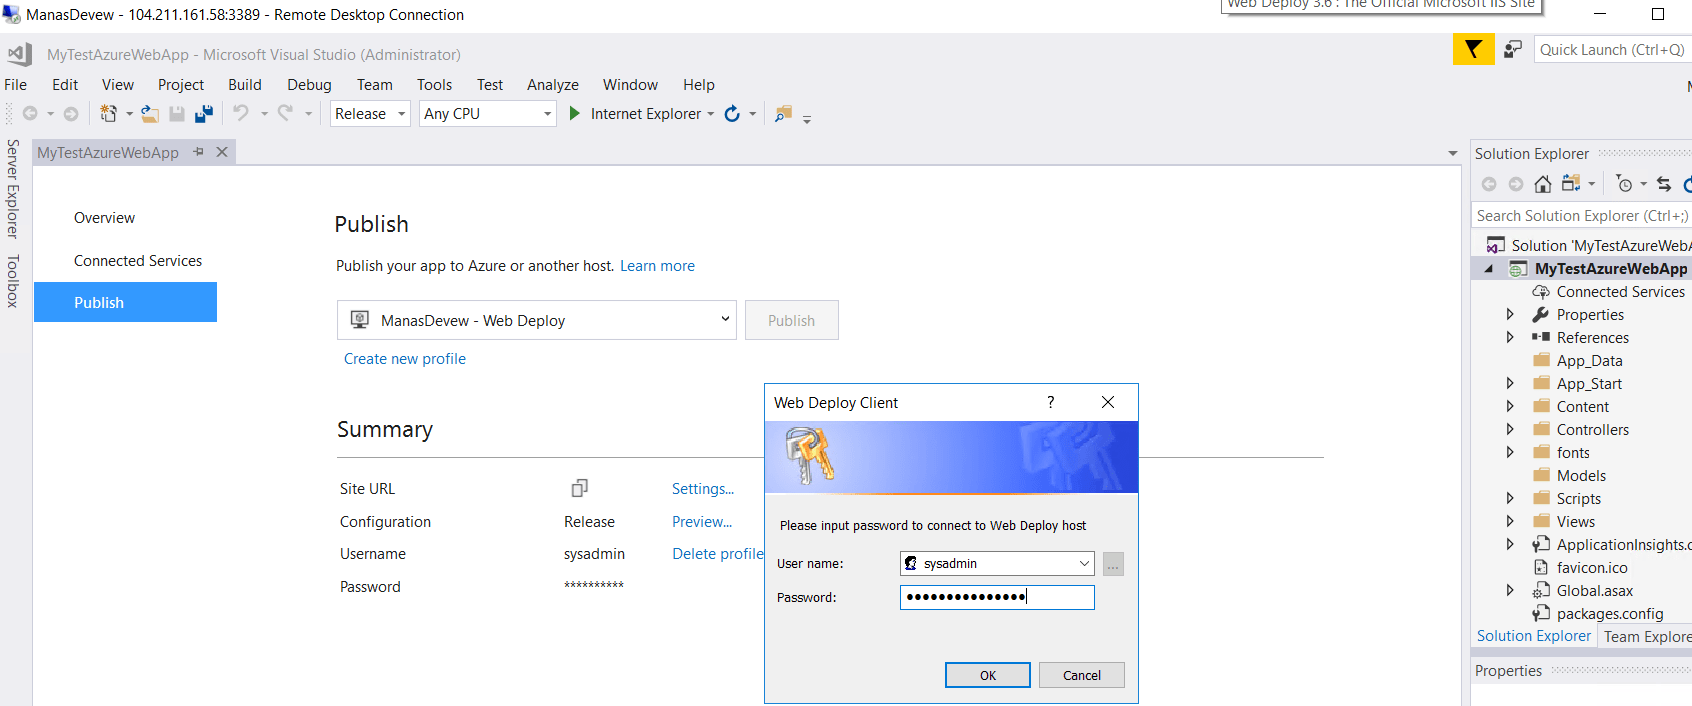
Figure 15: Azure Certification 70-532 – Publishing Web App using Web Deploy - After successfully published, we can go to the browser and check the Default Web Site, as shown in the following figure.

Figure 15: Azure Certification 70-532 – Successfully Web App deployed
Thanks for reading 🙂
Keep reading, share your thoughts, experiences. Feel free to contact us to discuss more. If you have any suggestion / feedback / doubt, you are most welcome.
Stay tuned on Knowledge-Junction, will come up with more such articles.
More Posts On Exam 70-532: Developing Microsoft Azure Solutions :
Azure – Create New Azure Virtual Machine
Azure – Managing Azure Virtual Machine Disks
Azure – Create An Azure Storage Account.
Azure – Configuring Shared Storage Using Azure File Service
Azure – Working with Azure CLI
Azure – Create a Virtual Machine with Azure Power Shell
Azure – Configuring Shared Storage Using Azure File Service
Azure – Working with Azure CLI
Azure – Create a Virtual Machine with Azure Power Shell
Azure – Deploying a Web App to Azure Virtual Machine with Web Deploy method
Azure – Remote debugging on an Azure VM
Azure – Azure Automation State Configuration
Azure – Configure Azure PowerShell Desired State Configuration (DSC) Through Azure Portal


good