Azure – Networking – Part 4 – Network Security Group (NSG) in Azure

Hello Friends,
Let’s continue with Azure Virtual Network in this articles. We have started a journey with Azure networking and this is the 3rd article on this series. If you have missed our last articles, please check it in following links.
Part 1 – Basics of Azure Networking
Part 2 – Azure Virtual Network (VNet)
Part 3 – Subnet in Azure Network
Next Article : Part 5 – Basics of Azure Application Gateway
In this article we will discuss about Network Security Group (NSG).
As we know a Network Security Group (NSG) contains a list of security rules and Access Control List (ACL) that allow or deny network traffic to resources connected to Azure Virtual Networks (VNet) .
A NSG is a firewall policy, defining a collection of inbound and outbound allow or deny rules for network traffic. We can enable network security group flow logs to analyze network traffic to and from resources that have an associated network security group.
NSG can be associates with subnet level or NIC level or both? Binding NSG to the individual VMs (by NIC) is powerful, but we may quickly lose control of the complexity of our deployment because it would be hard to track and maintain. So it is recommended to link NSG to the subnet level and reuse across our VNETs and subnets. The best practice is to design our VNET architecture before and also according to our NSG requirement. Once we have designed our network topology, then need to think about the architecture of the boundaries we want to deploy. In following figure, we can see the NSG requirement for our current requirement.

In our last article, we have created two Azure Subnets. Here we will create two different NSG for each of our subnets. Both NSG will have different security policies for inbound and outbound traffic. So let’s go through the following steps to create and configure two NSG for two subnet.
Create Network Security Group (NSG) Using Azure Portal
1. Connect to your Azure portal dashboard using your subscription account. If you don’t have any subscription, in that case you can get trial Azure subscription with one-month of validity. Then you can connect to the azure portal dashboard as showing in following figure.
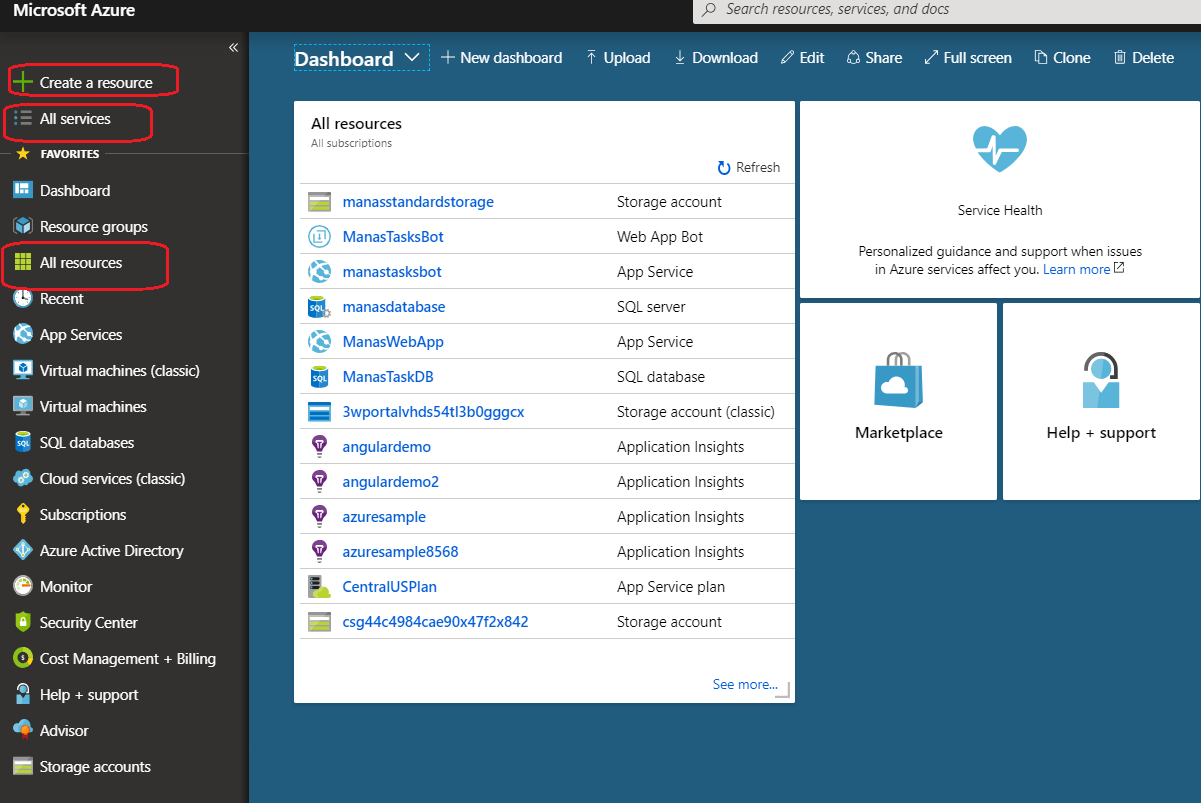
2. On the left side menu of the screen, select Create a resource > and try to find Network Security Group from the azure market place as shown in the following figure and then click Create button to create new NSG.

Figure 3: Azure – Find Network security group from Azure market place
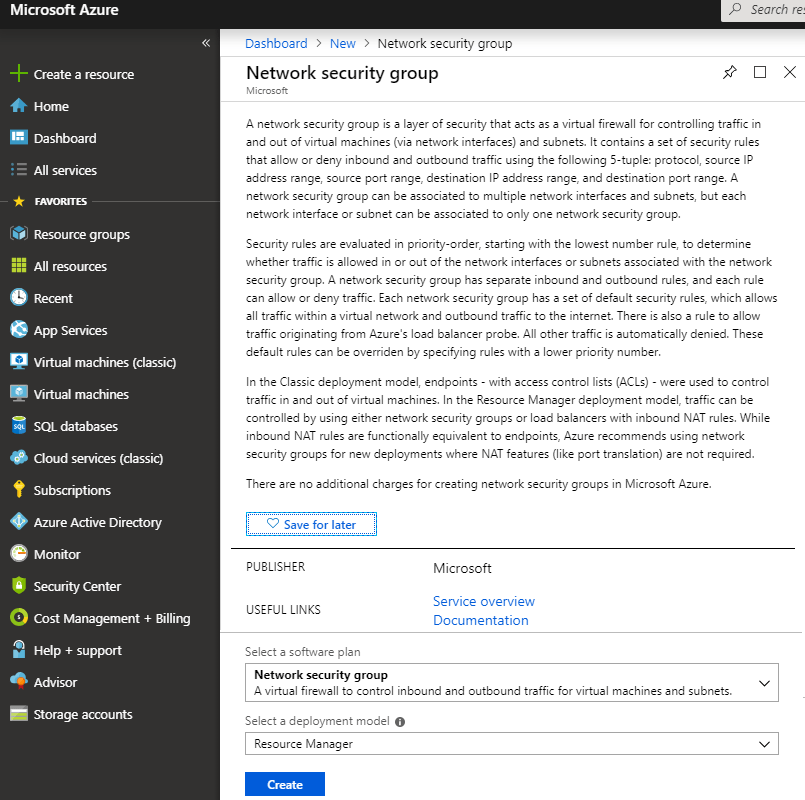
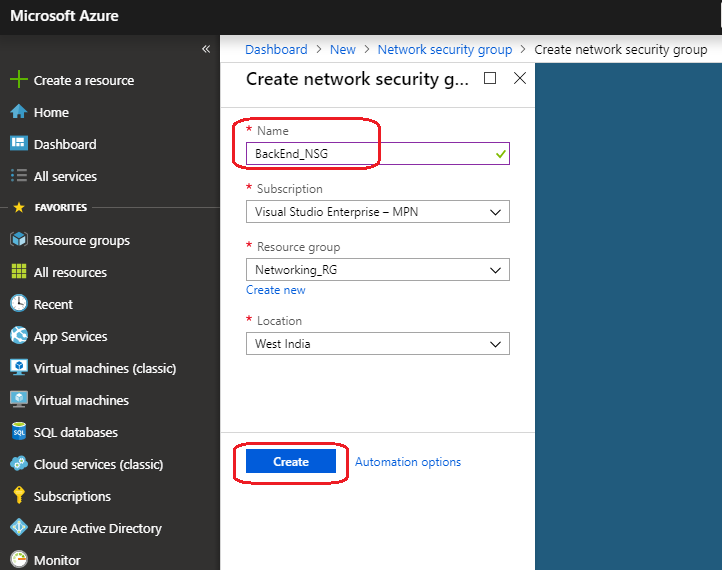
3. This will allow us to provide required information for our first NSG as shown in the following figure and then click Create button to create the NSG.

4. Follow the above steps to crate our second NSG as shown in the following figure.

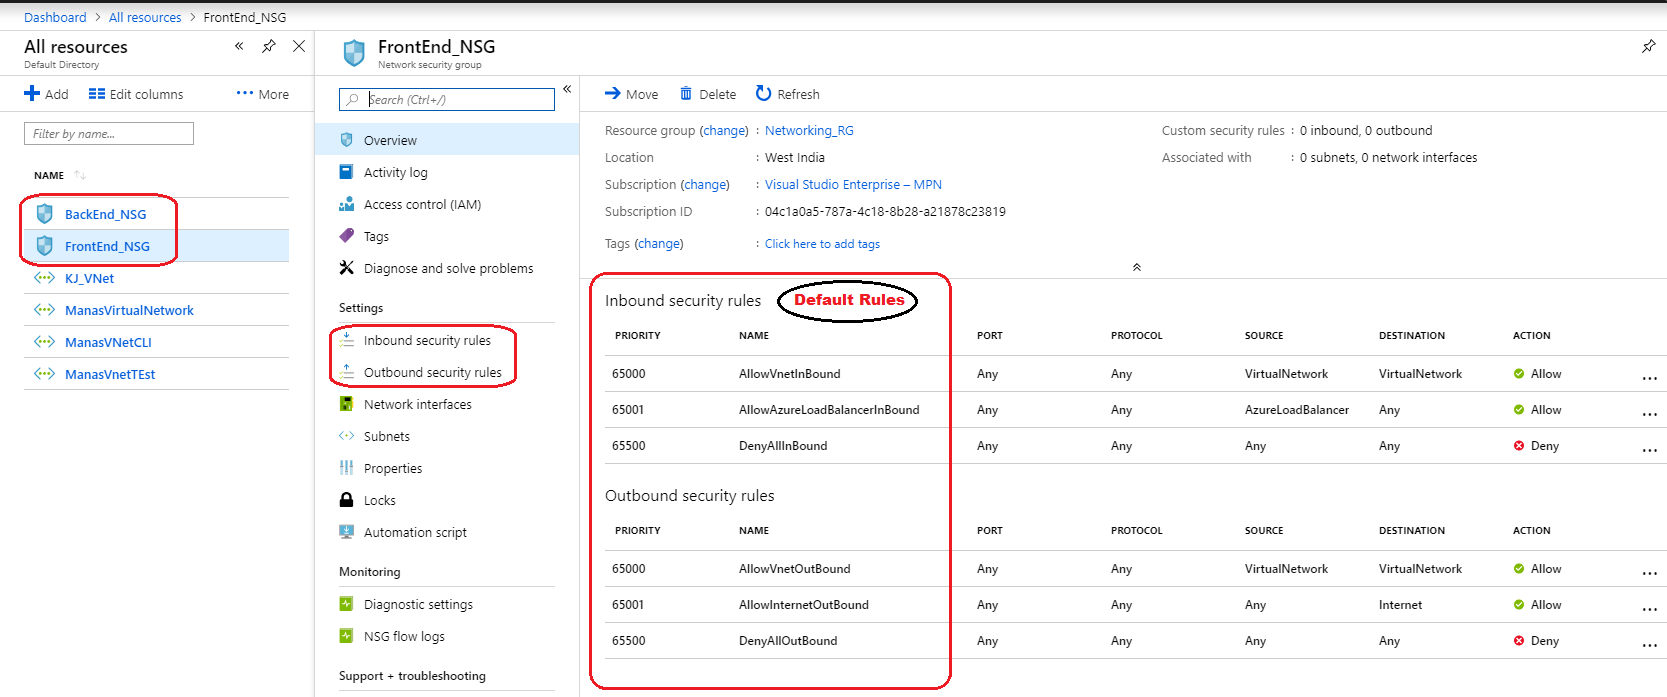
In the following figure, we can see that, we have crated our two Network security groups . Now we need to add security policies ( both inbound and outbound traffics ) to both NSGs.

we have created two NSGs, now we will move forward and add traffic rules to both Subnets as per the rule defined in our Figure 1.
6. To add rules to both NSG, we need to open newly created NSG one by one. In the following figure, we can see, there are few default rules added for both Inbound and Outbound traffics. For FrontEnd_NSG, we need to add two new rules as shown in following figures.

7. Select Inbound security rules and click +Add button to add new rules as shown in the following figure.


8. We have added required rules to FrontEnd NSG. Now let’s select BackEnd NSG to add one Inbound and one Outbound rules as shown following figure.

9. After added all Inbound rules, one outbound security rule need to be configure to deny all internet access from BackEnd NSG. Let’s add the Outbound rule as shown in the following figure.

10. After configured our NSGs with required rules, the next step is to associate both NSGs to there respected Subnet. As shown in the following figure, open each Subnet and set it’s NSG property.


So far so good, now we have done with our NSG configurations. As we can see in our design, our web servers are resides under FrontEnd Subnet and it is associated with FrontEnd_NSG. As per it’s Inbound rules, all servers under this NSG can be accessible through RDP connection and web applications can be accessible through internet.
In this design we have configured BackEnd Subnet which is associated with BackEnd_NSG . We have SQL server resides under BackEnd Subnet. As per it’s Inbound rule, SQL database can be accessible from any where. Here SQL database can be accessible by web application deployed in servers, under FrontEnd Subnet. We have also configured a Outbound rule so that internet can’t be accessible from any server resides under BackEnd Subnet.
Create Network Security Group (NSG) Using CLI :
Syntax:
az network nsg create –name
–resource-group
[–location]
[–subscription]
[–tags]
Example:
az network nsg create -g Network_RG -n FrontEndNsg --tags super_secure no_80 no_3389Add New Rule To Network Security Group (NSG) Using CLI :
Syntax:
az network nsg rule create –name –nsg-name –priority –resource-group [–access {Allow, Deny}] [–description] [–destination-address-prefixes] [–destination-asgs] [–destination-port-ranges] [–direction {Inbound, Outbound}] [–protocol {*, Tcp, Udp}] [–source-address-prefixes] [–source-asgs] [–source-port-ranges] [–subscription]
Example:
az network nsg rule create -g MyResourceGroup --nsg-name FrontEndNsg -n web-allow-rule --priority 100Create Network Security Group (NSG) Using Power shell :
New-AzureRmNetworkSecurityGroup -Name BackEndNsg -ResourceGroupName Network_RG-Location westindiaAdd New Rule To Network Security Group (NSG) Using Power Shell :
$nsg=Get-AzureRmNetworkSecurityGroup -Name BackEndNsg -ResourceGroupName NEtwork_RG
$nsg | Add-AzureRmNetworkSecurityRuleConfig -Name sql-allow_rull -Description "Allow port for 1433" -Access Allow -Protocol Tcp -Direction Inbound ‑Priority 110 -SourceAddressPrefix Any -SourcePortRange 1433‑DestinationAddressPrefix * -DestinationPortRange *| Set-AzureRmNetworkSecurityGroup
I hope this article gives a basic understanding about Network Security Group (NSG) and how to configure traffic rules for a NSG. My next article of this series is Part 5 – Basics of Azure Application Gateway .
Thanks for reading 🙂
Keep reading, share your thoughts, experiences. Feel free to contact us to discuss more. If you have any suggestion / feedback / doubt, you are most welcome.
Stay tuned on Knowledge-Junction, will come up with more such articles.


Very helpful series on azure. keep it up !!!
In addition – please discuss the option to rules to service tags.