Working with Terraform – Example 2 : Deploy a Single Web Server

- In previous article , we have learned how to create a simple EC2 instance using terraform and a detailed steps involved in deployment of infrastructure using terraform.
- Now, in this article we will move one step further and try to deploy a single web server which will return us a text “Learning Terraform is Fun !!!” .
Prerequisites
- Have aws-cli installed and aws configured with secret keys.
- Have a Terraform installed on the server . ( Follow this article to configure a Terraform server )
Create EC2 instance with Terraform
Step 1 – Create a Configuration file for Terraform AWS
Connect to the terraform server using SSH and create a file with .tf extention . We will
specify all the configuration details in this file .
vim main.tf
A blank main.tf file will open , click i button to Insert the code in this file .
Step 2 – Setting up AWS Provider
Provider tells Terraform which service it’s going to use to set up resources. Since we are working with AWS here , specify provider as aws and region where you wish to deploy your infrastructure. For ex. us-east-1 .
//AWS Provider

provider "aws" {
  region = "us-east-1"
}
Step 3 – Setting up EC2 Instance
For creating an EC2 instance , we have to use resource type as “aws_instance” . Write below code in main.tf file after the provider details.
// Instance having web server deployed using user_data

resource aws_instance "terrInstance" {
        ami = "ami-0c2b8ca1dad447f8a"
        instance_type = "t2.micro"
        associate_public_ip_address = "true"
        user_data = <<-EOF
             #!bin/bash sudo -i
             yum install httpd -y
             systemctl start httpd
             systemctl enable httpd
             echo "Learning Terraform is Fun !!!">/var/www/html/index.html
             EOF

        tags = {
	Name = "Web Server"
        }
}
Above we have written a script in between <<-EOF and EOF to deploy a webserver and echo a message as a part of EC2 instance user_data , which AWS will execute when the instance is booting.
Step 4 – Setting up Security Group
To allow the EC2 instance to receive traffic on port 80 (HTTP) and port 443 (HTTPS), we have to create a Security group .
// Security Group

resource aws_security_group "serverSG" {
     description = "Allow HTTP and HTTPS traffic"

     ingress {
        description = "HTTPS"
        from_port = 443
        to_port = 443
        protocol = "tcp"
        cidr_blocks = ["0.0.0.0/0"]
     }

     ingress {
        description = "HTTP"
        from_port = 80
        to_port = 80
        protocol = "tcp"
        cidr_blocks = ["0.0.0.0/0"]
     }

     egress {
        from_port   = 0
        to_port     = 0
        protocol    = "-1"
        cidr_blocks = ["0.0.0.0/0"]
     }
}
Step 5 – Pass Security Group ID to EC2 Instance
Now we have to tell the EC2 Instance to use the above security group by passing its ID into the vpc_security_group_ids argument of aws_instance resource.
vpc_security_group_ids = [aws_security_group.serverSG.id]
The complete main.tf file –
//AWS Provider
provider "aws" {
  region = "us-east-1"
}

// Instance having web server deployed using user_data
resource aws_instance "terrInstance" {
        ami = "ami-0c2b8ca1dad447f8a"
        instance_type = "t2.micro"
        associate_public_ip_address = "true"
        vpc_security_group_ids = [aws_security_group.serverSG.id]
        user_data = <<-EOF
             #!/bin/bash
             sudo -i
             yum install httpd -y
             systemctl start httpd
             systemctl enable httpd
             echo "Learning Terraform is Fun !!!">/var/www/html/index.html
             EOF

        tags = {
	Name = "Web Server"
        }
}

// Security Group
resource aws_security_group "serverSG" {
     description = "Allow HTTP and HTTPS traffic"
     name = "serverSG"

     ingress {
        description = "HTTPS"
        from_port = 443
        to_port = 443
        protocol = "tcp"
        cidr_blocks = ["0.0.0.0/0"]
     }

     ingress {
        description = "HTTP"
        from_port = 80
        to_port = 80
        protocol = "tcp"
        cidr_blocks = ["0.0.0.0/0"]
     }

     egress {
        from_port   = 0
        to_port     = 0
        protocol    = "-1"
        cidr_blocks = ["0.0.0.0/0"]
     }
}
Output – Deploy the Web Server
Finally , run the following commands in sequence to deploy the web server using terraform .
1. terraform init
2. terraform validate
3. terraform plan
4. terraform apply
You will see a new EC2 Instance is created and a security group serverSG is attached to it.

Figure 1 : EC2 Instance created with Security Group attached
Copy the public IP address of this EC2 Instance and use a web browser to make an HTTP request to this IP address at port 80 .
The web server is deployed with the message we have given in user_data .
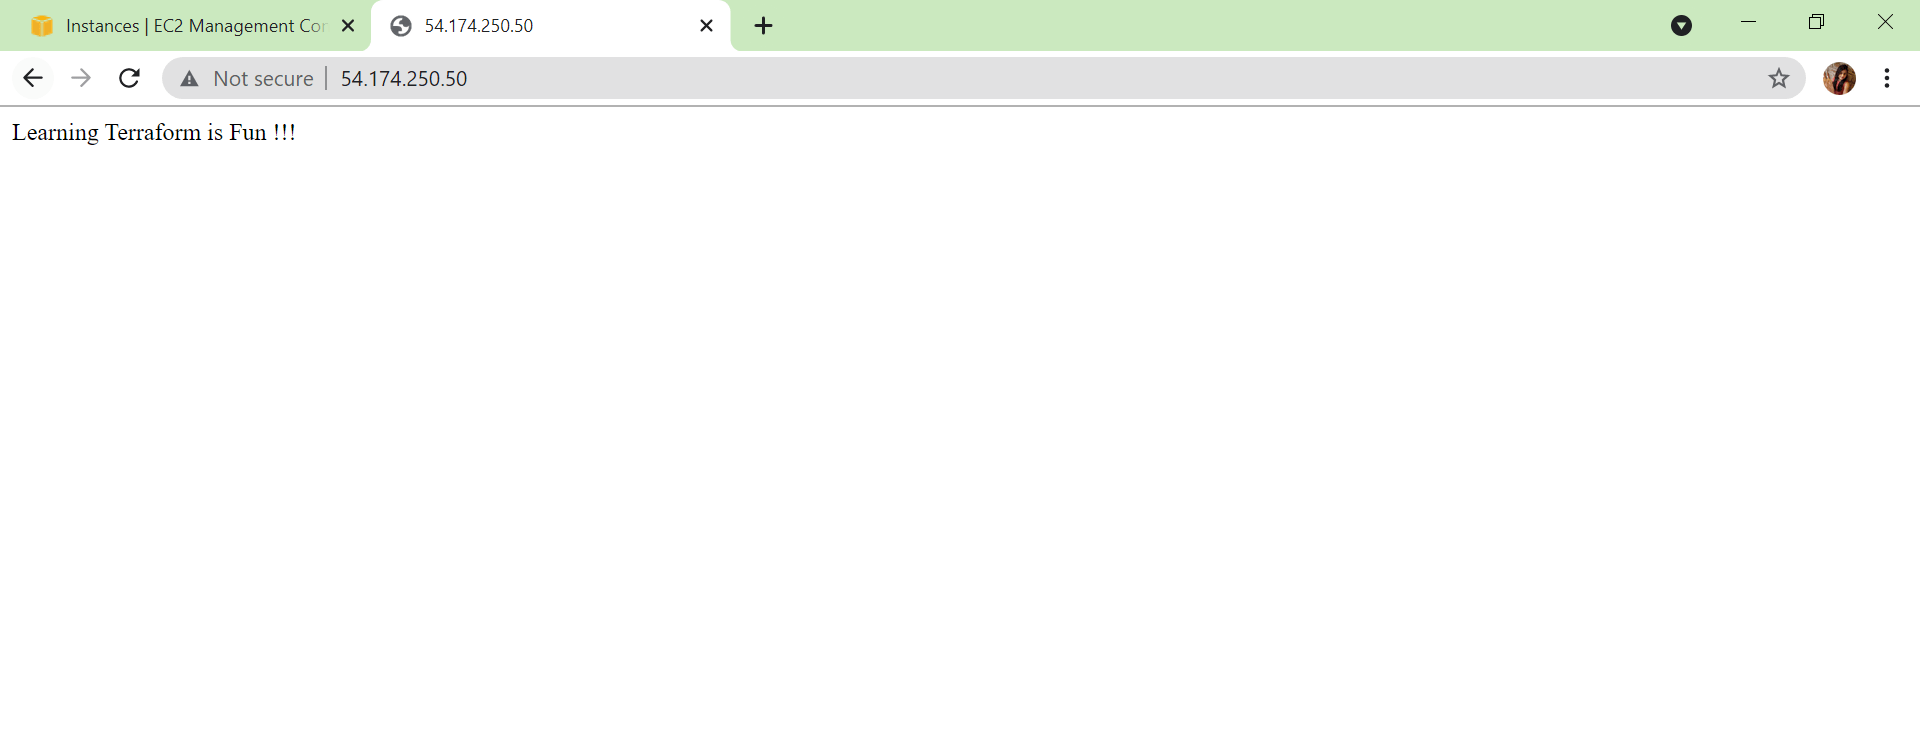
Figure 2 : Web Server Deployed using Terraform
Hope you like the article . If this is worth reading atleast once , please do like and share…!!!


You must be logged in to post a comment.