Preparing exam SC – 300 / Azure – Create, configure, and manage identities – Create custom security attributes – part 11.1

Hi All,
Greetings for the day!!!
On Knowledge Junction we are preparing study material for exam SC-300 – Identity and Access Administrator. We are having very good series of articles and preparation guide as well.
Please have a look our preparation guide – Azure – SC – 300 – Identity and Access Administrator – preparation guide
Today in this article we will discuss about Custom security attributes – How to create custom security attributes in Azure AD admin center
Since this article is big, dividing this article in multiple series. In next article we will discuss how to assign these Custom security attributes to Users or Applications
Take away from this article:
- What are custom security attributes?
- Use cases for custom security attributes?
- How to create Attribute set?
- How to create custom security attributes?
- Permissions required for creating custom security attributes?
What are custom security attributes
- Custom security attributes are key-value pairs
- These attributes can be assigned to Azure AD objects – users, managed identities (applications)
- These objects can be used to store information, categorize objects
- Security attributes are available tenant wide
- While creating Security attributes we can set description
- Security attributes support different types of data types – Boolean, integer and string
- Supports single value or multiple values
- We can assign security attributes to directory synced users from an on-premises Active Directory
Use cases for custom security objects
- To extend user profile properties like hiring date
- Implement attribute governance, for example – attributes will determine who will get access
How to create Custom Security Attributes
- Navigate to Azure Active Directory admin center (Azure AD admin center). We have separate detailed article for navigating to Azure AD admin center – Azure Active Directory admin center – navigating to Azure Active Directory admin center
- As we navigate to Azure AD admin center, we will be have our dashboard

- From left pane, click on “Azure Active Directory” link, we will be redirected to “Active Directory Menu Blade” as
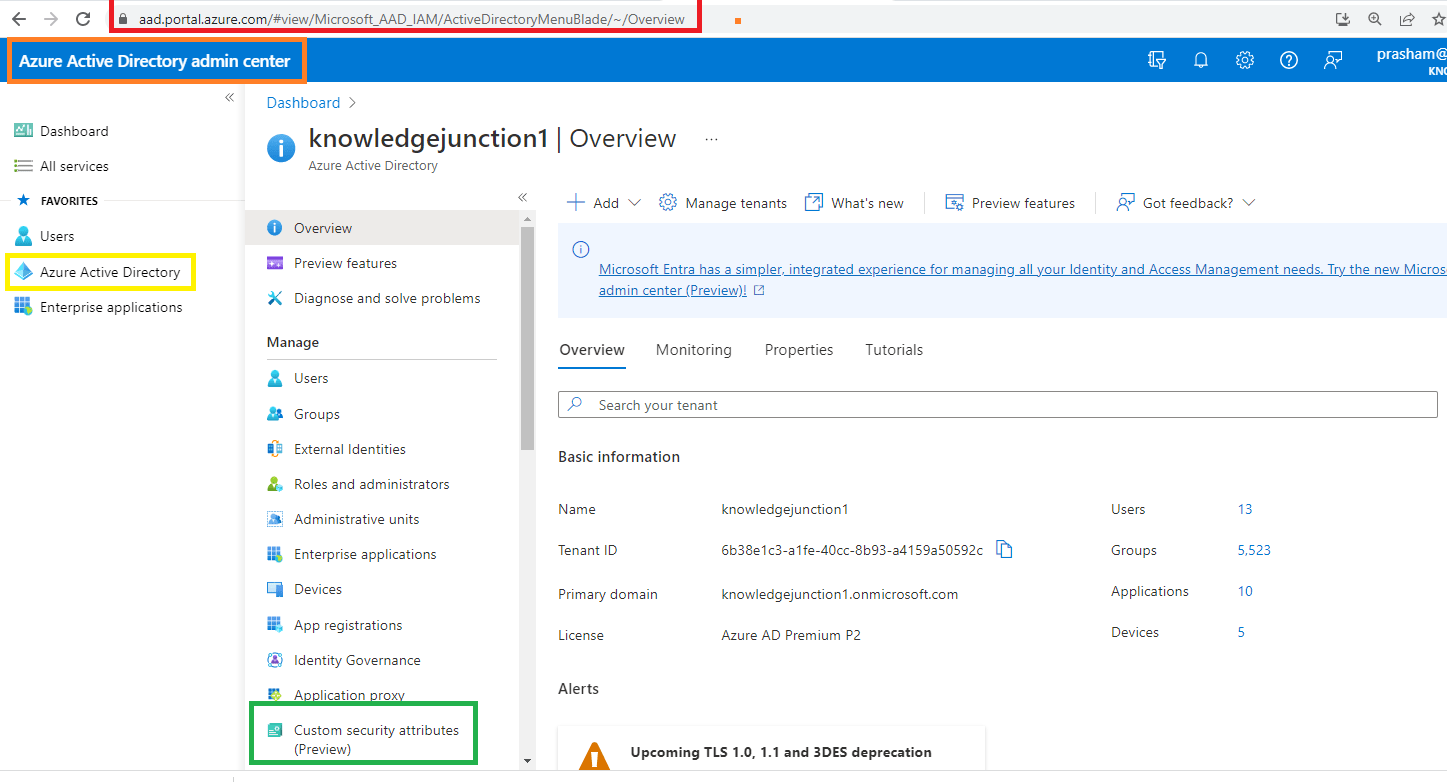
- As shown in above fig, we have a option / link “Custom security attributes (Preview)“
- We will navigate to “CustomAttributesCatalog” by clicking on link “Custom security attributes (Preview)” as

- If you notice here, “+ Add attribute set” option is disabled because it requires special permission – “Attribute Definition Administrator role“
- Even “Global administrator” or “Privileged Role Administrator roles” users also don’t have permission to create attribute set
- So we need to assign the role “Attribute Definition Administrator role” to the user who will be managing Custom security attributes – we have detailed article on Azure roles, managing Azure roles and assigning roles to users – Preparing exam SC – 300 – Identity and Access Administrator – Associate Configure and manage Azure Active Directory roles – Study material – Part 1
- Once we assigned azure role – “Attribute Definition Administrator role” to respective user, we will see “+ Add attribute set” option is enabled for creating Custom security attribute as

- Here since my tenant there is no “Attribute set” created, we first need to create “Attribute set“
- To create “Attribute set” click on “+ Add attribute set” link as shown in below fig

- On click of “+ Add attribute set” link, right pane – “New attribute set” will open as shown in above fig
- Fill the details on “New attribute set” pane
- Attribute set name – It does not allow space
- Description – give the appropriate description name
- Maximum number of attributes – For now, it allows 500 attributes only
- Make sure new attribute set is created successfully as shown in below fig

- Once we have new attribute set is in place, we are ready to create new Custom security attribute
- As shown in above fig, click on newly created attribute set, we will be redirected to “attributeset” page as shown in below fig
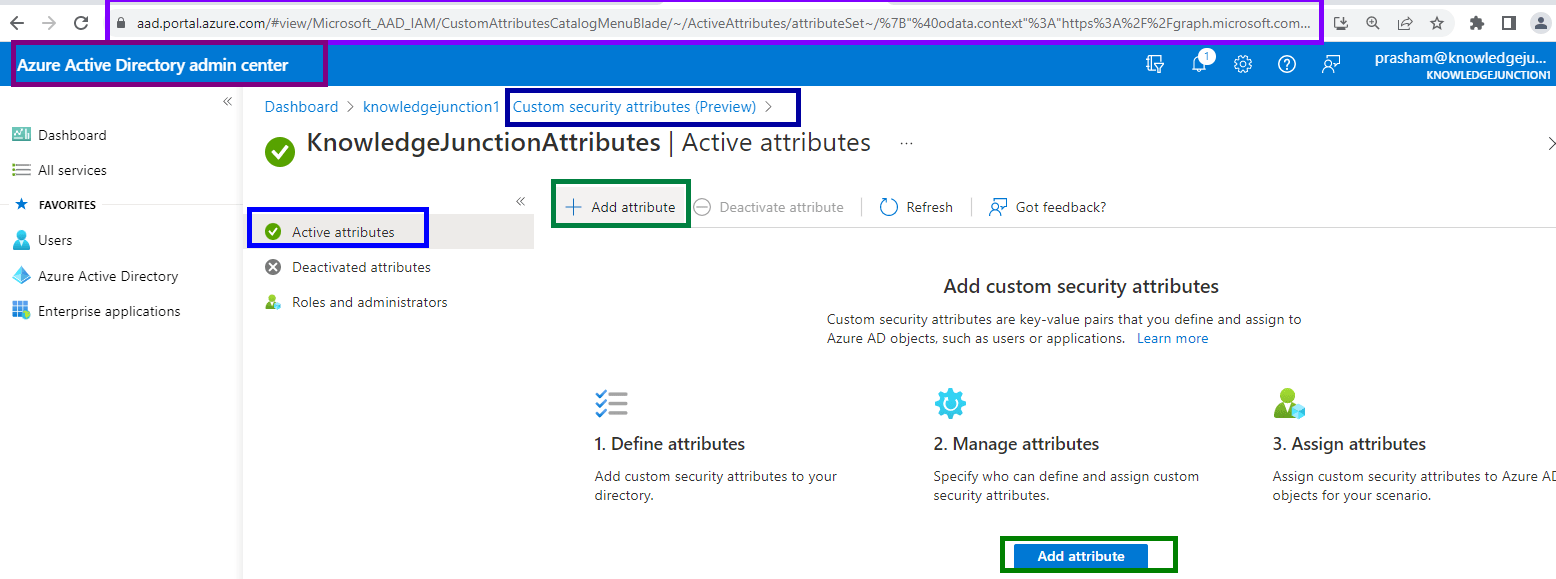
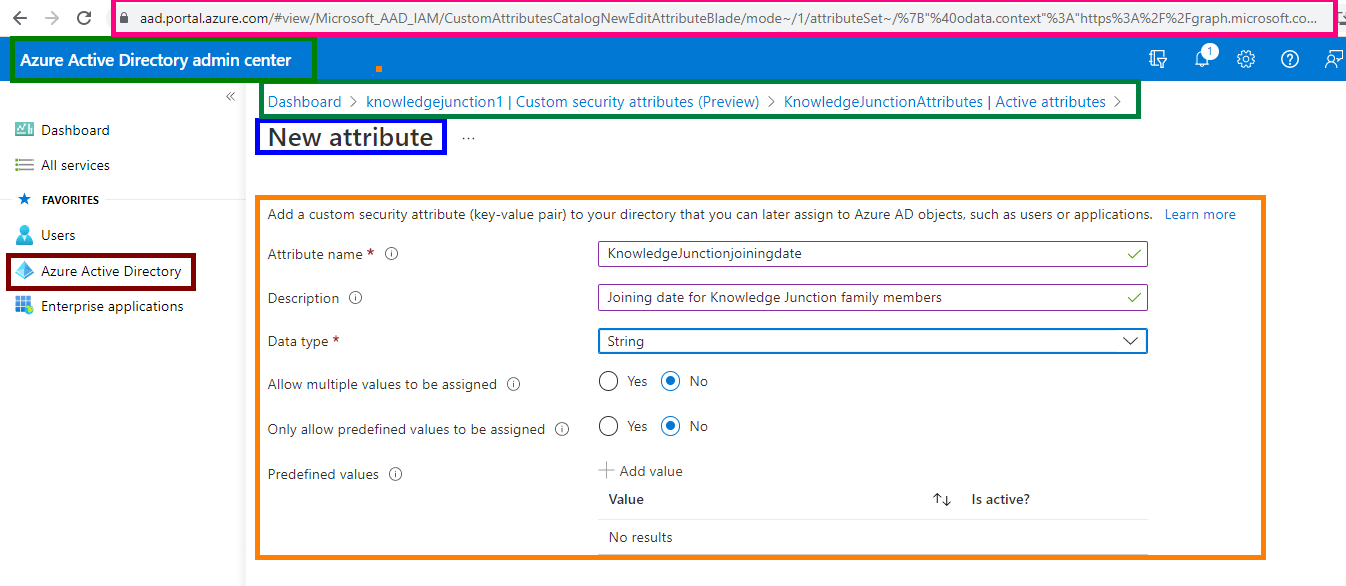
- On click “+ Add attribute” link we will be navigated to “New attribute” page as shown in below fig
- Fill the respective details and click on “Save” button at the bottom of page
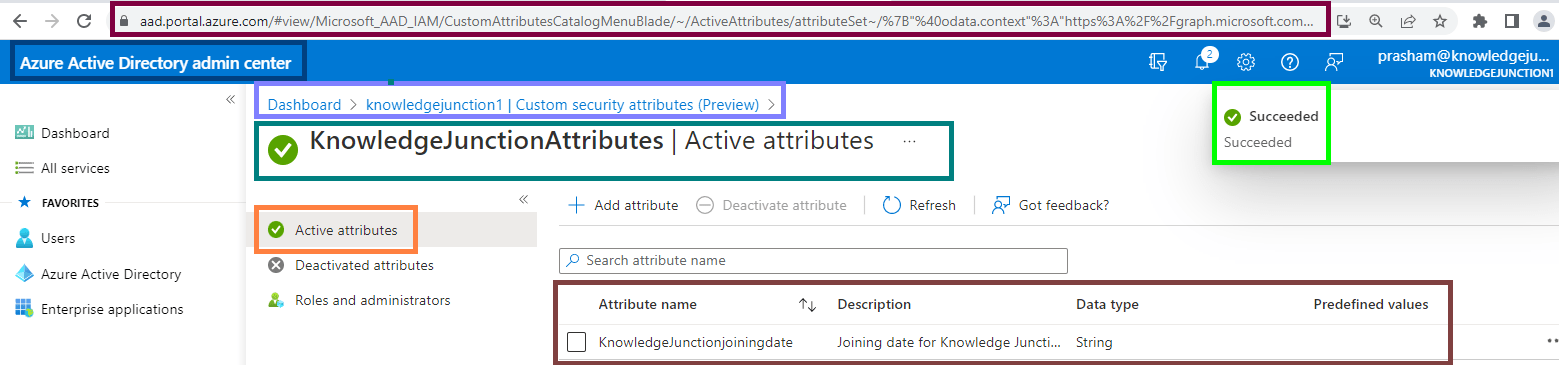
- Make sure new attribute created successfully as shown in below fig
References
- Azure Active Directory admin center – navigating to Azure Active Directory admin center
- Preparing exam SC – 300 – Identity and Access Administrator – Associate Configure and manage Azure Active Directory roles – Study material – Part 1
Thanks for reading. If its worth at least reading once, kindly please like and share !!! SHARING IS CARING 🙂
Enjoy the beautiful life !!! Have a FUN !!! HAVE A SAFE LIFE !!! TAKE CARE 🙂


2 Responses
[…] Preparing exam SC – 300 / Azure – Create, configure, and manage identities – Create custom sec… […]
[…] Preparing exam SC – 300 / Azure – Create, configure, and manage identities – Create custom sec… […]