Azure – Create Basic Azure Bot Service
Hello Everybody,
Today we will discuss about another Azure Service Azure Bot Service. In this blog we will describe how to create a simple Azure Bot Service.Azure Bot Services exists under AI + Machine Learnings section of All Resources, as shown in following figure.
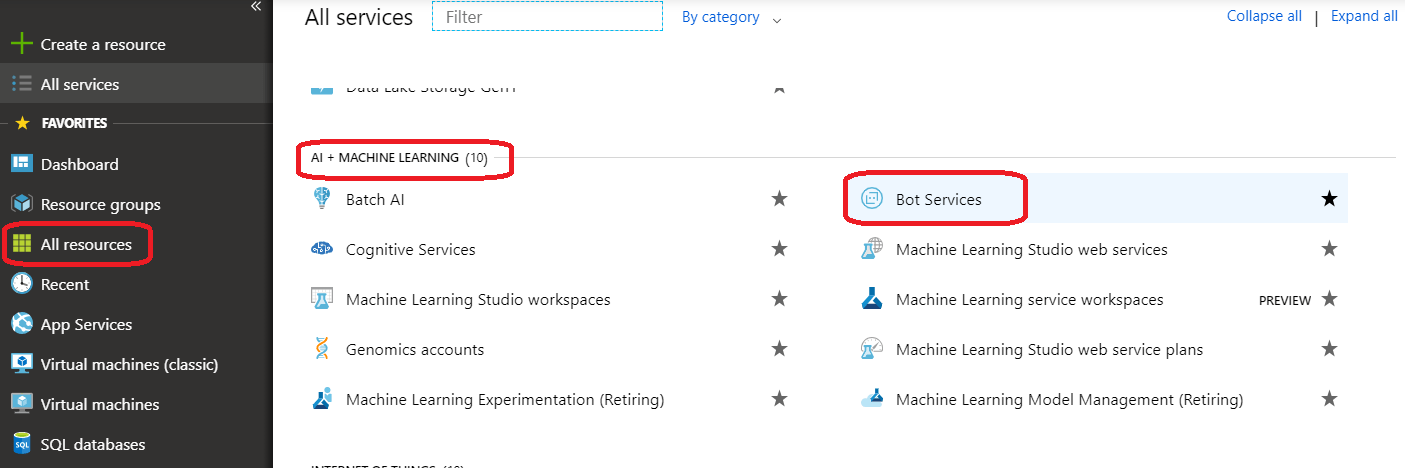
Figure 1: Azure Bot Service
Azure Bot services is a very powerful service provided by Microsoft Azure. Now a day, consumption of Azure Bot service is very high. Following are few steps to create a simple Azure Bot Service.
-
Connect to your Azure portal dashboard using your subscription account. If you don’t have any subscription, in that case you can get trial Azure subscription with one-month of validity. Then you can connect to the azure portal dashboard as in following figure.

Figure 2: Azure – Azure Portal Dashboard -
To create new Azure Function, click on Create a resource Link and then search for Web App Bot and click to create one Bot service as shown in the following figure.
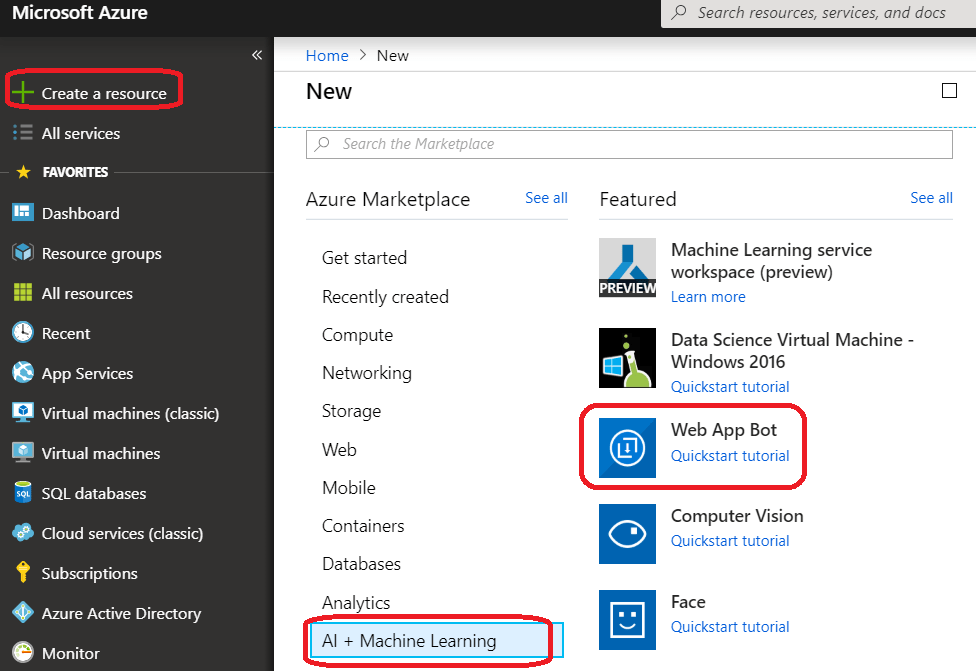
Figure 3: Create New Bot Service -
It will allow you to fill the required information to create a new Azure Bot service as shown in following figure. We need to fill all required information and click Create to create the Bot service successfully.

Figure 4: Create New Bot Service template -
Once our Azure Bot is created, we can see the newly created Bot service in All Resource page. When it creates, it comes with 4 different resource as shown in the following figure.

Figure 4: Azure Resources Created with Bot Service -
Lets click on Azure Bot App Service and select Overview of the Bot service and we can see the link “Get Publish Profile” to down load the publish profile of this Azure Bot. So that we can reuse this publish profile, we want to modify this Azur Bot and publish through Visual Studio. There is another importing link for “Application Settings” as shown in the following figure.

Figure 5: Azure – Overview of Azure Bot ServiceLet’s go to this link and here we can find all configuration information required for this Azure Bot. Some of this information might be required, when we are modifying this Azure Bot through Visual Studio. In that case, we need to copy the value of required key to our visual studio as shown in following figures.

Figure 6: Azure – Application Settings of Azure Bot Service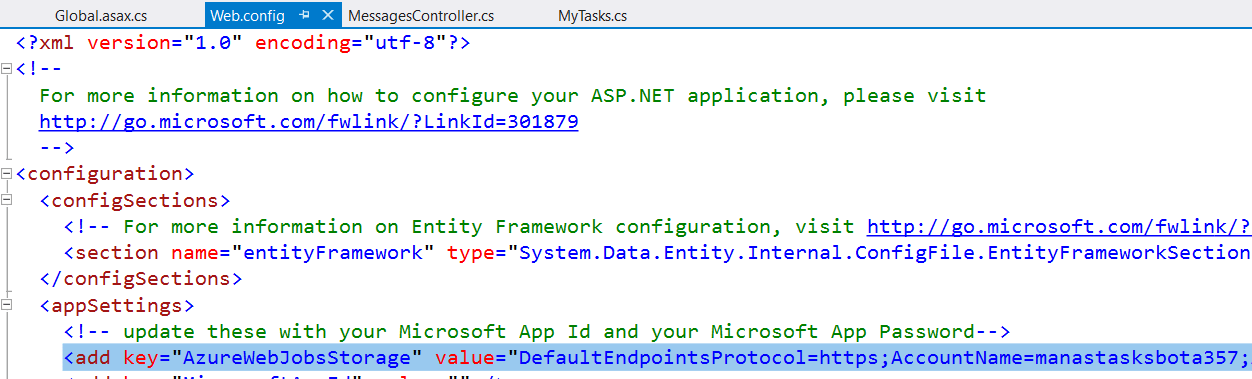
Figure 7: Azure – Application Settings value used in VS -
Now let’s go back to step 4 and click on “Web App Bot” resource of this Azure Bot as shown in figure 4. It will take you to another section where, we can find many other options. “Build”, “Test in Web Chat” are most important links among them, on the page as shown in following figure.Let’s first go to the Build section.
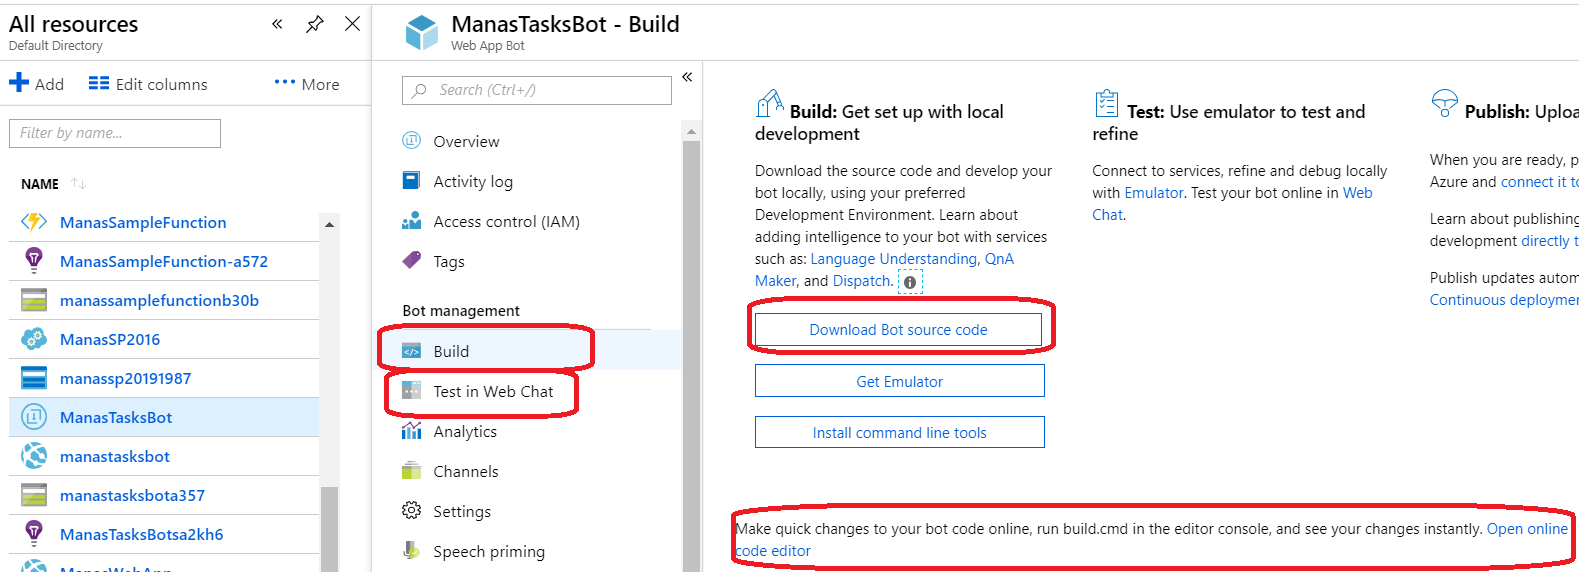
Figure 8: Azure – Web App Bot resource of Azure Bot -
In this section we can see some important links as shown in the above figure 8.
This page, allow us to customise or modify and test our bot in locally or online. Following are most important links with details.-
Download Bot source code
From here we can down load Azure Bot source code and later we can customise or modify the code and then we can test the Bot locally and again we can publish the updated solution back to the Azure/Cloud. In our next blow we will see how to Customise an Azure Bot using Visual Studio 2017. -
Get Emulator
This is a window application, which generally used to test a Azure Bot locally. We can debug the code in visual studio, when we are testing the Bot locally in Bot Emulator. -
Open online code editor
When we click on the above link, it will open an online editor, where we can directly modify the code and publish back as shown in the following figure.
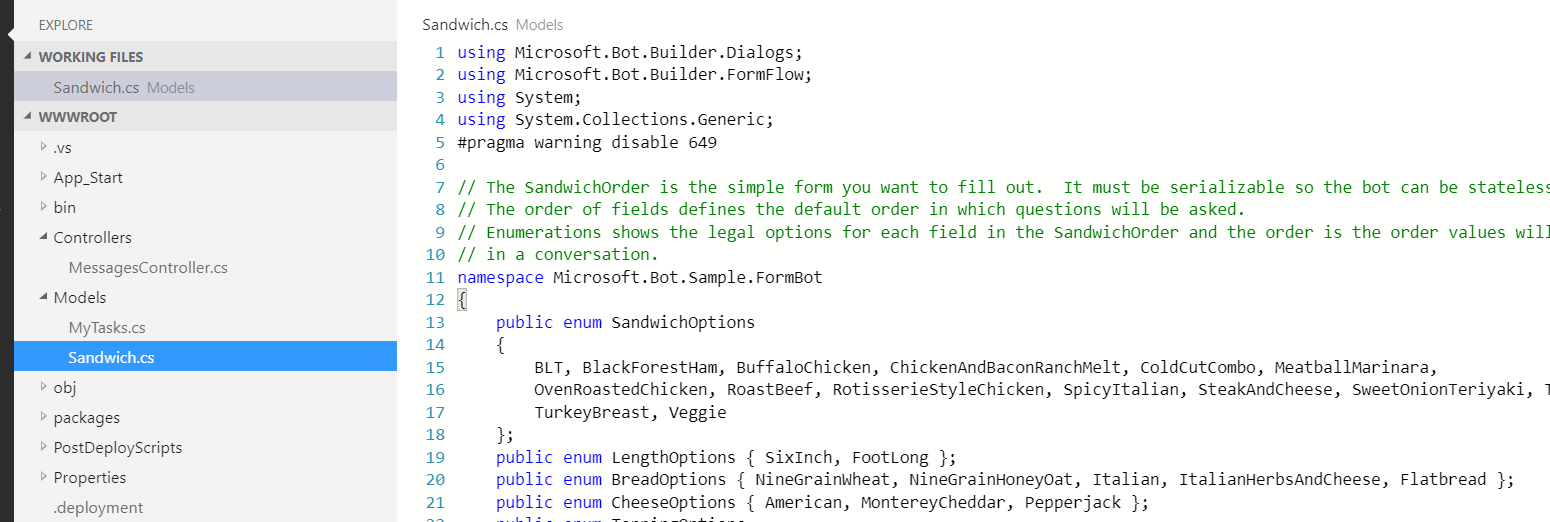
Figure 9: Azure – Online Code editor of Azure Bot
-
Download Bot source code
-
Now the next point of this blog is how to test this Azure Bot. To test the Bot, click on the next important link “Test in Web Chat” and start testing your Bot as shown in the following figure.

Figure 10: Azure – Testing of Azure Bot on portal.
I hope this blog give you an overall idea of Azure Bot.
Thanks for reading
Keep reading, share your thoughts, experiences. Feel free to contact us to discuss more. If you have any suggestion / feedback / doubt, you are most welcome.
Stay tuned on Knowledge-Junction, will come up with more such articles.


good one
Very useful…Thanks for sharing .