Azure – Managing Azure Virtual Machine Disks
Hello Friends,
As we have started with a series of post on Azure Exam : Developing Microsoft Azure Solutions. and our last post was on, Azure – Create New Azure Virtual Machine.
Today in this blog, we will move forward and discuss, how to scale up or manage disks of, the existing Virtual Machine. So let’s go through the post.
- Connect to your Azure portal dashboard using your subscription account. If you don’t have any subscription, in that case you can get trial Azure subscription with one-month of validity. Then you can connect to the azure portal dashboard as in following figure.
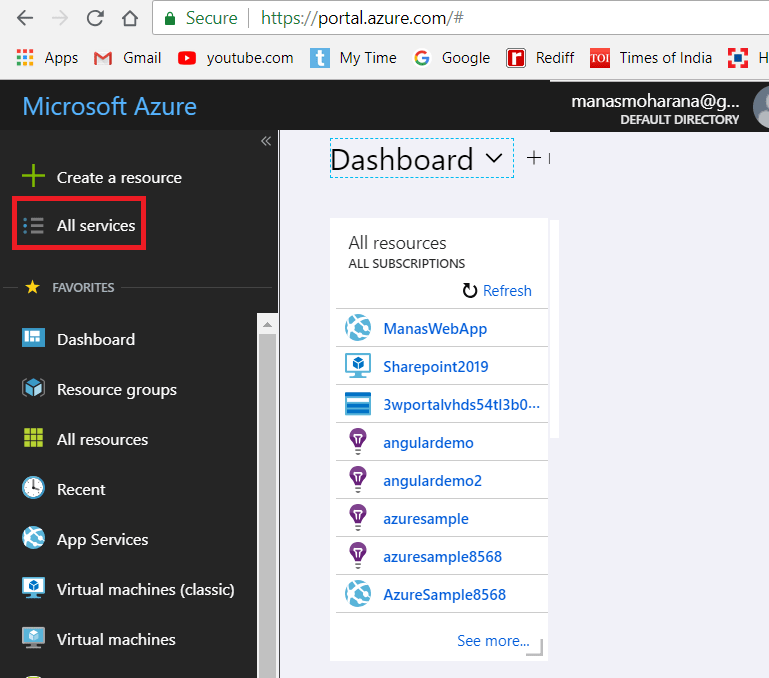
Figure 1: Azure Certification – portal dashboard - Once we are on the portal dashboard, click on Virtual Machines.It will lists all existing VMs. Let’s click on the VM, we want to scaled up, as shown in the following figure.

Figure 2: Azure Certification – Select VM to scale up - In the following figure, we can see that, we have only OS disk available with our VM and no data disk avilable to store our personal/secure data. Again only 128 GB of space available for the OS disk for C drive.But no worry, we can address those limitation.But make sure to Stop the VM before proceed with the scale up activity.

Figure 3: Azure Certification – Azure VM Before Scale Up - Let’s Start with scaling up OS disk, by assigning more disk space to it. First click on Disks link on left side menu and click on the OS disk, we want to scale, as shown in following figure.
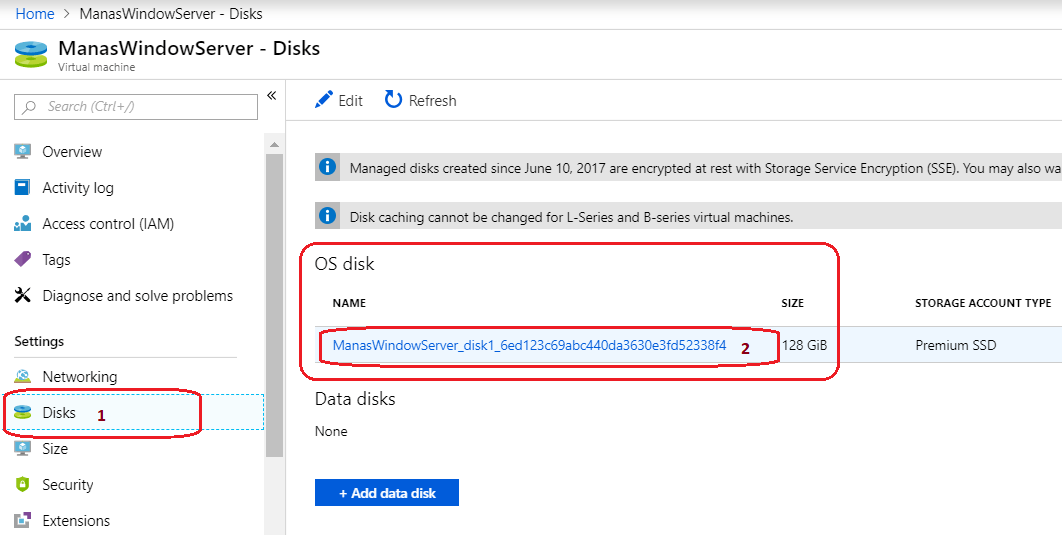
Figure 4: Azure Certification – Scale Up Azure VM OS Disk 1 - On OS disk overview page, increase the size of disk space to scale up the OS disk as sown in the following figure.Don’t forgot to save the changes before leave the page by clicking Save button on top menu.

Figure 5: Azure Certification – Scale Up Azure VM OS Disk 2 - Now we can see our OS disk space has increased, as shown in following figure.
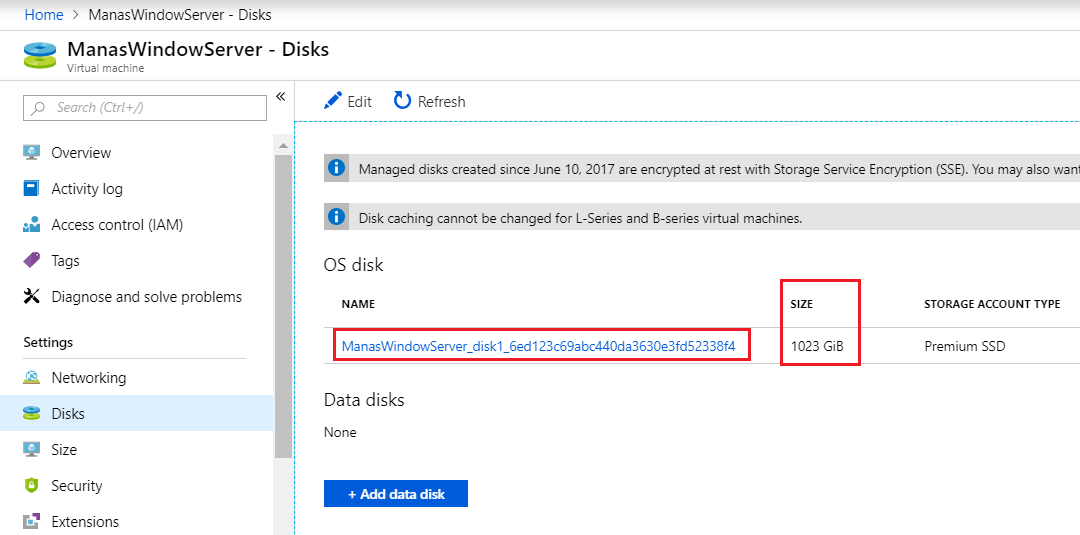
Figure 6: Azure Certification – Scaled Up Azure VM OS Disk 3 - It’s time now to add one more additional Data Disk to scale up the VM by clicking the Add data disk button and again click Create Disk link, as shown in following figure.
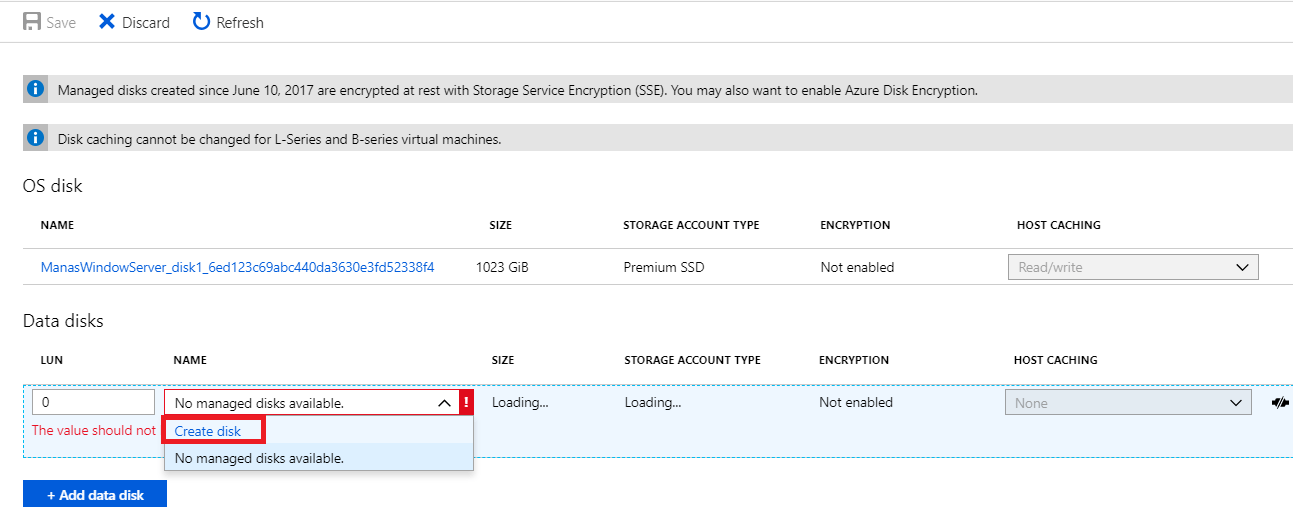
Figure 7: Azure Certification – Add new Data disk 1 - It will allow us to provide required information for the requested Data disk.Please provide all information as shown in following figure.Verify the detail information before click Create button to create additional data disk for the VM
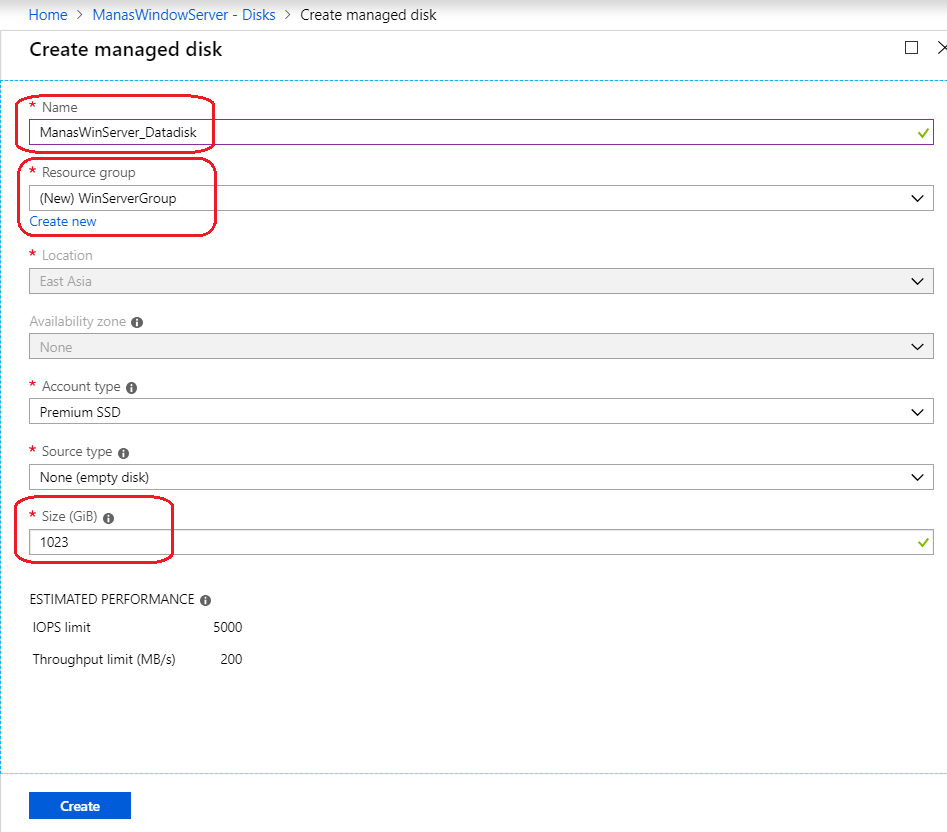
Figure 8: Azure Certification – Add new Data disk 2 - It will take couple of minute to allocate a new data disk to our VM and we are done after clicking the Save button.Now we have scaled up our VM as We can see in the following figure.

Figure 9: Azure Certification – VM has been Scaled Up - If we have any existing data disk available, and we want to add that disk to our VM. In this case, we need to follow the same procedure and click add to add additional disk.Instead of create new data disk, select one from the available data disk from the list and click Save button to associate the data disk, as we can see in the following figure.

Figure 10: Azure Certification – VM has been Scaled Up - Now let’s connect to the VM and check, if the scale up activity done successfully. After Log in to the VM, what we saw is, the scale up has not sync yet.We wanted to check, where is the issue so we go to computer management and select disk management from storage and saw the scale up done successfully but the new space has not been allocated automatically as shown in the following figure.

Figure 10: Azure Certification – Unallocated space - As we saw, in the above figure that, new space need to be allocate and we did it manually. After allocated the new added space, it scale up the VM as per our requirement as shown in the following figure.
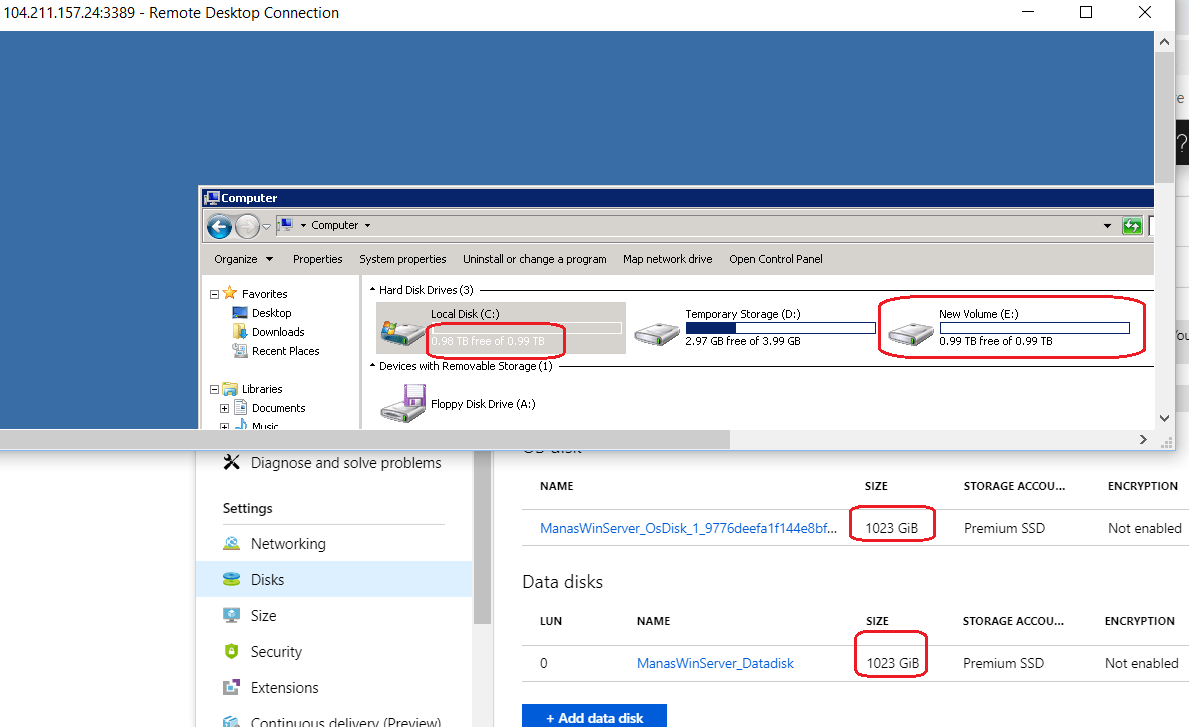
Figure 10: Azure Certification -VM Scaled up successfully
I hope this blog, gives you basic understanding about how to manage Azure disks.
Thanks for reading 🙂
Keep reading, share your thoughts, experiences. Feel free to contact us to discuss more. If you have any suggestion / feedback / doubt, you are most welcome.
Stay tuned on Knowledge-Junction, will come up with more such articles.
More Posts On Exam : Developing Microsoft Azure Solutions :
Azure – Create New Azure Virtual Machine
Azure – Create An Azure Storage Account.
Azure – Configuring Shared Storage Using Azure File Service
Azure – Working with Azure CLI
Azure – Create a Virtual Machine with Azure Power Shell
Azure – Deploying a Web App to Azure Virtual Machine with Web Deploy method


good job