Azure – Configuring Shared Storage Using Azure File Service
Hello Friends,
As we are continuing with our posts on Azure Exam : Developing Microsoft Azure Solutions. And our last post was on Create An Azure Storage Account.
Today in this blog, we will move ahead with last blog discuss, how to configure shared storage using Azure file service.Azure Files service is a managed service.It is cloud based file share service, by that files can access via SMB protocol. Once you created Azure File share it can be access from anywhere using Windows, Linux or macOS. It can also can be mapped as a shared drive to the system. So let’s go through the post how to configure Azure File Service through Azure Portal.
- Connect to your Azure portal dashboard using your subscription account. If you don’t have any subscription, in that case you can get trial Azure subscription with one-month of validity. Then you can connect to the azure portal dashboard as in following figure.
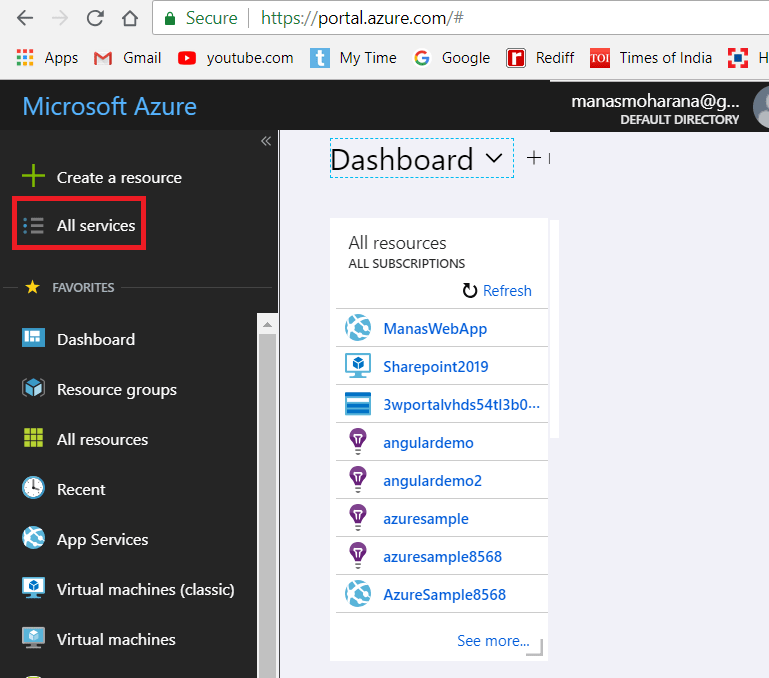
Figure 1: Azure
Certification 70-532 – portal dashboard - To proceed with this configuration, First, we need to have a storage account and then we need to configure that storage account to use Azure file service to be shared with others.So let’s continue with the storage account (manasstorage1), we have created in our last session/post.But unfortunately, we cannot proceed with that storage because we have created that storage account of type Premium because to have a better IOPS performance but the file service option is not available for premium storage account, as we can see in the following figure.

Figure 2: Azure Certification 70-532 – Existing Premium type storage Account - So let’s try to create a new Azure Storage Account of Standard type.We can follow our previous post to create a new Storage Account.Just we need to select Standard storage,and we could chose, how should the access tier, if Hot or cool as per our load, as we can see in the following figure.
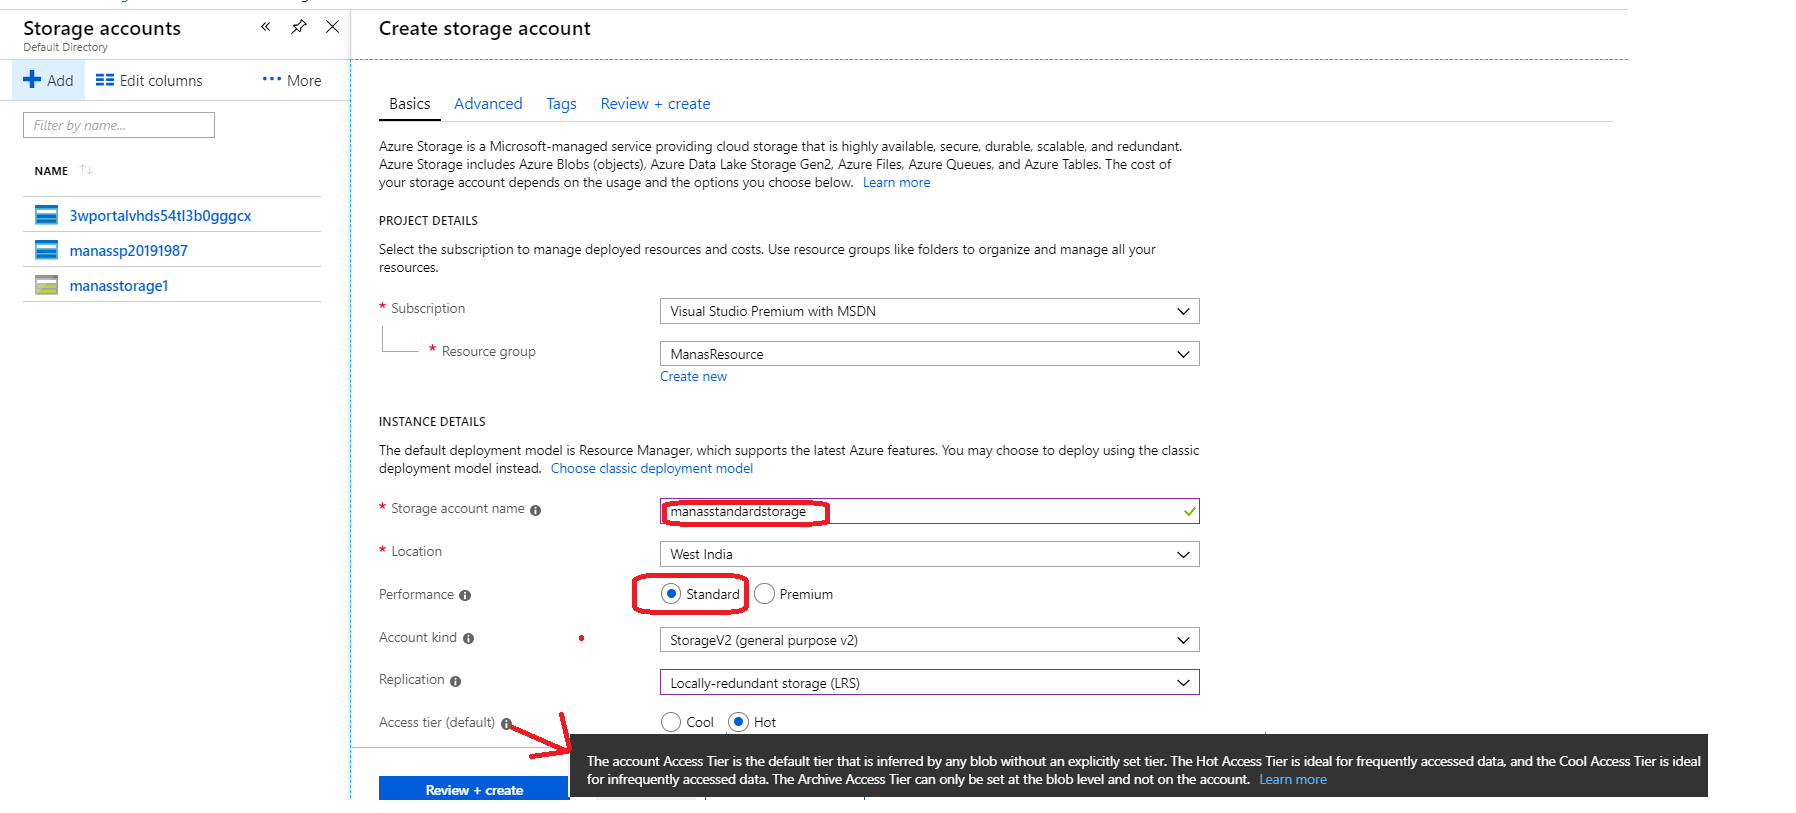
Figure 3: Azure Certification 70-532 – Basic information of create Standard storage Account - We could check the advance tab, if any thing required, to be set like, secured transfer required.But for the time being, we will go with unsecured, as we can see in the following figure.
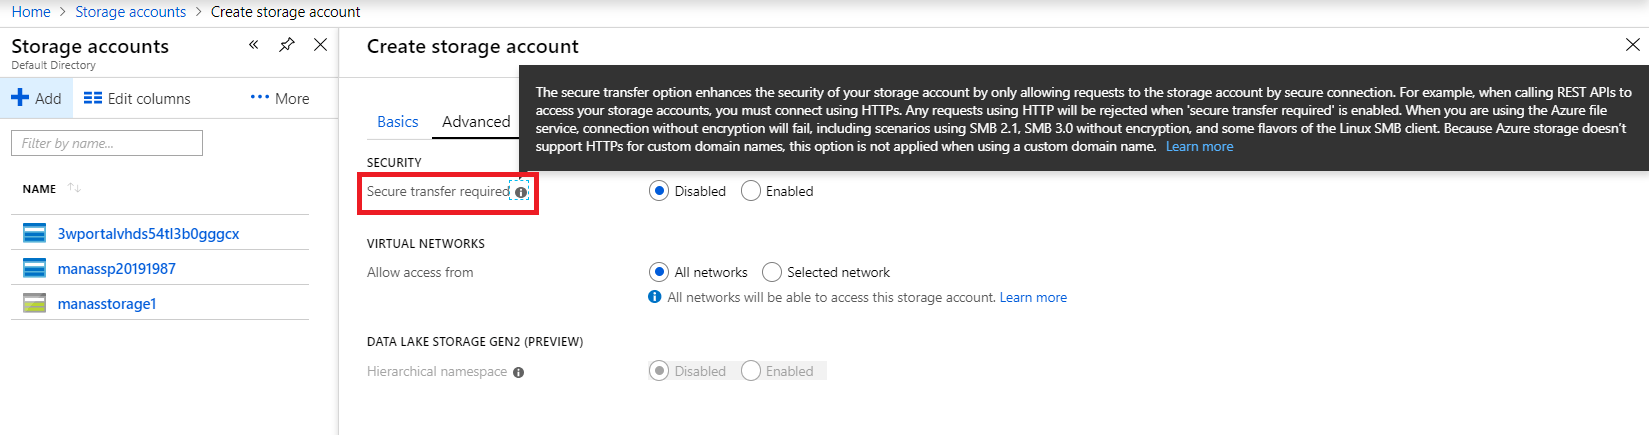
Figure 4: Azure Certification 70-532 – Advance information of create Standard storage Account - Once we have created the standard Azure storage account, click on the storage account to check the overview of the newly created storage account.Here we can see in the following figure, that we have File Service available.
- Now let’s click on the Files and then click on File Share button on the top ribbon, to create a File Share by providing all required information like, Name and the size,as shown in the following figure and click Create button to create the file share.
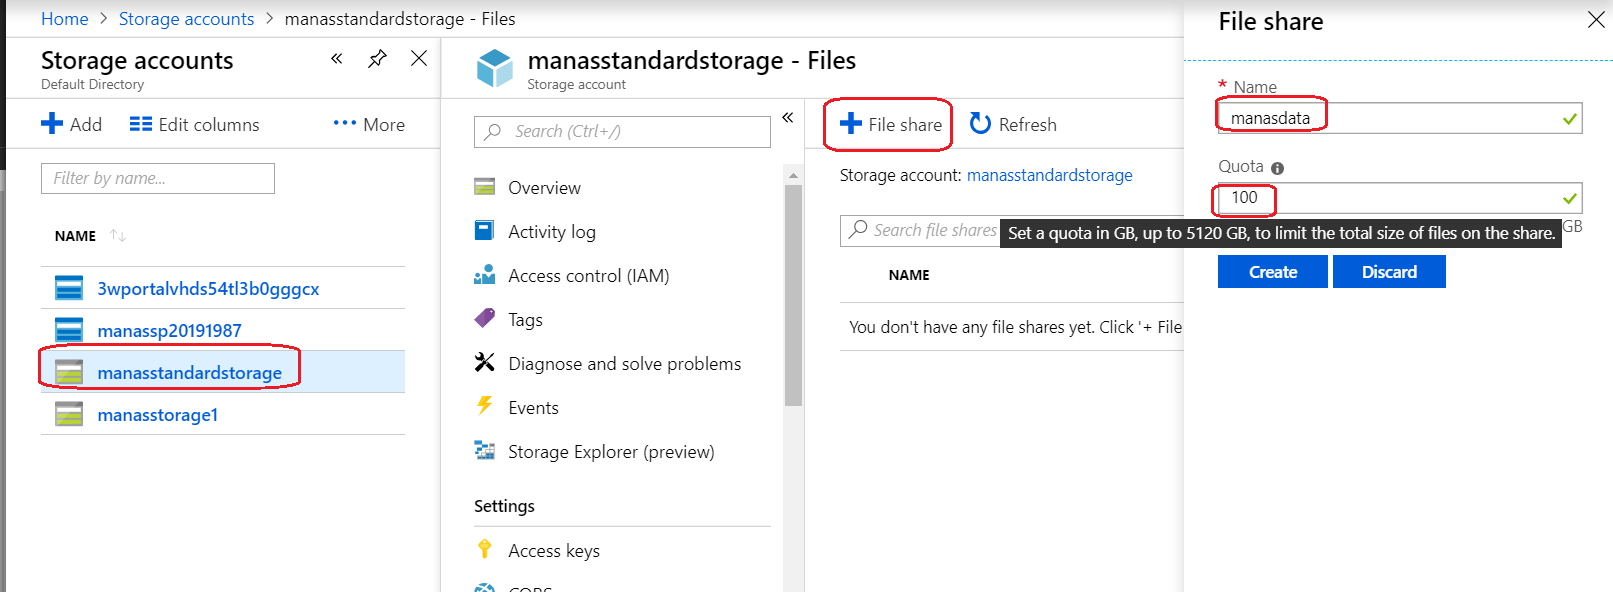
Figure 6: Azure Certification 70-532 – Create new File Share - Once, we have created new file share, go inside the newly created file share,
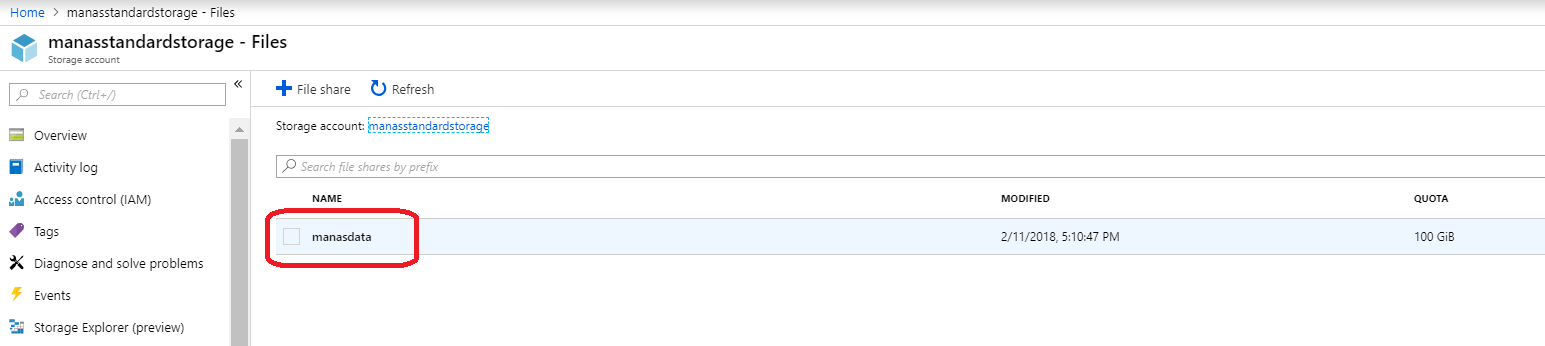
Figure 7: Azure Certification 70-532 – Created new File Share - As we can see in the following figure, That, there are multiple option available in side the file share section like, Upload files, Delete files, Add new directory, Extend quota etc. One more option Connect is also available there.
- Click on Connect button to get the power shell commands to connect to the shared storage, as shown in the following figure.
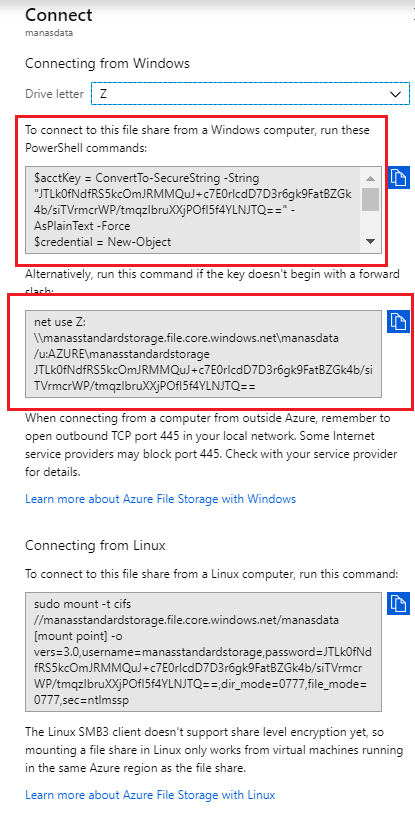
Figure 9: Azure Certification 70-532 – Power shell command to connect to shared storage - Now it’s time for testing the shared storage, using the provided power shell by Azure.We have log in to one of our existing VM and open the command prompt.Then Copy the appropriate power shell from Azure portal and run the power shell. As shown in the following figure, it connected to the shared storage successfully with drive name “Z”.
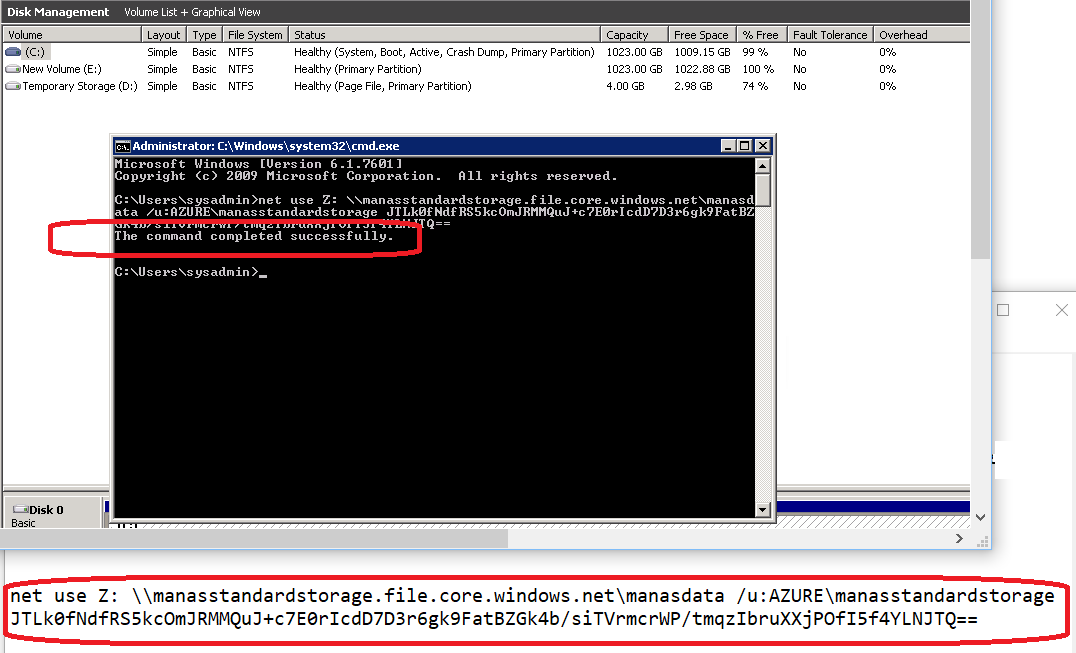
Figure 10: Azure Certification 70-532 – Power shell command to connect to shared storage - Here one very important point to note that, to connect to the shared storage account, the power shell used a key and it is known as Access Key of storage account.This key can be used by visual studio to connect to the storage.We can get the access key of a storage account from the storage account page it self, as shown in the following figure.
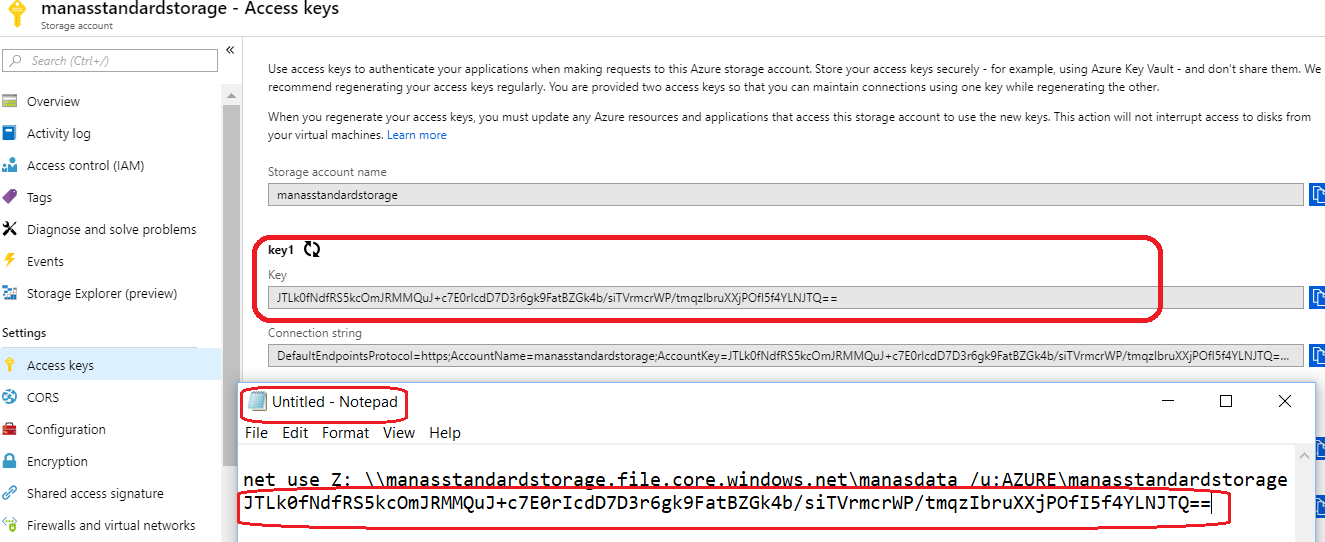
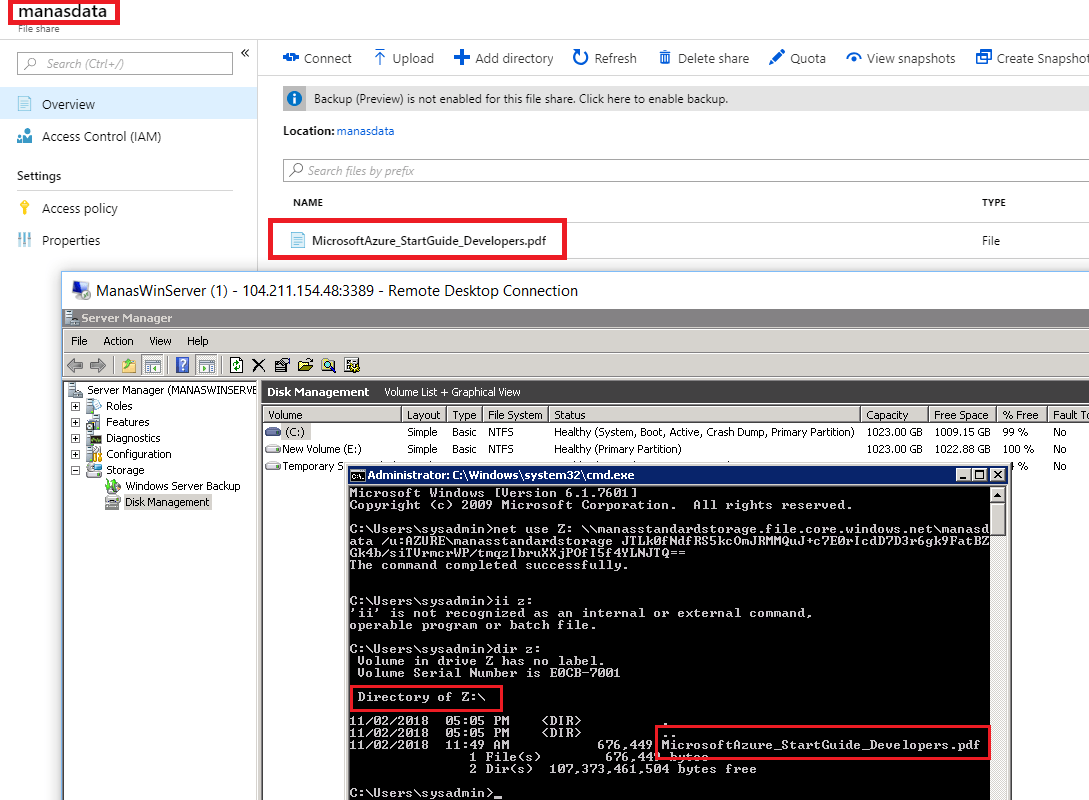
Figure 11: Azure Certification 70-532 -Access key of storage account - For testing purpose, we have uploaded a document to our file share (manasdata),at the time of it’s creation, as shown in above figure 8.Let’s access the file share and verify, if we can access the uploaded file. As shown in the following figure, we can successfully access the file.Yes Here you go !!!:).


I hope this blog, gives you basic understanding about how to shared storage.
Thanks for reading 🙂
Keep reading, share your thoughts, experiences. Feel free to contact us to discuss more. If you have any suggestion / feedback / doubt, you are most welcome.
Stay tuned on Knowledge-Junction, will come up with more such articles.
More Posts On Exam 70-532: Developing Microsoft Azure Solutions :
Azure – Create New Azure Virtual Machine
Azure – Managing Azure Virtual Machine Disks
Azure – Create An Azure Storage Account.
Azure – Working with Azure CLI
Azure – Create a Virtual Machine with Azure Power Shell
Azure – – Deploying a Web App to Azure Virtual Machine with Web Deploy method
Azure – – Remote debugging on an Azure VM
Azure – – Azure Automation State Configuration
Azure – Configure Azure PowerShell Desired State Configuration (DSC) Through Azure Portal


8 Responses
[…] Azure – Certification 70-532-Part 2- Managing Azure Virtual Machine Disks Azure – Certification 70-532-Part 4- Configuring Shared Storage Using Azure File Service […]
[…] Azure – Certification 70-532-Part 4- Configuring Shared Storage Using Azure File Service […]
[…] Azure – Certification 70-532-Part 4- Configuring Shared Storage Using Azure File Service […]
[…] Azure – Certification 70-532-Part 4- Configuring Shared Storage Using Azure File Service […]
[…] Azure – Certification 70-532-Part 4- Configuring Shared Storage Using Azure File Service […]
[…] Azure – Certification 70-532-Part 4- Configuring Shared Storage Using Azure File Service […]
[…] Azure – Certification 70-532-Part 4- Configuring Shared Storage Using Azure File Service […]
[…] 70-532-Part 14 – Create and Deploy Azure Resource Manager Template using Visual Studio 2017 Azure – Certification 70-532-Part 4- Configuring Shared Storage Using Azure File Service Azure – Certification 70-532-Part 8 – Remote debugging on an Azure VM Azure – […]