Azure – Create and Deploy Azure Resource Manager Template using Azure Portal

Hello Friends,
If you missed our following articles on Exam : Developing Microsoft Azure Solutions, Please have a look once here :
Azure – Remote debugging on an Azure VM
Azure – Azure Automation State Configuration
Azure – Configure Azure PowerShell Desired State Configuration (DSC) Through Azure Portal
Azure – Configure Azure PowerShell Desired State Configuration (DSC) Using PoserShell
Azure – Azure Resource Manager (ARM)
In our last blog, we have discussed about Azure Resource Manager (ARM). As We know that, Azure Resource Manager allow us to generate and use a template to deploy, update, or delete all the resources for a solution in a single operation and the template is know as ARM Template. Today we will see, how to create and deploy a ARM template using Azure Portal. Let’s proceed step by step and see how it works.
- Connect to your Azure portal dashboard using your subscription account. If you don’t have an Azure subscription, create a free account before you begin. Then you can connect to the azure portal dashboard as in following figure.
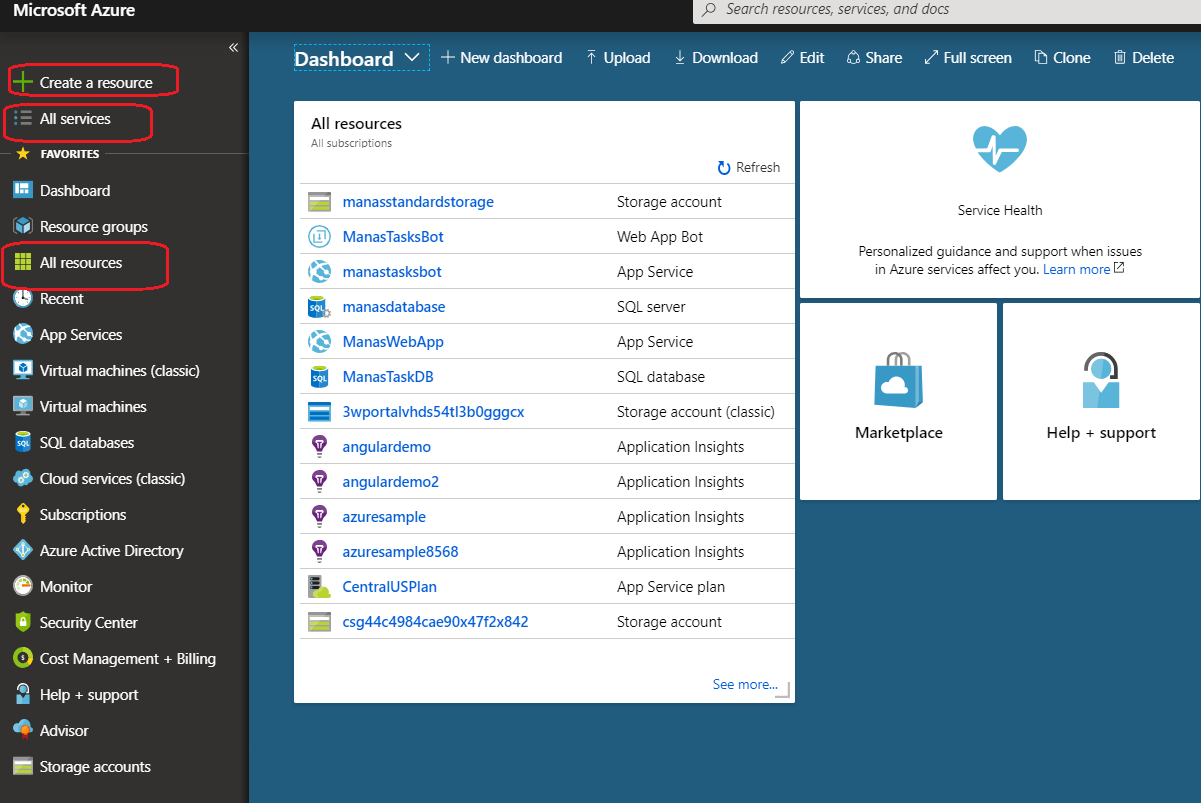
Figure 1: Azure Certification 70-532 – portal dashboard - For a better understanding, we have created two different resource groups. “ManasARMTemplatesGroup” will be used as source resource group and the other one “ManasARMDestnation” will be used as destination resource group, where we will deploy our template, as shown in the following figure.

Figure 2: Azure Certification 70-532 – Two Resource Group created
Figure 3: Azure Certification 70-532 – Destination Resource Group where template will be deployed - Before generating the ARM template, let’s create couple of resource in the source resource group. So that when we will generate the template, it will have couple of resources in the template. Here we have created one storage account and one Virtual Machine. Virtual Machine creation, in turn it created few more dependent resources, as in following figure.

Figure 4: Azure Certification 70-532 – Multiple resources under source resource group - Verify all resources, we required in the our template before download the template. To download the resource group template, go to the source resource group (ManasARMTemplatesGroup ) and from resource group page, Click on “Automation script” under “Setting” and click on Download button to download the template, as in following figure.

Figure 5: Azure Certification 70-532 – Download template from Resource Group page - After downloading the template as a package, Open template.json file and edit as per the requirement like change the VM name and Storage Account name and save the file. Azure requires that each Azure service has a unique name. The deployment fails if we enter a storage account name that already exists. To avoid this issue, we can also use a template function call uniquestring() to generate a unique storage account name. Here I have set the name with hard coded value, as shown in following figure.

Figure 6: Azure Certification 70-532 – Storage Account Name should not be duplicate - Once we are ready with our template file, the next step is to deploy the template to create all resources defined in the template. To start with deployment follow the below steps.
- In the Azure portal, select Create a resource.
- In Search the Marketplace, type template deployment, and then press ENTER.
- Select Template deployment as in following figure

Figure 7: Azure Certification 70-532 – Select Template Deployment service - Select Create and then Select Build your own template in the editor.
- Select Load file, and then follow the instructions to load template.json we downloaded in the last section.
- After successfully load the template file and click Save button, in turn it open one form with all parameters we have specified in our template and asking to purchase the order. To start deploy, we must Click Purchase button, as shown in the following figure.

Figure 8: Azure Certification 70-532 – Load the template file to be deployed
- If everything went well and deployment will be success otherwise it will fail with error. In our case we have faced following three errors. So I have written following articles for the fixes of the following issues.
- After fixing the above issues, we ware able to successfully deploy as shown in the following figure

Figure 9: Azure Certification 70-532 – successfully deployedTo verify, whether we got success with our deployment, lets move to destination resource group and see if all resources created or not as shown in the following figure.

Figure 10: Azure Certification 70-532 – Resources under Destination resource Group Post deployement
Thanks for reading 🙂
Keep reading, share your thoughts, experiences. Feel free to contact us to discuss more. If you have any suggestion / feedback / doubt, you are most welcome.
Stay tuned on Knowledge-Junction, will come up with more such articles.


5 Responses
[…] , I was writing an article on How to Create and Deploy Azure Resource Manager Template using Azure Portal. After modified the ARM template we deployed the template to our target resource group. During […]
[…] ware working on an use-case for How to Create and Deploy Azure Resource Manager Template using Azure Portal. During our deployment we got couple of issues and After fixing the first issue […]
[…] Studio and PowerShell are the two most popular tools. In our upcoming post we will explain, How to Create and Deploy Azure Resource Manager Template using Azure Portal, Visual Studio and PowerShell […]
[…] ware deploying an Azure Resource Manager Template using Azure Portal. During the deployment, we came across the issue as ” The schedule should be created in […]
[…] – Certification 70-532-Part 12 – Azure Resource Manager (ARM) Azure – Certification 70-532-Part 13 – Create and Deploy Azure Resource Manager Template using A… Azure – Certification 70-532-Part 14 – Create and Deploy Azure Resource Manager Template […]