Office 365 – SharePoint Online – Send E-mail notification on Document item update using workflow

Introduction:
Hi Techies,
SharePoint workflows are pre-programmed mini-applications that streamline and automate a wide variety of business processes — from collecting signatures, feedback, or approvals for a plan or document, to tracking the current status of a routine procedure.
In this blog we will go through the steps to create a workflow which will send an email notification on item update of a document library. These steps can be applied to create workflow for list as well.
Pre-requisite:
- SharePoint site
- SharePoint Designer 2013
Let’s get to the steps,
Step-1: Create document library
Create a document library and add some custom columns.

Step-2: Open library on SharePoint Designer 2013
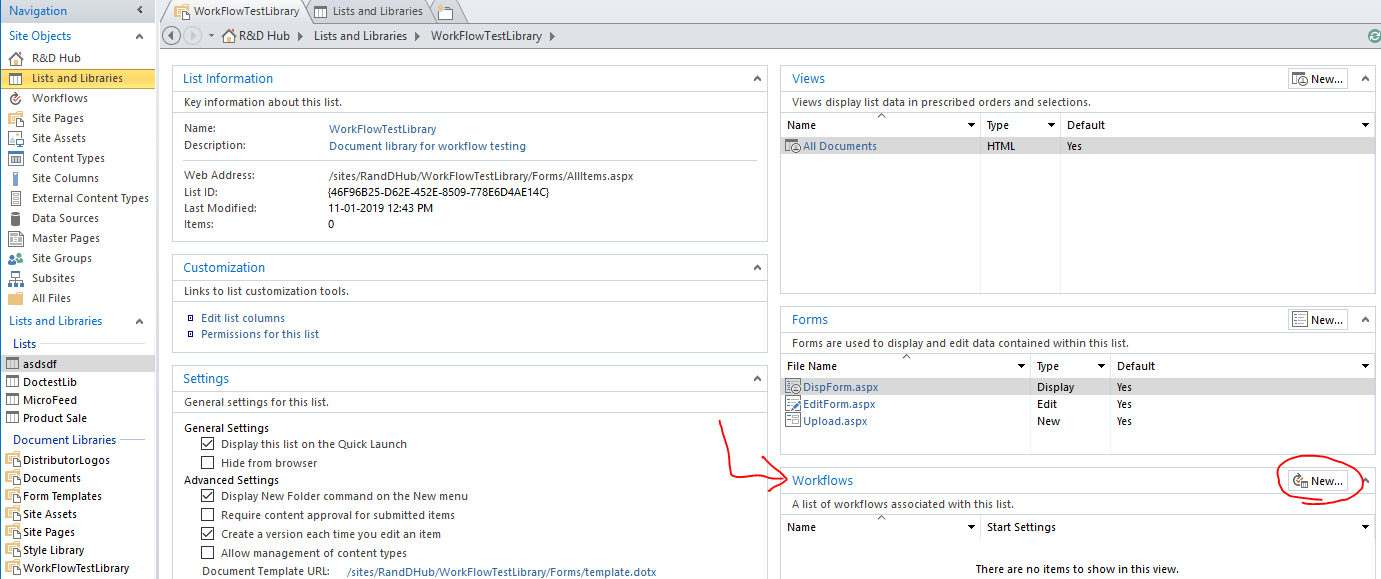
Open the SharePoint site in SharePoint Designer 2013. Under navigation click on lists and Libraries. This will open a tab and shows all the lists and libraries. The newly created library can be found under document library (Figure 2).

Now, open the document library that we have created in first step. Once opened it will show the list information (Details of the library).
Step-3: Create workflow for the document library
The workflow should be associated to the respective library in-order to perform any action. To associate, we can create the workflow under library details (List information) or we can select library while creating workflow. Here, I have created the workflow form “List information” of the library. Search for the workflows tab under list information and on the workflow tab click on new (Figure 3)
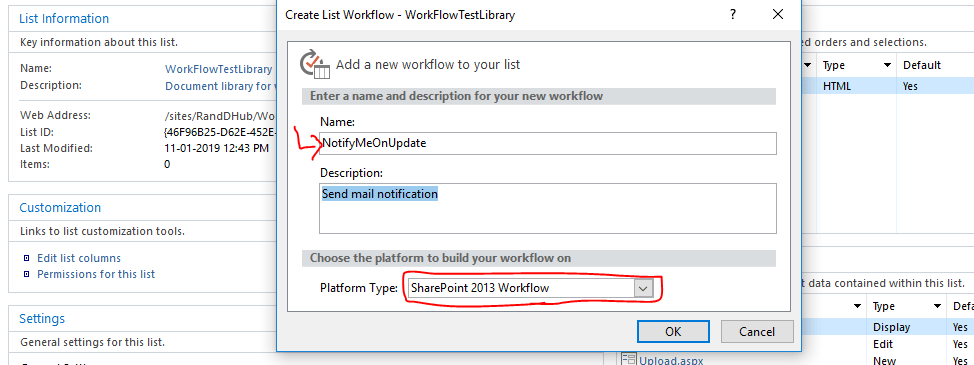
This will open a popup asking for workflow name, description and platform type. In my case the name of the workflow is “NotifyMeOnUpdate” and platform type is “SharePoint 2013 workflow” (Figure 4).
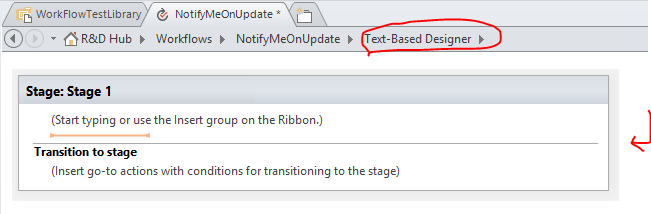
After creating workflow, SharePoint Designer 2013 will show the workflow in “text-based designer”.
Step-4: Add actions to stages
Here we need to add actions and stages as per our requirement. To add action, navigate to ribbon menu.
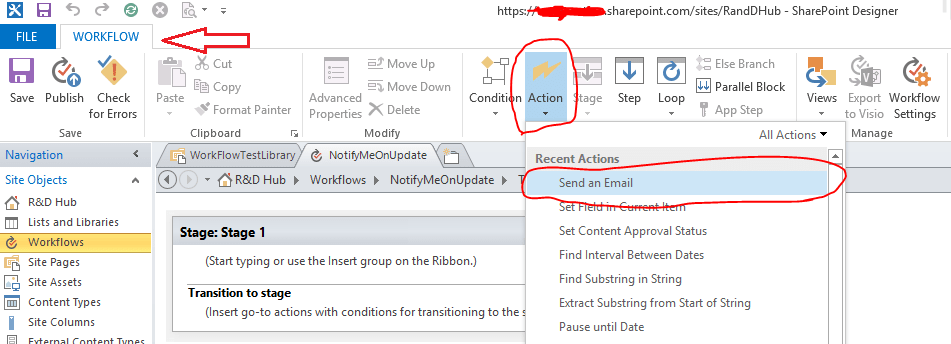
Under workflow tab click on “Action” and find “Send an Email”. This will add mail action to the stage.

Email action is added to the stage, but we still need to add the recipient, subject and mail body. To add these details, click on the mail action and it will open a popup where we can provide these details.
Recipient:
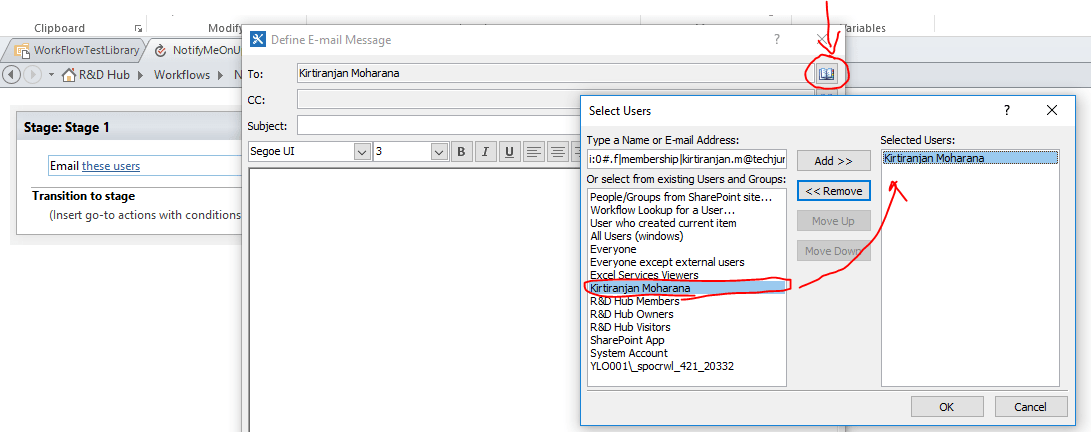
Click on the book icon on “To” field. It will open select user. Select the appropriate user or group and click OK (Figure 8).
Subject:
Click on the ellipse on subject field, it will prompt us to provide subject for the mail (Figure 9).

E-mail message body
So far we have provided the recipient, subject and now we need to provide message body. On the message body we are going to show name of the document. This way the message will be more meaningful and recipient will know which document is updated.

As you can see, I’ve added some text body. To add the document name, click on “Add or Change Lookup”. This will open popup asking for details.

Here, select Current Item as data source. This will show all the columns of the list / library. In my case, I’ve selected “Name” field and clicked OK. This will show name of current updated document in the message.

Step-5: Transition to stage
We have added email notification, recipient, subject and message body. Now, we need to stop the workflow after sending the email. This is where transition stage comes.
To add transition stage, right click on the (Insert go-to action…) and add “Go-To a stage”.

After adding “Go to a stage”, select “End of workflow” from the drop-down.

Step-6: Workflow settings
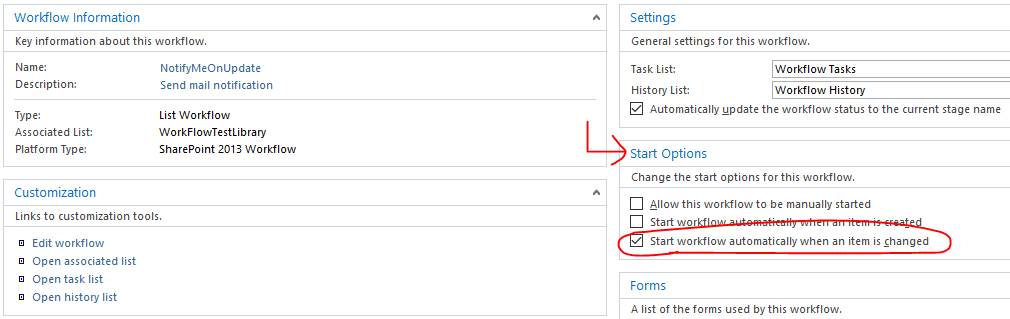
Our primary objective is to sent email notification on item update. To achieve this we need to execute the workflow on item update.
Open the workflow setting (on ribbon menu). Under start option check the item change option (Figure 16).

Now, save the workflow and publish.
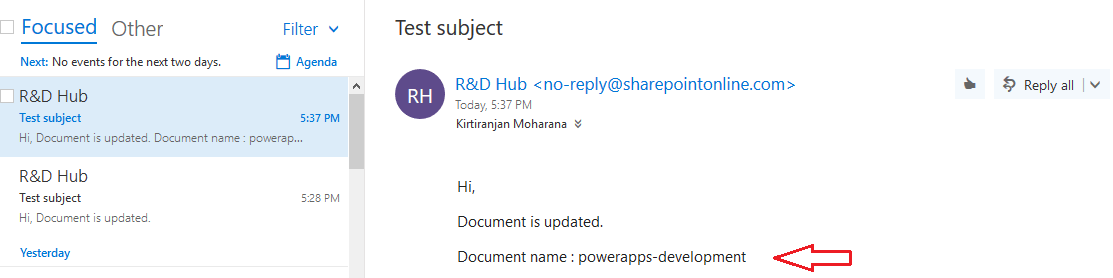
Result
Upload a document and edit it’s properties

E-mail notification:
Thanks for reading 🙂
Keep reading, share your thoughts, experiences. Feel free to contact us to discuss more. If you have any suggestion / feedback / doubt, you are most welcome.
Stay tuned on Knowledge-Junction, will come up with more such articles.


You must be logged in to post a comment.