Microsoft Azure Storage and Database Part 34 – Azure Disk Storage – Create And Attach Azure Data Disk To Azure VM Using PowerShell

Hello,
In our previous article we have discussed on how to create and attach azure data disk to azure Virtual Machine in Azure portal. Today in this article we will continue on the same topic and will discuss how to create and attach azure data disk to azure Virtual Machine using PoserShell.
Tool Installation Articles :
- Configure Azure Command Line Interface ( Azure CLI) On Windows
- Configure PowerShell For Microsoft Azure Az Module On Windows
Previous Azure Series :
- Learn Basics Of Azure Networking In 60 Hours
- Learn Basic Of Azure Active Directory And Azure Identity And Access Management
- Azure DevOps – Learn at one place
If you have missed our previous articles on Azure Storage and Database Series, please check it in following links.
Part 1 – Overview Of Azure Storage and Database
Part 2 – Azure Storage Account
Part 4 – Work With Azure Blob Storage
- .
- .
- .
Part 5 – Storage Explorer For Azure Storage
Part 30 – Azure Table Storage – Overview
Part 31 – Azure Table Storage – Work with Azure Table Storage
Part 32 – Azure Disk Storage – Overview
Part 33 – Azure Disk Storage – Create And Attach Azure Data Disk To Azure VM
Current Environment :
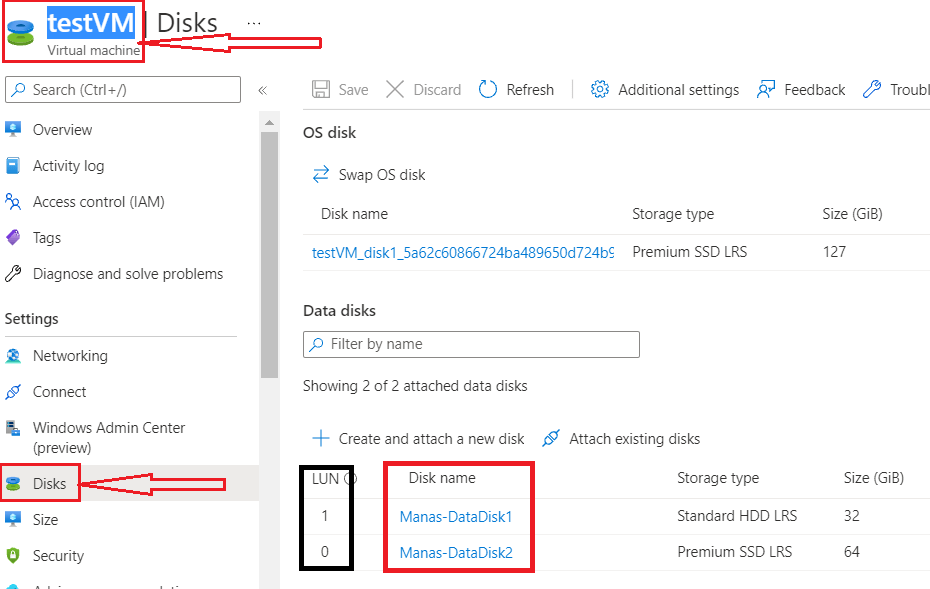
In our last article, we have attached two new disk to our Virtual Machine using Azure portal as showing in the following figure.
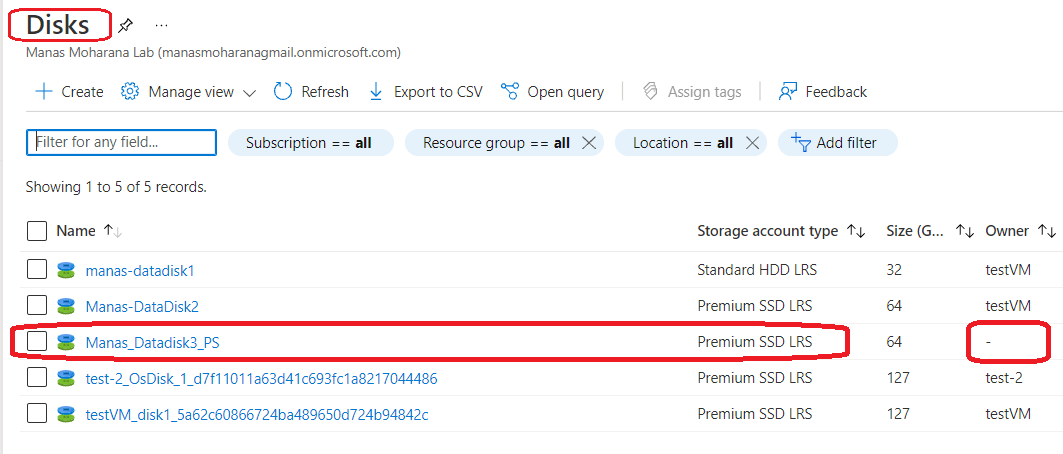
Following figure showing the list of Azure Disks under my current subscription out of those two data disk attached to the above VM.

In this article we will see, how to create and attach a new disk to our above Virtual machine.
Here will use my window PowerShell command line to implement the requirement. I have configured and installed all the Az module. So my PowerShell is ready to go. Let’s go through the flowing steps.
Step 1 – Open window powershell and store our following required information to variables as showing in the following figure.
$rgName = 'StorageAndDatabase'
$vmName = 'testVM'
$location = 'West US'
$storageType = 'Premium_LRS'
$dataDiskName ='Manas_Datadisk3_PS'

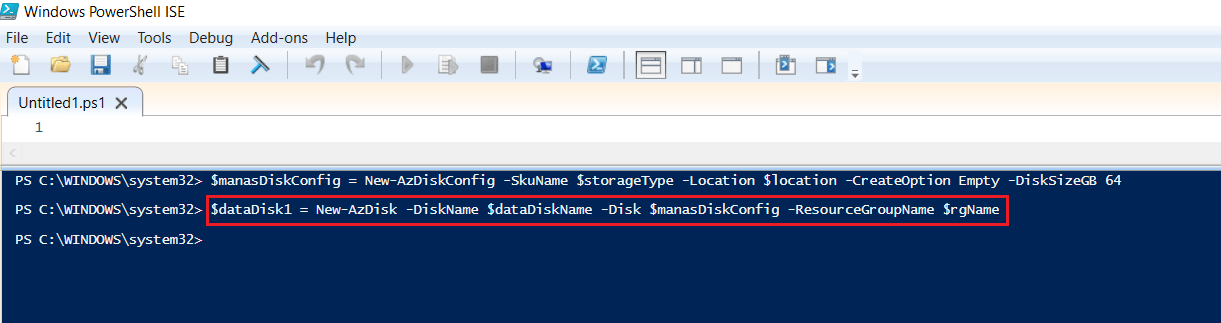
Step 2 – In our next set we will create a new Azure Disk by providing the above information to the following coad snippet.
$manasDiskConfig = New-AzDiskConfig -SkuName $storageType -Location $location -CreateOption Empty -DiskSizeGB 64
$dataDisk1 = New-AzDisk -DiskName $dataDiskName -Disk $manasDiskConfig -ResourceGroupName $rgName
After executing the above command, it has created a new Disk as showing in the following figures.
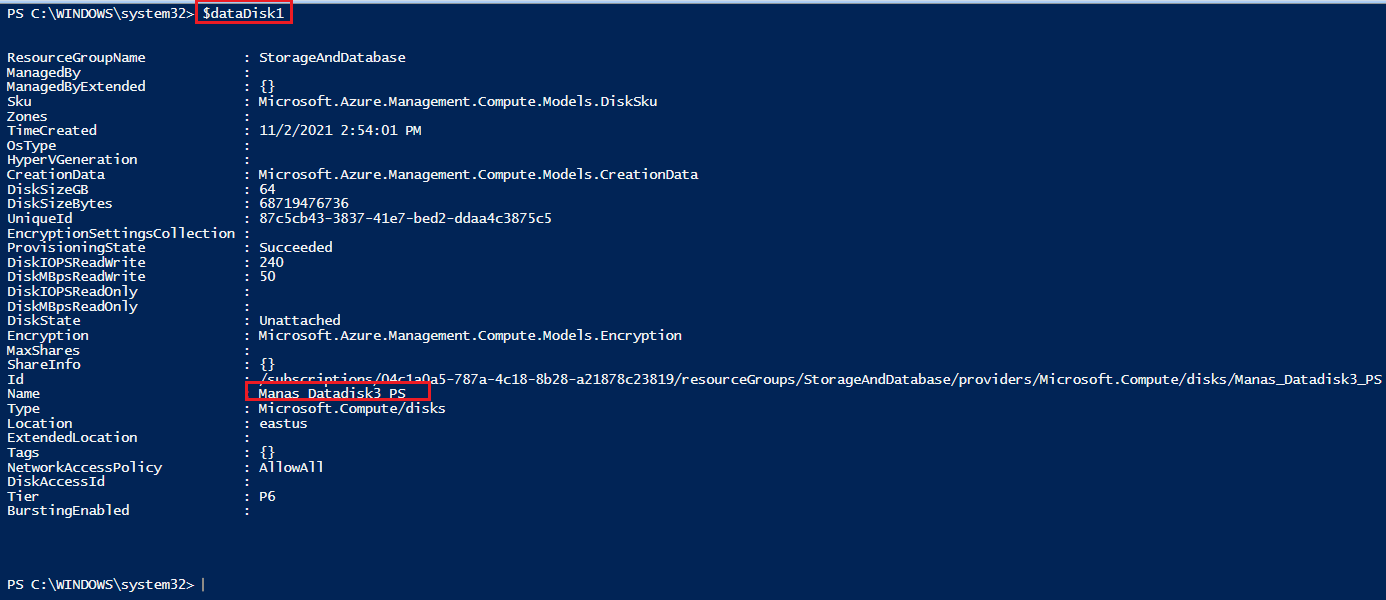
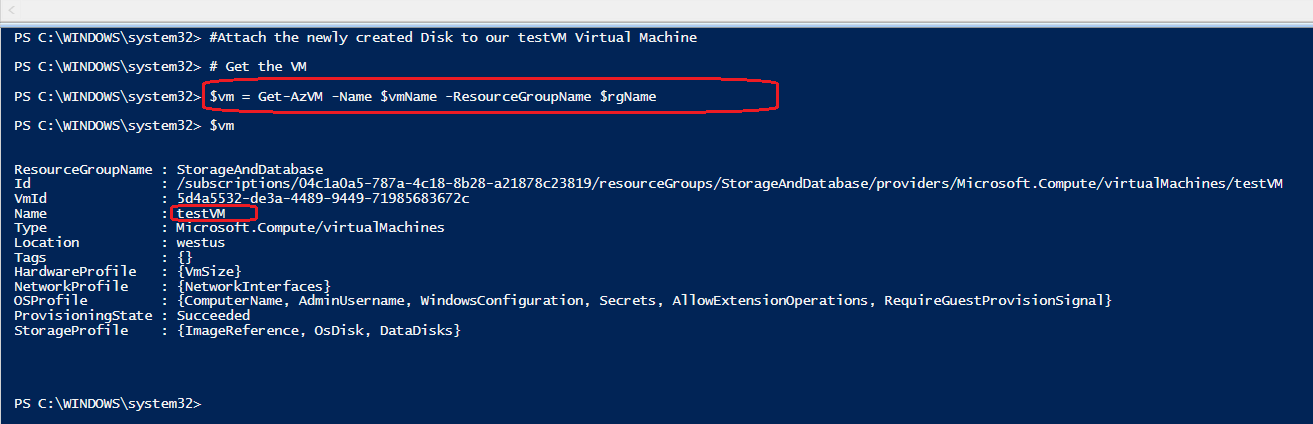
Step 3 – We are now ready with our newly created Disk, as showing in the above figure. In this step, we will get the Virtual machine, where we want to attach this newly creaked disk s showing in the following figure
$vm = Get-AzVM -Name $vmName -ResourceGroupName $rgName
Step 4 – In this step and here we will attach our new disk to our VM (testVM). In our last article, we had added two data disk to this VM which took the position LUN 0 and LUN 1. So we are going to add the new one to LUN 2 position as showing in the following command line.
$vm = Add-AzVMDataDisk -VM $vm -Name $dataDiskName -CreateOption Attach -ManagedDiskId $dataDisk1.Id -Lun 2
Step 5 – This is the last step to save the changes we have just done with the VM using following command line.
Update-AzVM -VM $vm -ResourceGroupName $rgName
After executing the above command the change are deployed to the Azure as we can see in the following figures.
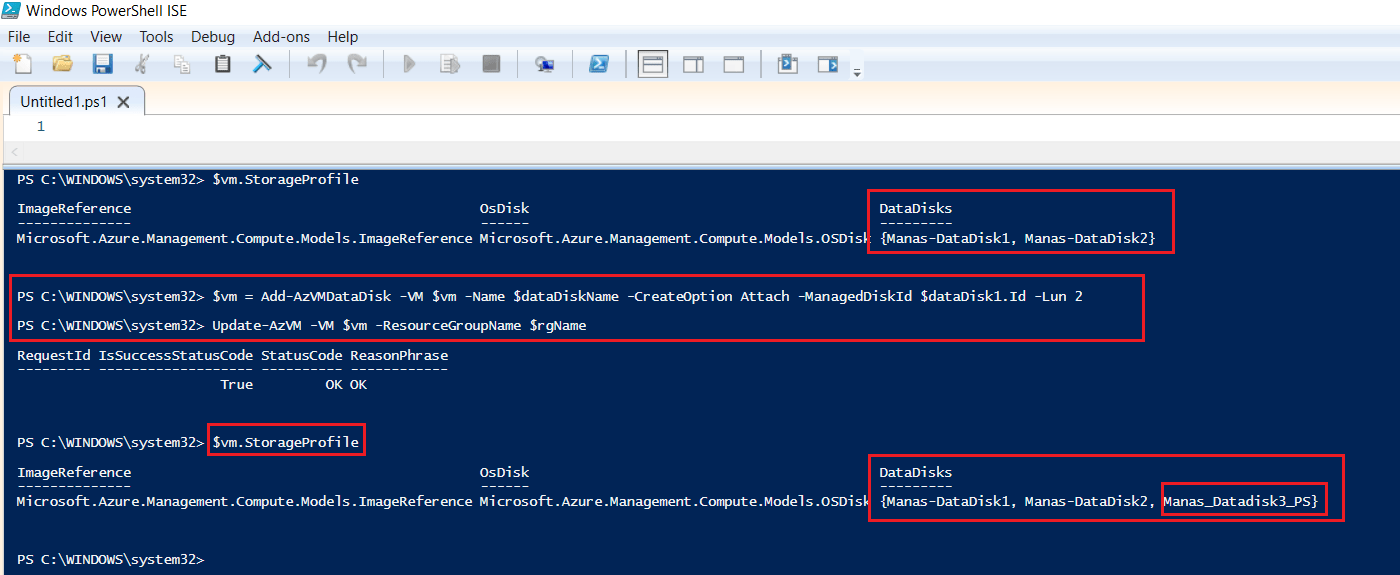
Now in the following figure we can see the newly created Disk is attached with our VM.

With the above information, I am concluding this article. I hope this is informative to you. Please let me know if I missed anything important or if my understanding is not up to the mark. Keep reading, share your thoughts, experiences. Feel free to contact us to discuss more.
If you have any suggestion / feedback / doubt, you are most welcome. Stay tuned on Knowledge-Junction, will come up with more such articles.
Thanks for reading 🙂 .


1 Response
[…] Chapter 34 – Azure Disk Storage – Create And Attach Azure Data Disk To Azure VM Using PowerShell […]