Azure Migration And Backup 3 – Run a Disaster Recovery Test Fail-over for Azure VM

Hello Friends,
Let’s continue with my last article Set Up Azure Site Recovery (ASR) using Azure portal. In that article, we will discuss, how to configured our ASR Manas-MSTECHs-Vault and also we will also create one Replicated Item for one Azure virtual Machine as shown in the following figure.

Figure 1 : Azure ASR – ASR replicated item created for migration
If you have missed our previous articles on Azure Migration And Backup, please check it in following links.
Azure Migration And Backup 1 – Azure Site Recovery (ASR)
Azure Migration And Backup 2- Configure Azure Site Recovery (ASR) using Azure portal
Next Article : Azure Migration And Backup 4 – Run a Disaster Recovery Failover for Azure VM
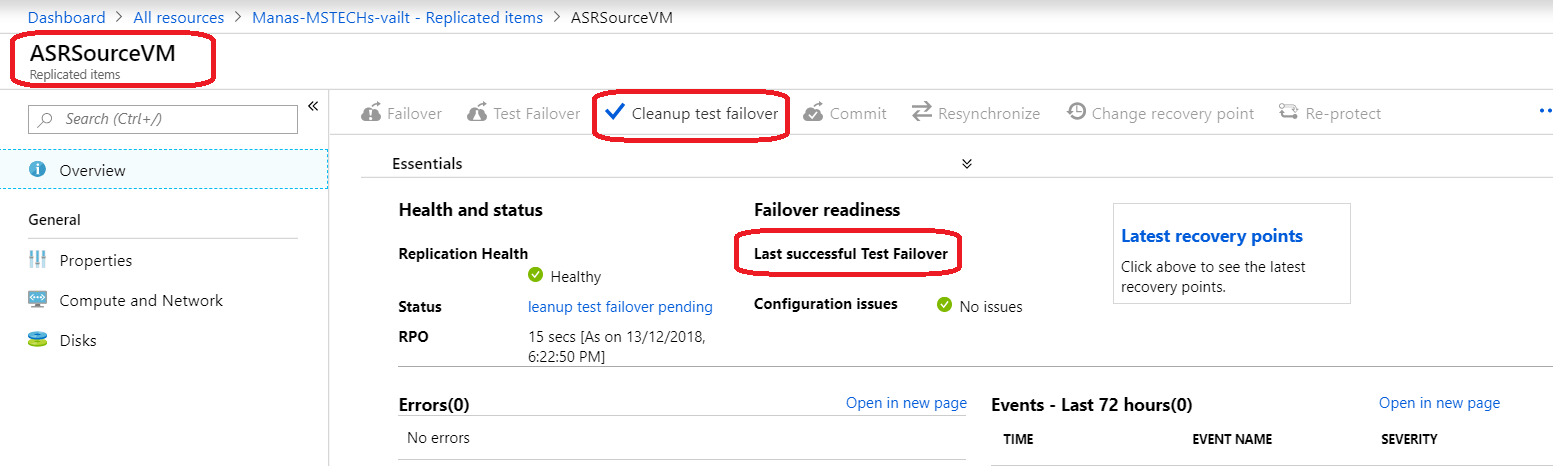
We can see in the above figure that, we have added one replicated item for one Azure VM ( ASRSourceVM) as a source located in “South India” region. We are going to migrate the VM to a different location “Central India“. I am not quite sure about the reason, but when we do a fail-over , it replicate the environment in the same region, where we configured our ASR. Let’s open our replicated item in azure portal to proceed. Check this article to find the location of replicated item in Azure portal. In the following image we can see the overview of our replicated item.

Figure 2 : Azure ASR – Overview of replicated Item in ASR
On replicated item page, in left menu, under General section, we can see Properties, Compute and Network and Disk links. we can reconfigure them if required. Following figures are showing the sections, which we can customize.

Figure 3 : Azure ASR – Configuring replicated item

In this article we will discuss, how to run a disaster recovery Test Failover for an Azure VM, from one Azure region to another. A test fail-over will validates our replication strategy without data loss or downtime, and doesn’t affect any production environment. The best practice is to
use a separate Azure VM network for the test fail-over, and not the default network that was set up when we enabled replication. So lets go through this article.
Les’t go back to Replicated Items page, click the VM +Test Failover icon as shown in the following figure.

In Test Failover window, as shown in the above figure, the Fail-over direction already set to their value. Now select a recovery point to use for the fail-over. There are three following options available.
- Latest processed: Fails the VM over to the latest recovery point that was processed by the Site Recovery service. The time stamp is shown. With this option, no time is spent processing data, so it provides a low RTO (Recovery Time Objective)
- Latest app-consistent: This option fails over all VMs to the latest app-consistent recovery point. The time stamp is shown.
- Custom: Select any recovery point.
Select the target Azure virtual network .Which will be used for the Azure VMs in the secondary region, after the fail-over completed. To start the fail-over, click OK. We can track progress by clicking the Test Failover job in the vault name > Settings > Jobs > Site Recovery jobs , as shown in the following figure.

After the fail-over finishes, There will be a message “Last successfully Test Failover” on the overview page of Replicated Item, as shown in the following figure in red rectangle.
Once it finished, the replica Azure VM appears in the Azure portal > Virtual Machines. Make sure that the VM is running, sized appropriately, and connected to the appropriate network as in following figure.

As we discussed, this drill is just to verify that everything will go smoothly in actual fail-over. If test job fail then, record and save any observations associated with the test fail-over and fixed it before do the actual Fail-over. If test fail-over success then verify everything and cleanup test fail-over. To delete the VMs that were created during the test fail-over, click Cleanup test failover on the replicated item or the recovery plan. On Test failover cleanup window, put some message and check the check box and click OK to start the cleanup process and delete all the resources created by test failover job.

I hope , this article help you to understand the test failover process . In our next article I have described how to run actual Fail-over.
Thanks for reading 😊
Keep reading, share your thoughts, experiences. Feel free to contact us to discuss more.
If you have any suggestion / feedback / doubt, you are most welcome. Stay tuned on Knowledge-Junction, will come up with more such articles


3 Responses
[…] We have described in detail of those button in our next articles. Our next article is about Test Failover of our azure VM.Figure 12: Azure ASR – Replicated Item […]
[…] my last article, I have discussed, about the procedure of doing a Test Failover or we can also say it as the drill of a azure failover before actual Failover. So In this article, […]
WOW
Wow Content