Azure – Networking – Part 24 – Azure Load Balancer – Configure Basic Load Balancer – 2

Hello Friends,
Hope you all are doing good. In our last article we have discussed about, how to configure Azure Basic Load Balance. Today in this article, we will continue with the configuration of Azure Basic Load Balancer. So let’s start :).
Tool Installation Articles :
- Configure Azure Command Line Interface ( Azure CLI) On Windows
- Configure PowerShell For Microsoft Azure Az Module On Windows
Previous Azure Series :
- Learn Basics Of Azure Networking In 100 Hours
- Learn Basics Of Microsoft Azure Storage services
- Learn Basic Of Azure Active Directory And Azure Identity And Access Management
- Azure DevOps – Learn at one place
- Learn Basics Of Lift-And-Shift Migration To Azure
If you have missed our previous articles on Azure Networking, please check it in following links.
Part 1 – Basics of Azure Networking
- *
- *
- *
Part 19 – Azure Traffic Manager 2 -Create Traffic Manager Profile using (Cloud Shell)
Part 21 – Azure Route Table 2 – Configure User Define Route (UDR)
Part 22 – Azure Load Balancer – Overview
Part 23 – Azure Load Balancer -Configure Basic Load Balancer – 1
Next Article : Part 25 – Azure Load Balancer – Configure Basic Load Balancer -3
Configure Azure Load Balancer :
In this section, I am going to show how to configure a Azure basic load balancer to distribute web traffic. This lab exercise includes the following tasks:
- Setup two new windows VM
- Install IIS and configure Default.html page for Testing
- Dissociate public IP and set private IP as static of each Virtual Machine
- Create Public IP for Load Balancer
- Create Azure load balancer
- Create a backend pool
- Create health probes
- Create a load balancer rule
- Add virtual machines to the backend pool
- Testing
In our last article we have configured our webservers as well as configured IIS and Default.html page on each server. So In this way we have completed following points.
- Setup two new windows VM
- Install IIS and configure Default.html page for Testing
In this article we will cover the following points.
- Dissociate public IP for VMS and set private IP as static
- Create Public IP for Load Balancer
- Create Azure load balancer
In our next article we will cover rest of the points. So let’s start with the next point.
3. Dissociate Public IP and set private IP as static of each Virtual Machine
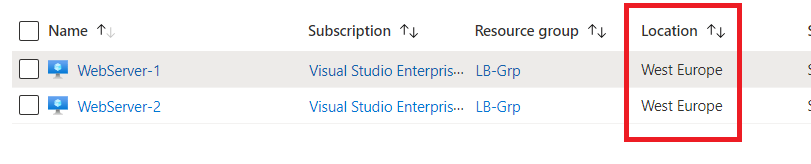
Now we are going to dissociate Public IP of all VM’s. Because we don’t need this public IP address any more. We associated the IP to connect through RDP and install and configure IIS and Default.html page (though we can do this using script as well). Now our users are going to be reaching to the application of the Azure VMS via the load balancer. and User are going to be use the Public IP of the load balancer, that’s why we don’t need the public IP addressed of VM any more. The load balancer will now start directing the traffic to the VM via the private IP address of the virtual machine. The Load balancer will take care of that. So let’s go to the azure resources and open-up both VMs as showing in the following figure to dissociate its public IP.
There are two approaches to dissociate the public IP. In first approach,
Go to the VM => Click Networking => Click on the NIC public IP as showing in the following figure.

Once we are on the Public IP address window, hit Dissociate to dissociate the public IP from the VM as showing in the following figure.

In the second approach, go to the VM => Click Networking => Click on the Network Interface as showing in the following figure.
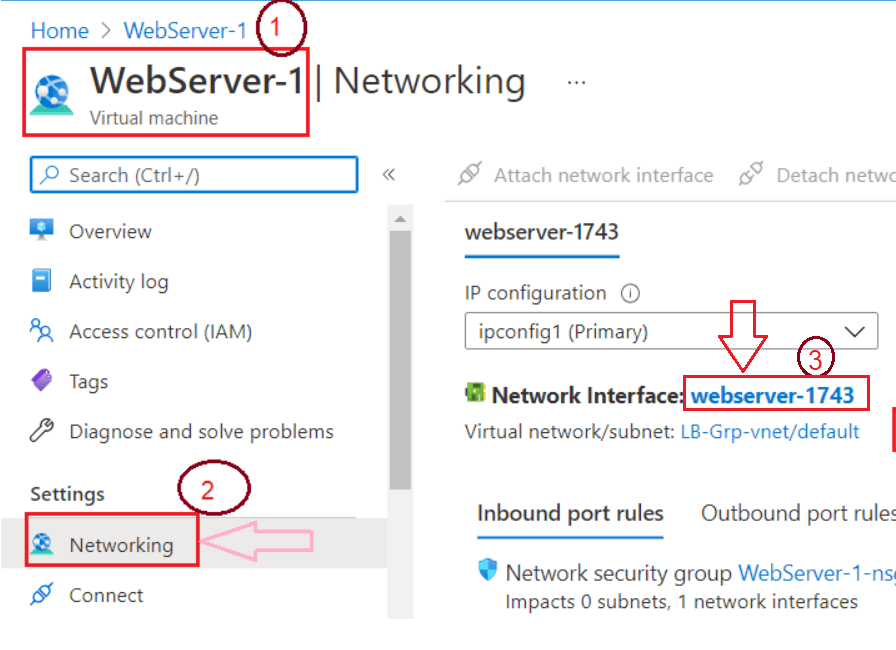
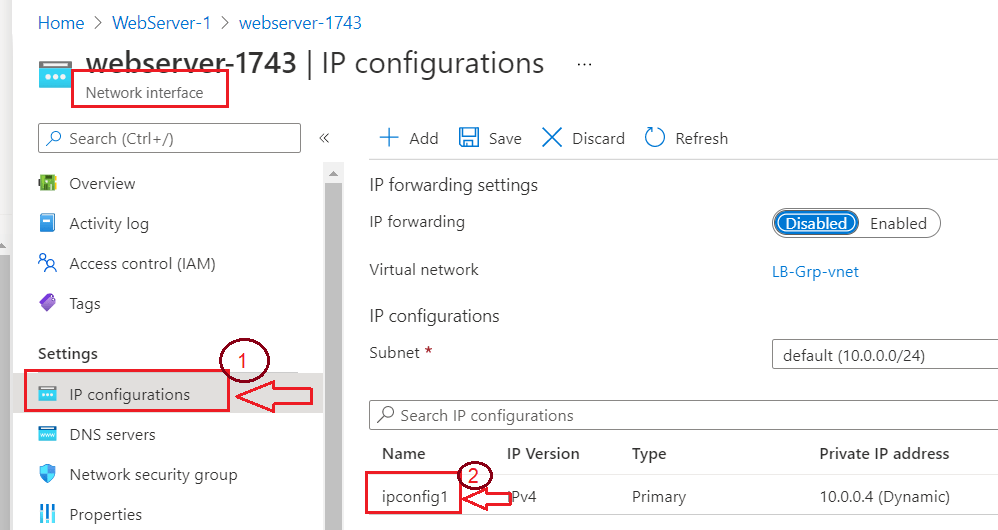
On Network Interface window, click on IP configuration => click iponfig1
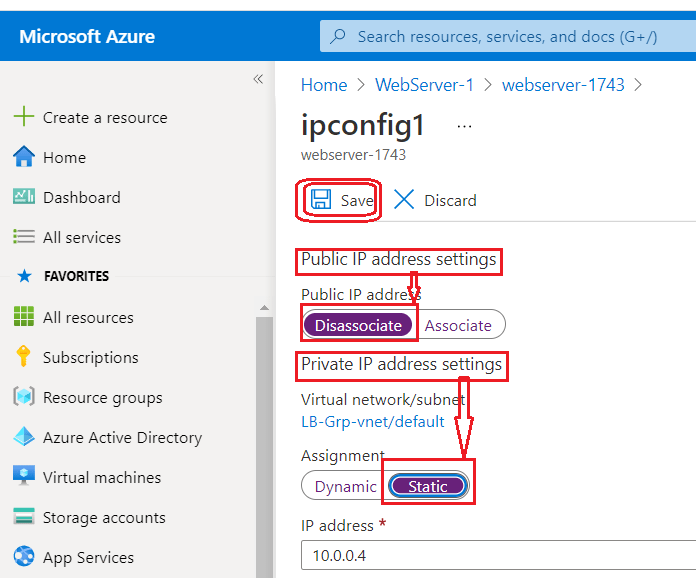
As showing in the following figure, click on Disassociate to disassociate the Public I address and click on Static to make Private IP address static and then hit Save button to save the changes.
4. Create Public IP for Load Balancer
In the above section, we have dissociated the public IP address from each VM. Then here the question is how should an internet user, will communicate with the application on server without a public IP address ? So the answer is, we will create a new static public IP address and then associate it with the load balancer, so that user will communicate with load balancer and in-turn load balancer will direct the traffic with the server via it’s private IP address. So let’s proceed to create a public IP address.
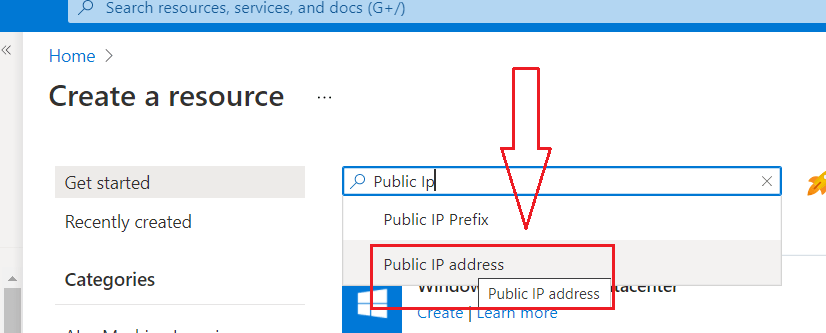
Go to create a resource => search for public IP address =>On Public IP address page click on Create button to start configuring the public IP as showing in the following figures.

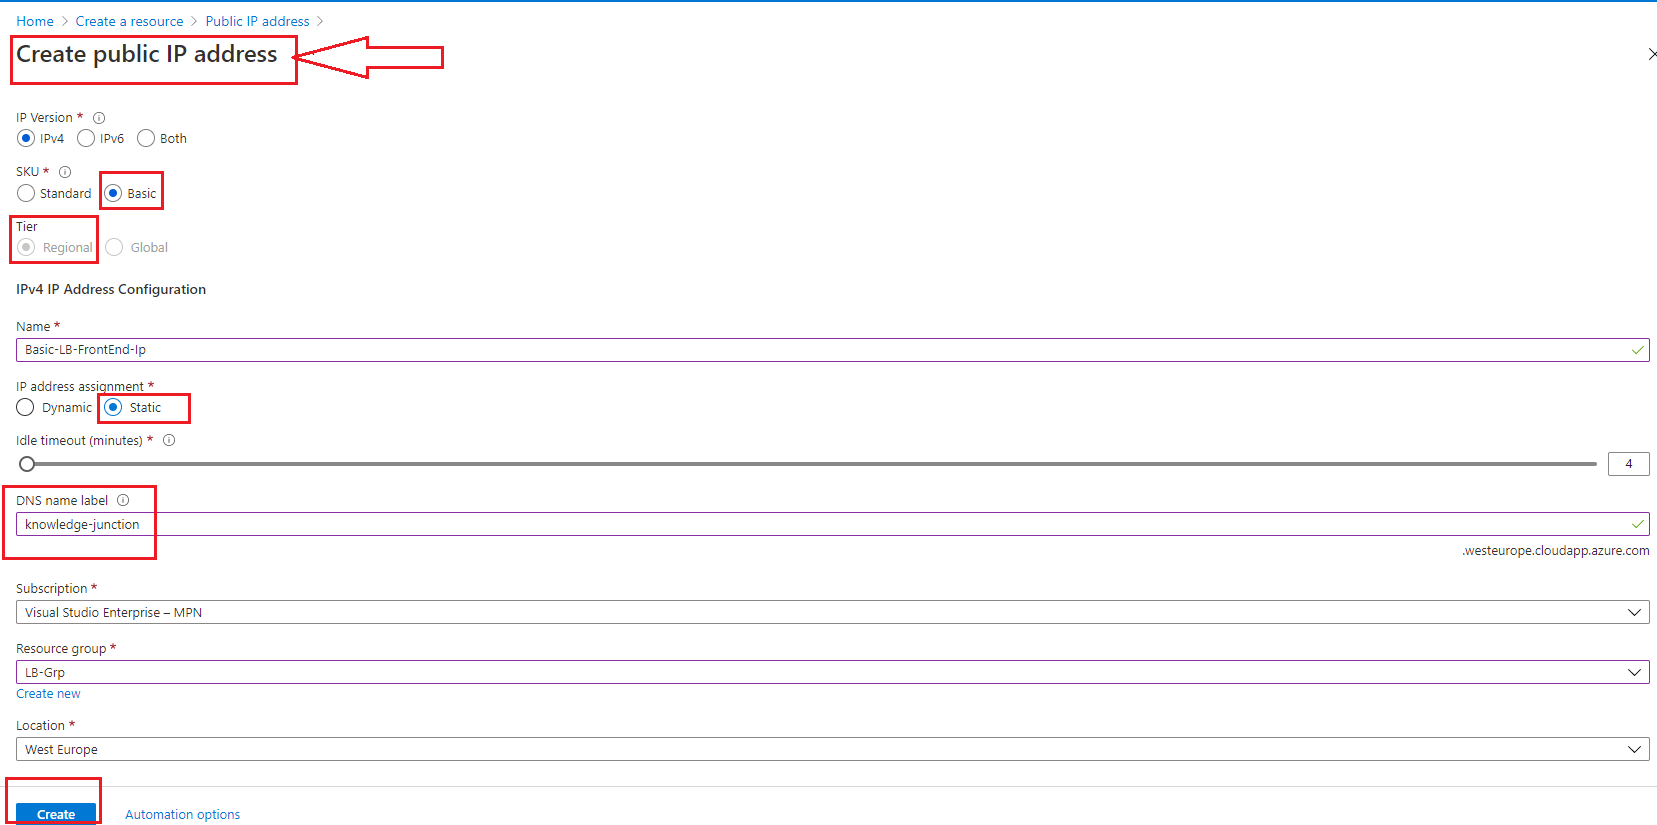
AS we can see in the following figure, we need configure the public IP as per our requirement. In our case we are creating the public IP for our basic load balancer. In this case we can choose basic SKU. When we choose basic Public IP , the IP will be available for Regional Tier. In case of Standard load balancer , we must create a public IP with Standard SKU and in that case, the public IP would be available for both Regional and Global Tier.
We should create a static public IP as showing in the following figure, so that user’s request can come to that particular IP address also it help to whitewash the IP. Then check with your Location as the location should be same as our load balancer and Resource Group etc.. before hit the Create button. Once you confirm, that your done with all setting then click Create button 🙂 .
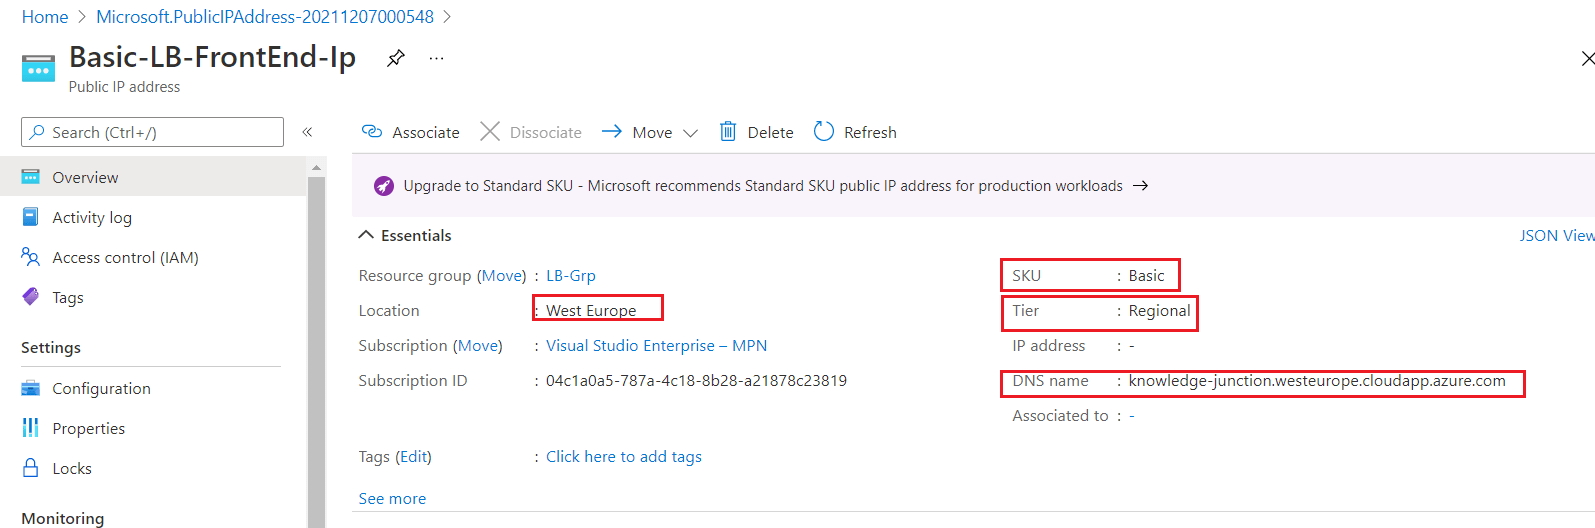
We can see in the following figure, our Public IP address is ready to use. We will use this public IP when we will configure our load balancer in our next section.
5. Create Azure load balancer
In our above section, we have configured the public IP for our load balancer and before that, in our previous article we have configured multiple VMs under one availability set. In this section we will see how to create a public basic load balancer. Let’s proceed for this.
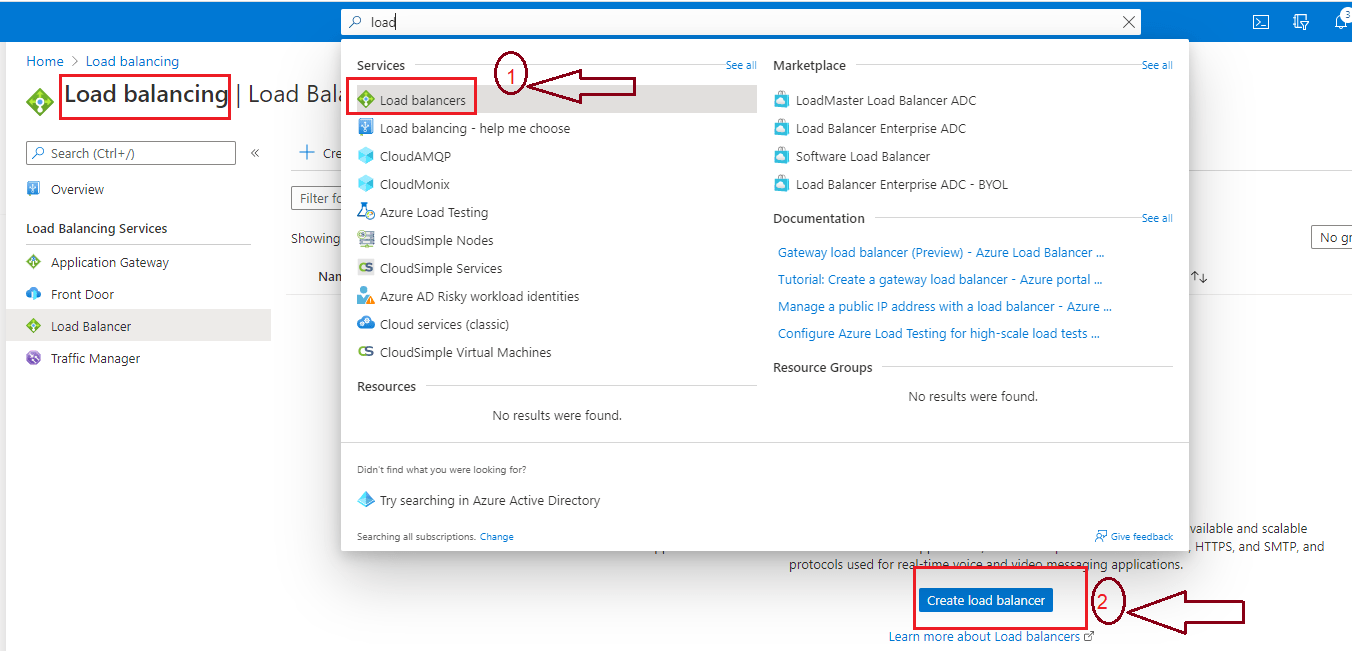
Go to create a resource => search for Microsoft Azure Load Balancer =>On Load balancing page click on Create load balancer button to start configuring the load balancer as showing in the following figures.
On Create load balancer page, we need to configure as per our requirement. In Basic tab, we need to configure , Resource Group, Name , Region, SKU, Type, Tier etc… In this lab , we are going to configure Basic load balancer and the Type would be Public as internet user will send request to load balancer as showing in the following figure.
Once we configured the above settings, click Next: Frontend IP configuration button as showing in the following figure.

On Frontend IP configuration page, let’s click + Add a frontend IP configuration link to add an IP address. It will open a new pop up window. In this window, it will allows to use existing Public IP or create a new public IP. As we have already created a public IP address in our previous section, we can associate here as the frontend IP. Here I am selecting my newly created Public IP address.

Once we selected the public IP address, click Add button to associate it with the load balancer as showing in the following figure.

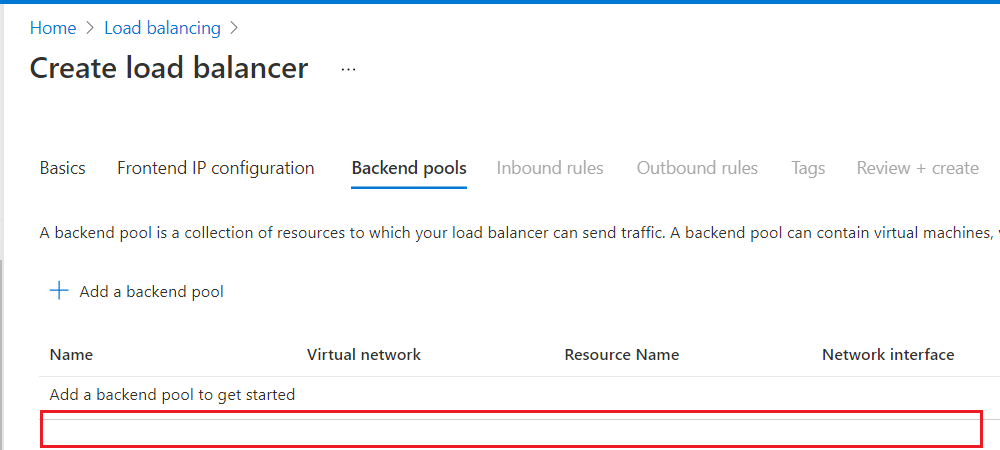
Once our Frontend IP configured, click on Backend Pools tab. But , let’s leave it for the time being , we will configure rest of the setting later after creating the load balancer.

Once we make sure that all configurations are as per our requirement, click Create button to deploy the load balancer resource.


We can now see in the above figure, our basic public load balancer is now deployed and ready to use. In our next article we will cover and configure, rest of the settings.
With the above information, I am concluding this article. I hope this is informative to you. Please let me know if I missed anything important or if my understanding is not up to the mark. Keep reading, share your thoughts, experiences. Feel free to contact us to discuss more. In our next article we will continue with the Lab exercise with configuring load balancer.
Next Article : Part 25 – Azure Load Balancer – Configure Basic Load Balancer -3
If you have any suggestion / feedback / doubt, you are most welcome. Stay tuned on Knowledge-Junction, will come up with more such articles.
Thanks for reading 🙂 .


5 Responses
[…] Chapter 24 – Azure Load Balancer – Configure Basic Load Balancer – 2 […]
[…] Part 24 – Azure Load Balancer – Configure Basic Load Balancer – 2 […]
[…] Part 24 – Azure Load Balancer – Configure Basic Load Balancer – 2 […]
[…] Part 24 – Azure Load Balancer – Configure Basic Load Balancer – 2 […]
[…] Part 24 – Azure Load Balancer – Configure Basic Load Balancer – 2 […]