Azure – Networking – Part 30 – Configure Azure Virtual Network NAT Gateway In Azure Portal

Hello Friends,
Hope you all are doing good. In our last article we have discussed about, another Azure Networking Service Network Address Translation Gateway (NAT Gateway). Today in this article we will continue with NAT service and see how to configure NAT Gateway in Azure portal.
Tool Installation Articles :
- Configure Azure Command Line Interface ( Azure CLI) On Windows
- Configure PowerShell For Microsoft Azure Az Module On Windows
Previous Azure Series :
- Learn Basics Of Azure Networking In 100 Hours
- Learn Basics Of Microsoft Azure Storage services
- Learn Basic Of Azure Active Directory And Azure Identity And Access Management
- Azure DevOps – Learn at one place
- Learn Basics Of Lift-And-Shift Migration To Azure
If you have missed our previous articles on Azure Networking, please check it in following links.
Part 1 – Basics of Azure Networking
- *
- *
- *
Part 23 – Azure Load Balancer -Configure Basic Load Balancer – 1
Part 24 – Azure Load Balancer – Configure Basic Load Balancer – 2
Part 25 – Azure Load Balancer – Configure Basic Load Balancer -3
Part 26 – Azure Load Balancer – Outbound Connectivity
Part 27 – Azure Load Balancer – Outbound Rule – Lab Exercise
Part 28 – Azure Virtual Network NAT (Network Address Translation)
Part 29 – Azure Virtual Network NAT Gateway
Next Article : Part 31 – Azure Front Door
Configure Azure NAT Gateway
In our previous two article we have gone through the theory part of NAT service of Azure. As we discuss, in this article we will go through the lab exercise.
Scenario
In this exercise, we will configure two VM and one virtual machine (Manas-Jump-Server) will have a public IP to connect through RDP session and it will act as a jump server of the other virtual machine (Private-server), which does not have a public IP but we can use Azure backbone network and use it’s private IP to connect the VM. The next step is to try to get the public IP of the private server and note the IP address and we will see Azure automatically assign a public IP to the private server.
Now Configure Azure NAT Gateway by assign a new public IP to it and associate the NAT Gateway to the subnet which host our Private-Server virtual machine. Then again check the public IP of the Private-Server. Here we will see that, it shows the public IP of NAT Gateway. It means that all resource under the subnet, which is associated with the NAT Gateway, can use the same Public IP assign to NAT Gateway to communicate with internet. Let’s check this scenario
Lab Exercise
In the above we saw, we need to configure following resources.
- One Virtual Network (NAT-RG-Vnet)
- Two Subnet (JumpServer-Subnet and PrivateServer-Subnet)
- Two Virtual machine (Manas-Jump-Server and Private-Server) in both subnet
In the following figure we can see our both VM are ready.
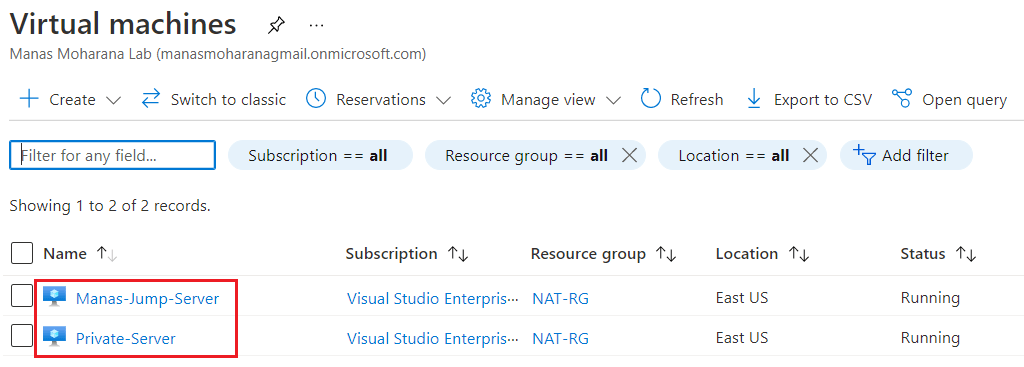
As showing in the following figure, Manas-Jump-Server hosted under JumpServer-Subnet and it has it’s own public IP address and the public IP is under same subnet as the virtual machine.

Below we can see the Private-Server VM, which is hosted by PrivateServer-Subnet and the VM does not have a public IP. We will use it’s private IP address 10.0.1.5 to connect the server from the above jump server.

Now we need to connect the Manas-Jump-Server VM using it’s public IP as showing in the following figure.

Now from the jump server connect PrivateServer VM using its private IP address ( 10.0.1.5). We can connect using private IP because both are under same Vnet and it uses the Azure backbone network as showing in the following figure.

Now let’s check the public IP address of the server. As showing in the following figure the public IP address is 13.92.135.63 without Azure NAT Gateway.

The next step is to configure NAT Gateway as showing in the following igure.

In the Basics tab, we can set Resource group, NAT Gateway Name, Region, Availability Zone etc. as showing in the following figure.

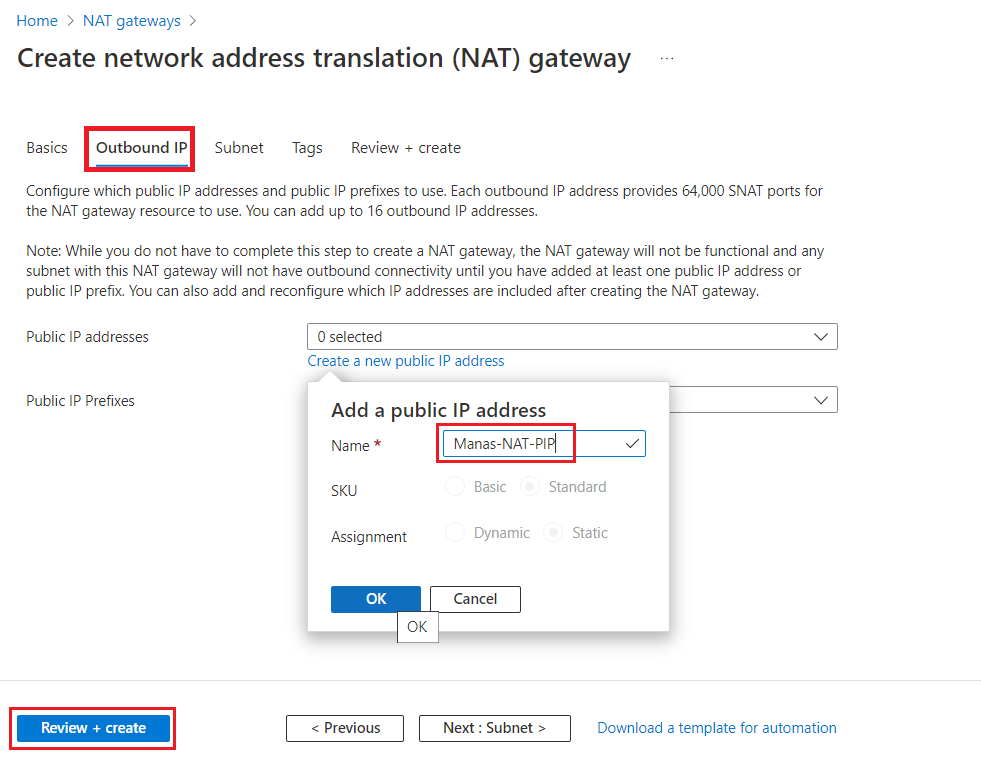
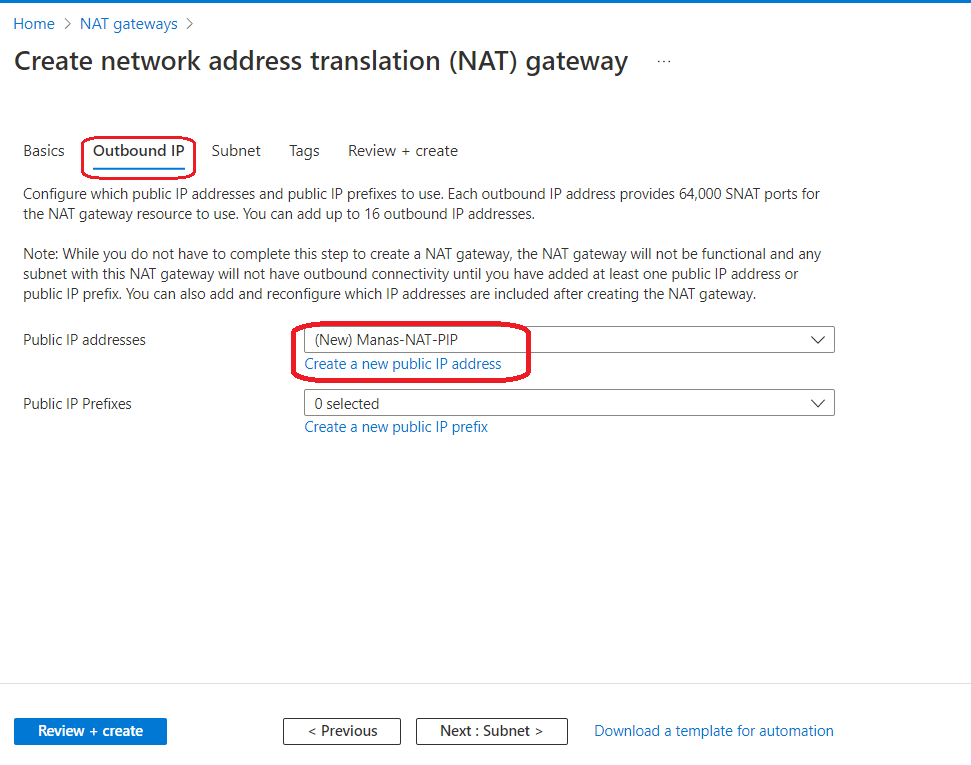
Next is to configure Outbound IP. It is most important part of the configuration. Here we need to assign a public IP or a public IP prefix to the NAT Gateway. We can choose the existing Public IP other wise we can create a new Public IP from here as showing in the following figures.
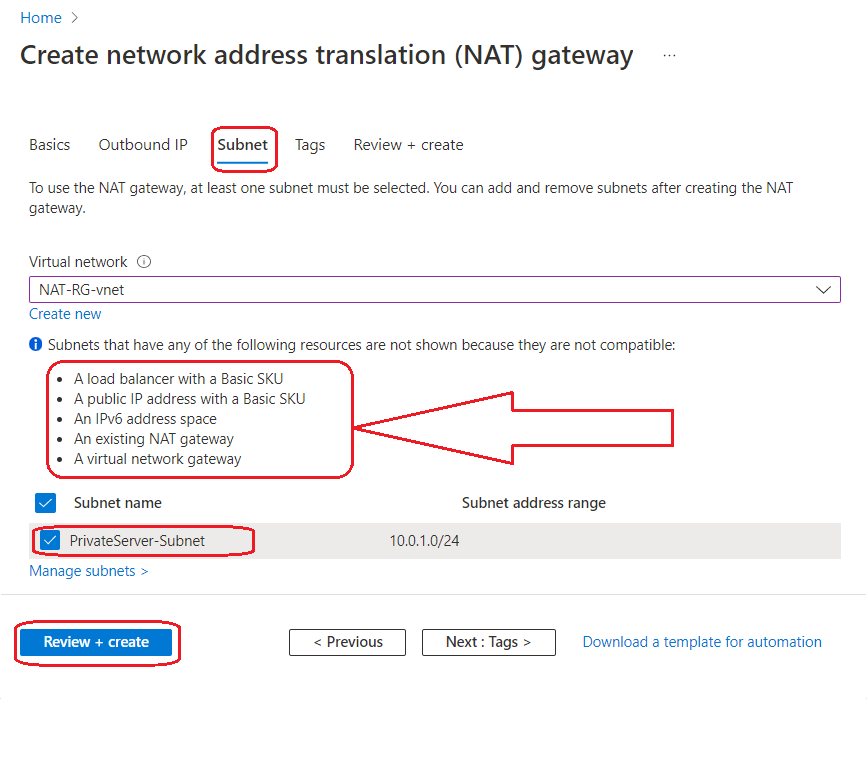
Next is to configure Subnets. One NAT gateway can be have multiple subnet but at least one subnet is must when we configure a NAT gateway and later we can add more subnet if we want. There are few condition, which is required for a subnet to fulfil otherwise the subnet will not be visible under available subnets. Following figure showing all the conditions.
Here I have configured my PrivateServer -Subnet as the Jumpserver-Subnet does not fulfil the requirement as it has one basic public IP which is associated with jump server.
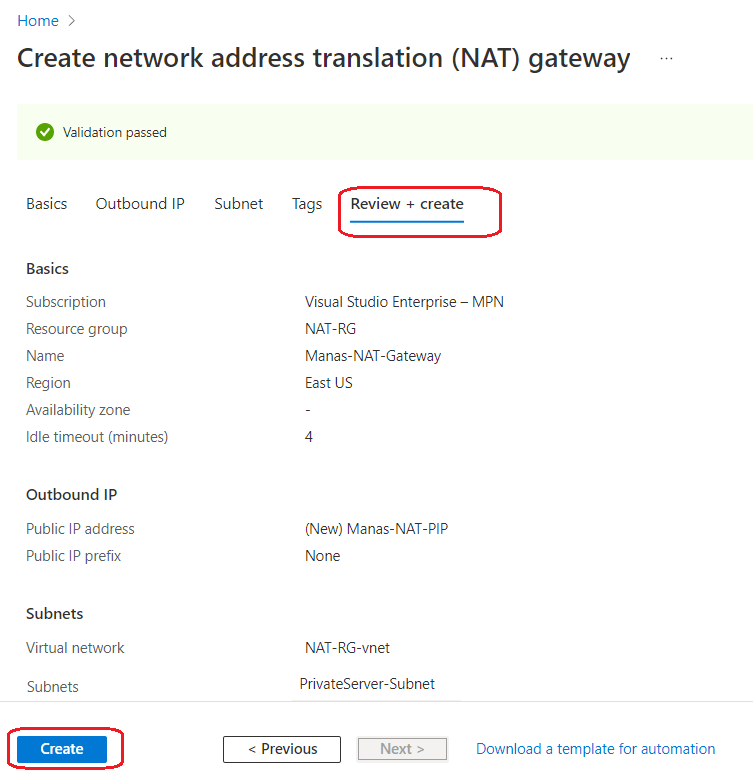
Once it we review the configuration , let’s click Create button to finish the configuration.
After we configured the NAT Gateway, if we go to the Outbound IP of the NAT Gateway, we can see the Public IP address assigned to it. In our case it is 23.96.124.56 s showing in the following figures.


Now all set to test our NAT Gateway configuration. Let’s connect our Private-Server (10.0.1.5) and test the public IP of the virtual machine in same way we did earlier. Now we can see in the following figure the Public IP address is same as the public IP address (23.96.124.56) of the NAT Gateway.
So it is tested that once we attached one NAT Gateway to a subnet, then all resources under the subnet, uses NAT Gateway public IP to communicate with Internet as showing in the following figure.

With the above information, I am concluding this article. I hope this is informative to you. Please let me know if I missed anything important or if my understanding is not up to the mark.
Keep reading, share your thoughts, experiences. Feel free to contact us to discuss more. In our next article we will continue with new Azure Service.
Next Article : Part 31 – Azure Front Door
If you have any suggestion / feedback / doubt, you are most welcome. Stay tuned on Knowledge-Junction, will come up with more such articles.
Thanks for reading 🙂


2 Responses
[…] you all are doing good. In our last article we have discussed on how to configure NAT Gateway in Azure portal. Today in this article we will start with a new Azure network service Azure Front […]
[…] Part 30 – Configure Azure Virtual Network NAT Gateway In Azure Portal […]