Microsoft Teams: Create and Explore Team in Microsoft Teams.

.
Hello Everyone,
Hope you all are doing well.
Earlier we create a team using PowerShell cmdlet and Power Automate flow.
Today in this article I am going to discuss about how to create a team and its properties in Microsoft Teams.
Introduction
Microsoft Teams:
Microsoft Teams is the ultimate messaging app for our organizations—a workspace for real-time collaboration and communication, meetings, file and app sharing, and even the occasional emoji! All in one place, all in the open, all accessible to everyone.
Team in Microsoft Teams:
In Microsoft Teams, teams are groups of people brought together for work, projects, or common interests. Teams are made up of two types of channels — standard (available and visible to everyone) and private (focused, private conversations with a specific audience).
Team Channel:
In Microsoft Teams, teams are groups of people brought together for work, projects, or common interests.
Teams are made up of two types of channels — standard (available and visible to everyone) and private (focused, private conversations with a specific audience). Each channel is built around a topic like “Team Events,” a department name, or just for fun. Channels are where we hold meetings, have conversations, and work on files together.
The tabs at the top of each channel link to our favorite files, apps, and services.
Details
Create Team
- Go to office.com, and sign in to our M365 account – https://www.office.com/?auth=2
- Launch Teams from Office365 app launcher.
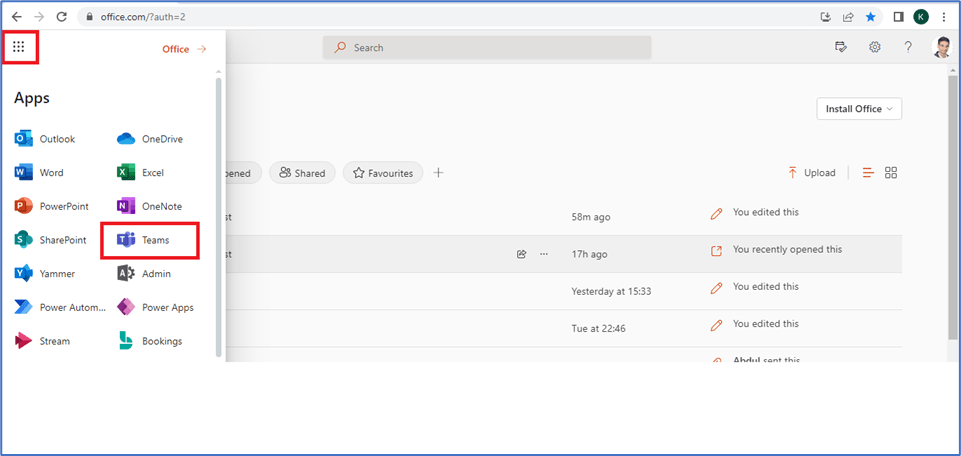
- Click on Teams and then click on Join or create a team.

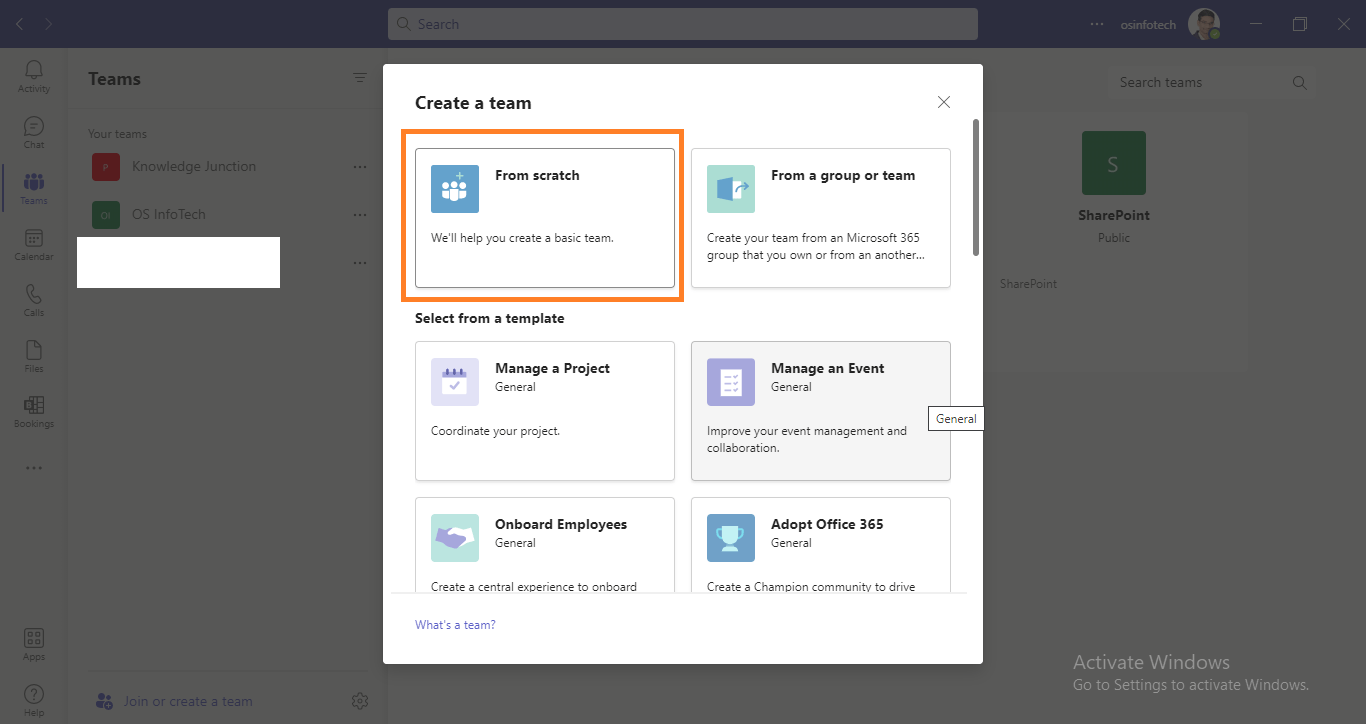
- Click on Create team.

- Here we can create the from scratch, from a team and from the templates.
- We are going to create a team From scratch.
- Choose the kind of team Private / Public / Org-wide depends on our team requirement.

Private Team:
It will be permission-based.
Public Team:
It will be a “free to join anytime – no permission to join required” type of membership.
Org-Wide Privacy Setting:
Org-Wide is a special type of public group and unique to MS Teams. It is only available/seen by Office 365 Global Admins (so most users won’t see it). When chosen, the MS Team and an associated Office 365 Group created behind the scenes will automatically include all the internal users in our tenant! Moreover, as we add or remove users from our directory/Office 365, their membership will automatically be reflected with his group. Very convenient!
Use cases for Org-Wide MS Teams:
- Company-wide communications for small organizations (I do not think using Org-Wide Teams for large organizations is practical as it will lead to communication chaos)
- When we want to also have a shared calendar. As part of an Office 365 created behind the scenes, we also get an Outlook Calendar, which we can then embed on a SharePoint Page (using Group Calendar Web Part). We can use this to list recurring Birthdays for the team, for example, on a SharePoint Intranet page somewhere!
Limitations of the Org-Wide MS Teams:
There are a few significant limitations to be aware of with Org-wide MS Teams:
- Org-Wide MS Teams can only be created by Global Office 365 Admins
- We can create a max of 5 Org-Wide MS Teams per tenant
- Org-Wide MS Teams only exist on tenants (Office 365 accounts) with less than 5,000 users.
So choose the kind of team as per our requirement and click on Next.
- Now give a name to the team, description of the team and then click on Create.

- Here add members to the team here by giving their mail address.
- If we want to add the members later then we can skip this step.

- Here we can change role of the added member as owner.

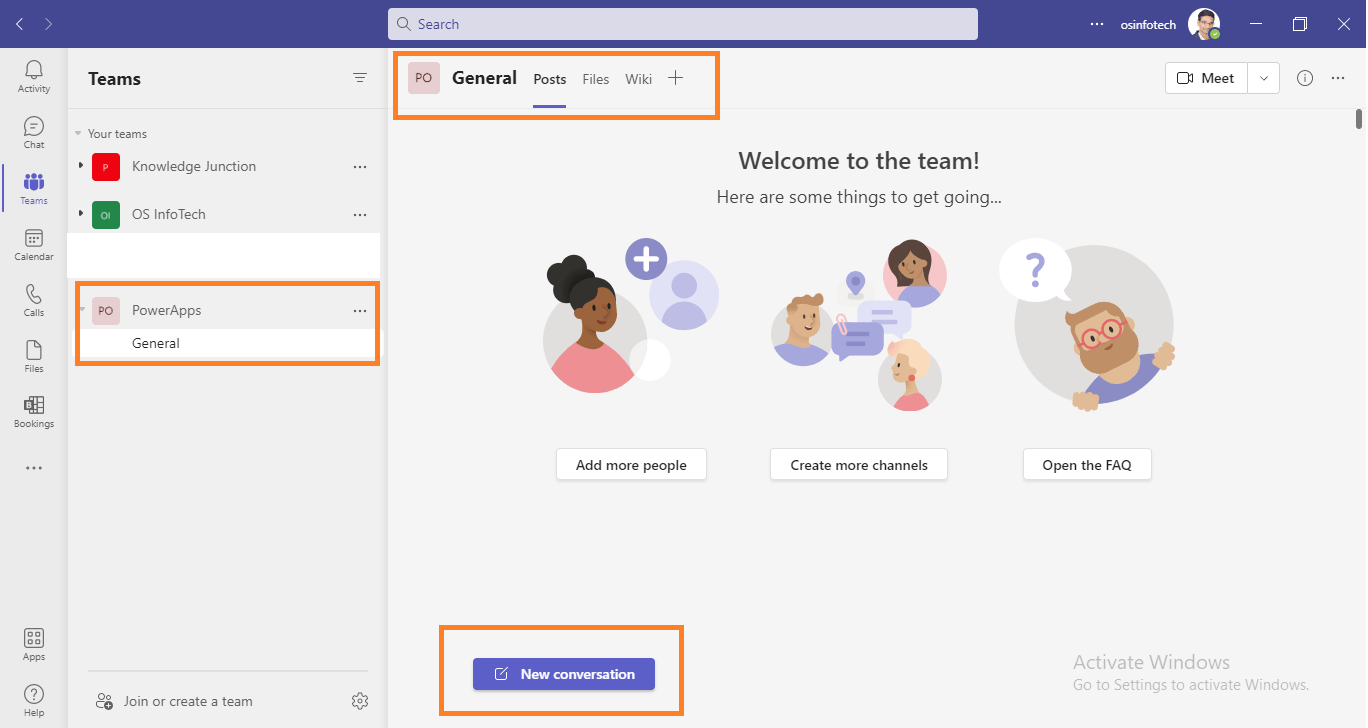
- Now we can see our team created with common General channel.
- Here we can start conversation, share files and folders with our team members.
Team Properties
Manage team
- Click on more options (…) of the team, we can see the properties of the team.

Go to manage team from more options (…) of the team.
Add or remove team members
In the teams list, go to the team name and select More options  > Manage team.
We can manage these member settings:
- To remove someone, select X to remove them.
- To change someone’s role, select the dropdown arrow and choose a role such as Owner or Member.
- To add someone, select Add member. Add a member from within or outside our org:
- To add someone in our org, type in the name of who we want. Then, select Add.
- To add a guest, type in their email address. Select the pencil icon to add a display name for them. Then, select Add.

Pending Requests
Team members can send requests to add members to a team, and team owners will receive an alert for any pending requests. As a team owner, you have the ability to accept or deny requests to join your team:
- If you have a manually-managed team (i.e., team Owner(s) add/remove members via the “Manage Team” setting in MS Teams.), you can add members by accepting the pending requests you received on Teams. See the instructions below for more information.
- If you have a maillist-managed team (i.e., team Owner(s) add/remove members via SFU Maillist), this functionality to accept/deny requests will not work. To add any members to your team, please add them via the maillist.

Manage channels
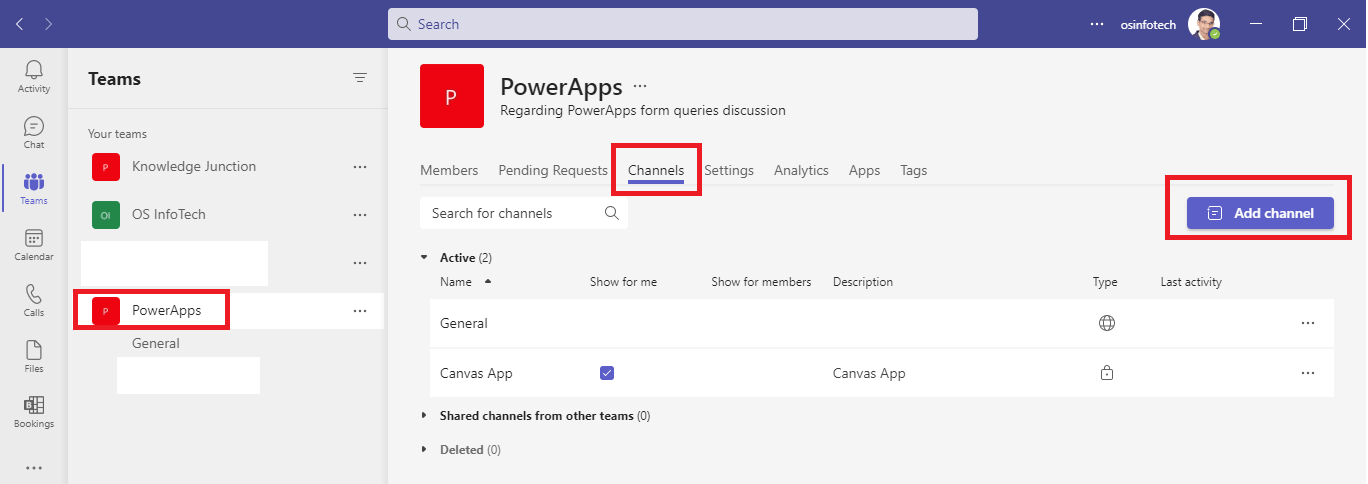
Go to the team name and select More options > Manage team.
In the Channels tab, we can:
- Select Add channel to add new channels.
- Make channels visible for team members.
Change team settings
Go to the team name and select More options > Manage team.
From there, we can access our team Settings tab, which lets us:
- Add or change the team picture.
- Set member permissions (like allowing them to create, update, or delete channels and tabs).
- Enable @team or @[team name] mentions.
- Enable @channel or @[channel name] mentions.
- Set permissions for guests.
- Enable team members to send GIFs, emoji, and stickers.
Owners of a Microsoft Team have:
- Access to Teams settings and can add new members to a private Team or Group.
- Administrative access to the Group SharePoint site associated with the Team.
- The ability to “restore” files (if versioning is enabled) to previous versions and delete or archive the Team.
By default, members of a Team cannot access or change Team settings or add members. They can edit the site and make lists and libraries, but they don’t have admin access to the Group SharePoint site associated with the Team. Members can also add channels in Teams (but can’t delete them).
Both Owners and Members (by default) are able to connect external applications–including other storage and collaboration apps–to each Team via Team channel tabs. They can both also add tabs to Teams channels and delete them.
If external sharing is turned on for Microsoft Teams and the Team in question, owners may invite “Guest” users from outside the organization to Teams. Guest users have the ability to participate in private Microsoft Teams chats (by default they cannot add or remove channels or tabs), Teams conversations (for joined Teams), and have access to files and the SharePoint information behind the Team as well (they will also be Guest users of the Office 365 Group).

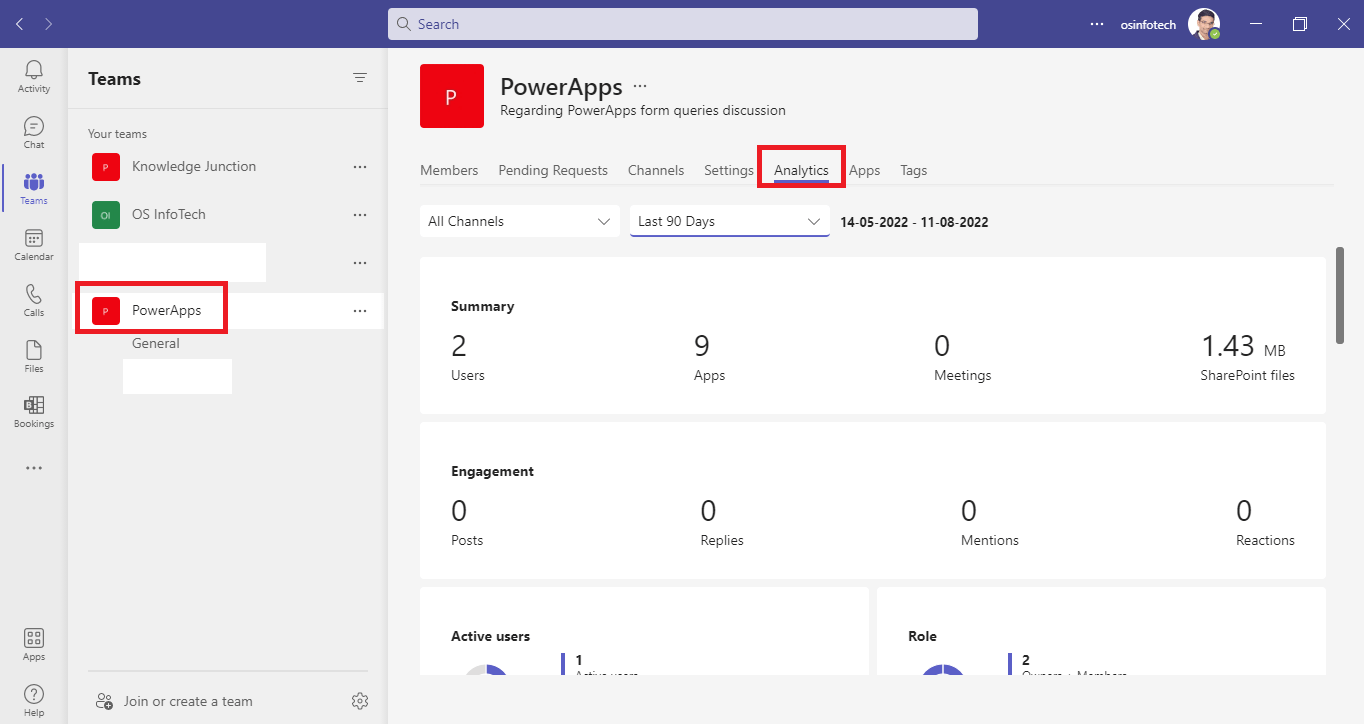
Analytics
Microsoft Teams allows you to quickly view analytics data about teams that you are a member or an owner of. This info can provide insights into the activity patterns on your teams.
Analytics data includes the number of active users, guests, and the total number of messages sent in each team for a given period. You can view analytics across all your teams, within individual teams, and in specific channels.
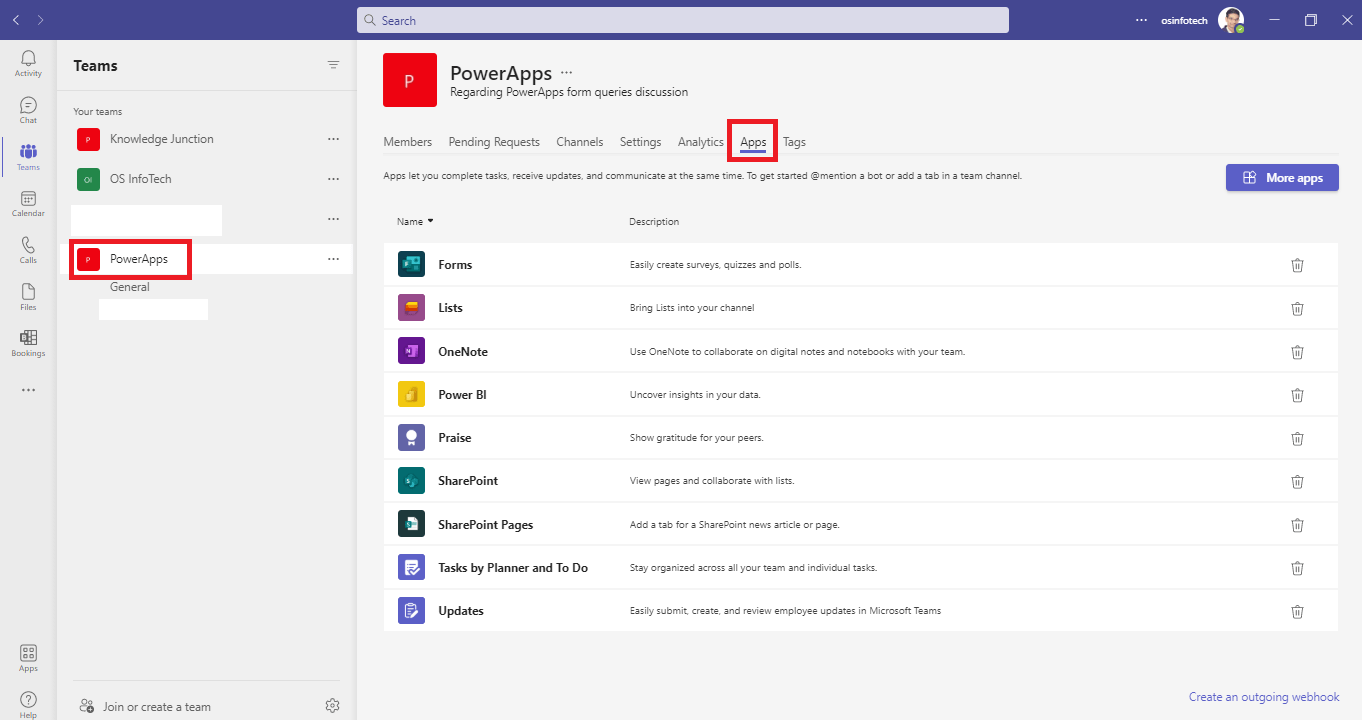
Manage and add Apps
Go to the team name and select More options > Manage team:
- In the Apps tab, we can install and manage the apps our team uses.
Tags
Tags let you quickly reach a group of people all at once.
With tags, you can categorize people based on attributes, such as role, project, skill, training, or location. For example, a “Nurse” or “Manager” or Designer” tag will enable you to reach groups of people in Teams without having to type every single name.
Once a tag is added, just @mention it in a channel. Everyone who has been assigned that tag will receive a notification just as they would if they were @mentioned individually.
Another way to use a tag is to start a new chat and then select the tag that is assigned to the people you want to reach.

Add Channel
General Channel
A team is built from channels. Starting off, a team has a General channel. In fact, the General channel is the core of a team. It cannot be removed or renamed. But that’s OK, because a team can have up to 199 additional regular channels to use to segregate discussions. All team members have full access to whatever’s stored in regular channels.
Ideally, the General channel should be kept for team-wide announcements rather than discussions, which should be in channels dedicated to themes. There’s nothing to stop us keeping everything in the General channel and this can work for low-traffic teams, but once discussions heat up and become active, keeping everything in General often creates a catch-all collection of badly organized topics that’s difficult to navigate. For this reason, it’s best to block the ability to post to the General channel to anyone but team owners.

Create Channel
- We can create a channel as per our company requirement.
- Click on more options (…) of the team, go to Add channel.

- Give the details Name, Description and Privacy settings of the channel.

We have three channel options available in Teams will be:
- Standard: Open to all team members in Teams. Most channels are standard channels.
- Private: Open to a defined subset of team members (including guests), use for private conversations and document sharing.
- Shared: Open to a defined subset of team members and people/teams shared in other federated organizations, use for collaboration.
Choose the Privacy of team accordingly and click on Add.
- Next add members to the team here by giving their mail address.
- If we want to add the members later then we can skip this step.

- Here we can change role of the added member as owner.

- Our channel created in the team.
- We can start conversation, share files and folders with our channel members.

Add members to a team
If we’re a team owner, we can add someone to a team. If we’re not a team owner, we can submit a request and the team owner can then accept or deny it.
This topic is about adding members who are already a part of our team’s org. If we want to add someone who’s not a part of our org, see Add guests to a team.
Note: If we’re a global admin, consider creating an org-wide team that automatically adds everyone in our organization.
- If we’re a team owner, go to the team name in the teams list and click More options > Add member.
- Start by typing a name, distribution list, security group, or a Microsoft 365 group. We can also add people outside our org as guests by typing their email addresses.
- When we’re done adding members, select Add. We can make someone a team owner by selecting the down arrow next to Member. A team can have multiple owners. For more about roles and permissions, see Team owner and member capabilities in Teams.
- Select Close. People that we add to a team will receive an email letting them know they are now a member and the team will appear in their teams list.
Leave a team
We can leave a team at any time by choosing the team name and then selecting More options > Leave the team.
We’ll receive a confirmation message to make sure that we want to leave the team.
Note: We can leave a team on your own, but only an admin can remove you from an org or an org-wide team.
Edit Team
We can edit a team’s basic properties in the Edit Team window.
- Click a team’s More Options button.
- Select Edit team. The Edit Team window opens, where we can edit some of the team’s basic properties—its name, description, and privacy level.
- Edit a team’s basic properties.
- Click Done.
The team’s name, description, and privacy settings are updated.
Get link to team
- If we’re a team owner, go to our team listed on the left side of the app.
- Select More options >
 Get link to team.
 - Choose Copy and then send the link to the person we want to invite to our team. That person can then paste the link into any browser to join our team.
- In this link we can get the Group ID and Tenant ID.
More details about Group ID and Tenant ID, please go through this article.
Create and manage tags in Teams
Select Teams  on the left side of the app and find our team in the list. Then select More options and choose Manage tags
  .
.
Here, we can create tags and assign them to people on our team.
@mention a tag in a channel
In a channel conversation, simply @mention a tag in our message and select the tag from the list. The tag will appear just like any @mention, and the people associated with the tag will get notified.
Using tags in a chat
To start a chat with the members of a tag, select New chat  , start typing the name of the tag, and then select the tag from the list. Everyone in the tag group will be added to the To: field.
Manage settings for team owners
Team owners can choose which members of their team are allowed to add tags. Select Teams on the left side of the app and find our team in the list.
Go to More options , select Manage team  , choose the Settings tab, and then navigate to the Tags section. Here we can control whether team members or team owners can manage tags.
Note: If we’re unable to create or manage tags, our organization might not have the feature enabled or we are not a team owner. If tags are enabled and we are not a team owner, we can still view tags that have been applied to ourselves or other team members.
Delete a team
Note: Team owners can delete a team from the desktop or web app.
If we want to delete a team (and we’re the team owner), go to the team name and select More options > Delete the team. our team will be permanently removed.
Remember:
- Deleting a team removes the team mailbox and calendar from Exchange
- The corresponding SharePoint site and all its files will also be deleted
- And any OneNote notebook, Planner plan, PowerBI workspace, or Stream group affiliated with the team will also be deleted
Team owners and IT admins can recover deleted teams for up to 30 days. For more info, see Restore a deleted Microsoft 365 Group.
.
Hope this article will help us to create a team and its properties in Microsoft Teams.
Also get my article updates on my social media handles.
LinkedIn – https://www.linkedin.com/in/khasim-shaik-8784a1232/
Twitter – https://twitter.com/KhasimShaik2009
Facebook – https://www.facebook.com/profile.php?id=100078255554660
Thank you for your support, will catch up with new article soon.
Keep learning and keep smiling.
Have a great day.
Thanks.


1 Response
[…] Microsoft Teams: Create and Explore Team in Microsoft Teams […]