Microsoft 365: Microsoft Purview – Record management – how to manage the document of SharePoint using Records management retention label – Data Governance

Hope is the belief in the probability of the possible rather than the necessity of the probable.
Hello Everyone,
Hope you all are doing well.
Today I am going to discuss about Record management and how to manage the document of SharePoint using Records management retention label
If you want to know about Microsoft Purview, then you can read the previous article link for following is given below – https://knowledge-junction.in/2023/05/11/microsoft-365-exploring-microsoft-purview-introduction-simplifying-concepts-study-material-for-exam-sc-900-microsoft-security-compliance-and-identity-fundamentals/
Key takeaways from this article
At the end of this article we will understand
- About Records management in Microsoft Purview
- Licenses requirement for Records management in Microsoft Purview
- Understand how to manage the document of SharePoint using Records management retention label.
- We will also understand about how to apply the Retention label to the SharePoint.
- Understand how to view and disposition of content take place after the specified period of retention label is over.
Records management

- Records management in Microsoft Purview involves the systematic control of records from creation to disposition.
- It helps organizations ensure compliance with regulatory requirements, manage risks, and maintain the integrity and accessibility of their records.
- This is used to adhere to legal, regulatory, and business needs to manage certain types of documents differently.
- It can be done manually by applying a retention label or based on the content using SITs, keywords, or content types.
- You can control the retention period based on when the document was created, last modified or based on a particular event taking place, such as an employee leaving the company, a contract expiring or a particular product reaching a stage in its lifecycle. This makes it possible to build workflows around governing the retention of documents.
Licensing Requirements for Records management
- Microsoft 365 E5
- Office 365 E5
- E5 Information Protection and Governace
- E5 Advanced Compliance
- M365 F5 Security+Compliance/F5 Compliance
Types of Restriction applied using Records management
- There are three types of restrictions that can be applied using records:
- Record – locked, Record – unlocked and Regulatory record.
- The last one is new, it lets us lock/prevent any changes not only to the document content but also to its metadata, stops you moving the document to another location and blocks the ability to change or remove the label.
- This is important where businesses have strict regulations to follow and must prove that documents are immutable once declared records.
- The locked/unlocked record types differ in whether they allow changes to the content to happen or not.
To experience the full features of M365 records management, you need an E5 license, which allows you to:
- apply event triggered retention
- use trainable classifiers to automatically apply retention
- provide proof of disposition after the disposition of the document
Records management has a feature i.e., File plan.
File Plan

- File Plans allow you to create plans to classify content by Business Function, Category, Sub-Category and then apply specific retention rules.
- This means you can set retention specific to meet specific requirements, for example, retain financial records for 7 years, contracts for duration of the contract, HR records for event-based timeframes etc.
- File plans can be exported as CSV files, edited in Excel, and imported back into M365, which is handy if we are migrating from a legacy system or need to import many labels at once.
- To access file plan, you must have one of the following admin roles:
- Retention Manager
- View-only Retention Manager
The lifecycle of our records needs to be planned for their disposition at the end of their specific period. Once time’s up we can have the information automatically deleted, just left where it is or trigger a disposition review.
Disposition review
- Disposition reviews cover content in Exchange online mailboxes, SharePoint sites, OneDrive accounts and Microsoft 365 groups (Teams).
- Reviewers will receive an email notification weekly and then use the Disposition tab in the Compliance Center to review the content, and either permanently delete it, extend the retention period, or apply a different retention label.
- Note that you can only define individual user accounts or mail-enabled security groups as reviewers
File plan descriptors columns
- These file plan descriptors provide more options to improve the manageability and organization of the content you need to label.
- It starts with References Id by default and the next columns display these optional file plan descriptors that you can specify when you create a retention label, or edit an existing label i.e., given below:
- Business function/department
- Category
- Authority type
- Provision/citation
Let get started and see how to manage the data retention using Records management
We have the detailed article for navigate to Microsoft Purview compliance portal– Microsoft 365 – Navigate to Microsoft Purview compliance portal – https://knowledge-junction.in/2023/05/04/small-tricks-and-tips-microsoft-365-administration-microsoft-purview-portal-how-to-navigate/
- Go to the Microsoft Purview compliance portal at https://compliance.microsoft.com/homepage

- Open Microsoft Purview compliance portal > Records management

- Click on the File plan, retention labels from Data lifecycle management in the Microsoft Purview compliance portal are automatically displayed in your file plan.
- On the File plan page, you see all your labels with their status and settings, optional file plan descriptors, an export option to analyze or enable offline reviews of your labels, and an import option to create retention labels.
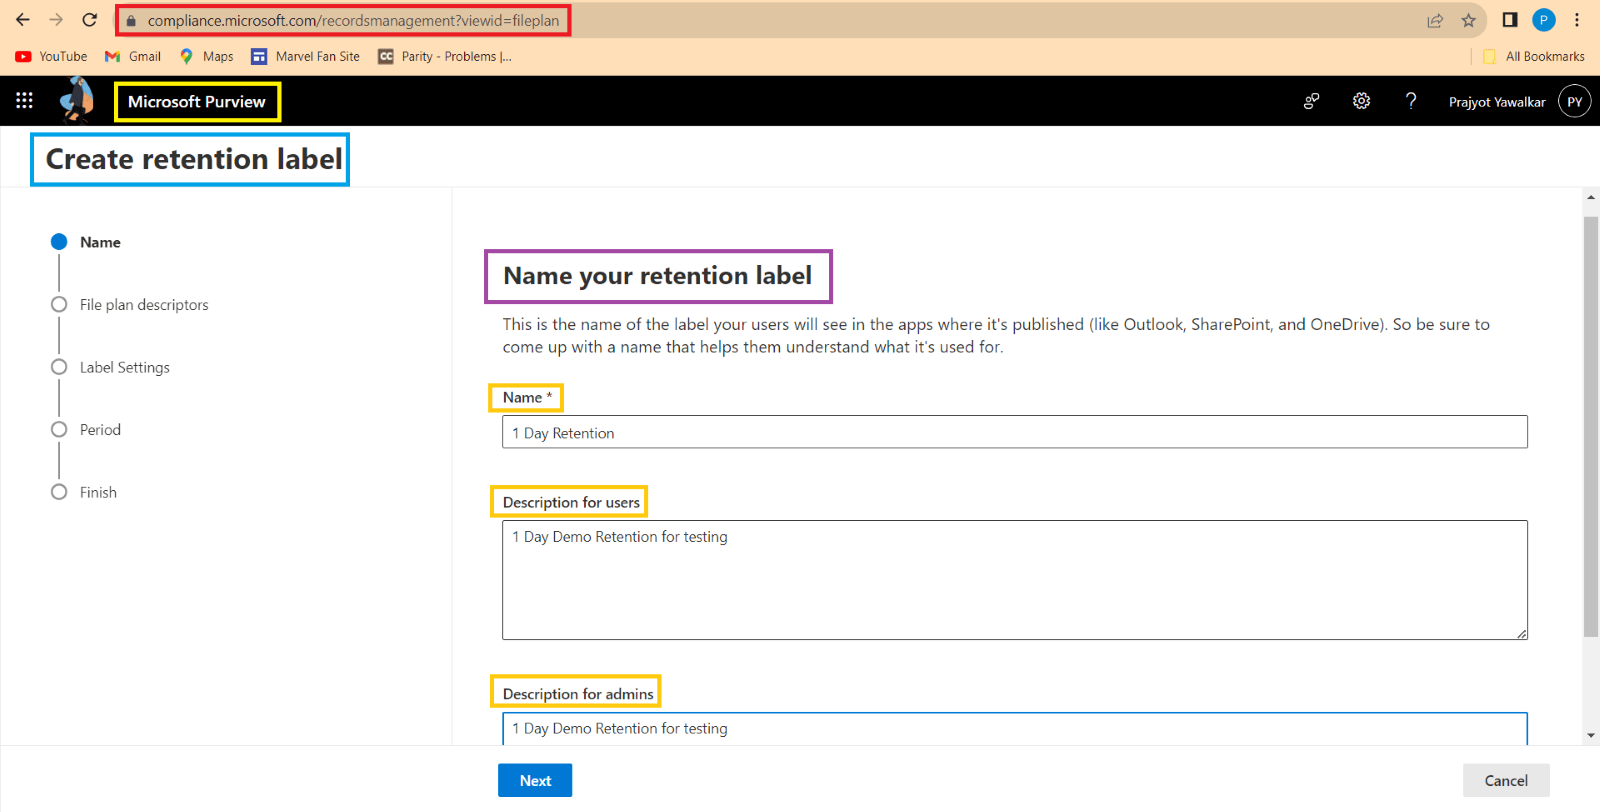
- Click on the Create a label to create retention label, enter the name and description for retention label (be careful what name you choose, because this cannot be changed after the label is save

- When we select Choose for each of these optional descriptors, we can select one of the out-of-box values or create your own and then select it.

- Choose the inbuilt Business Function/department or create a new one and select it.

- Choose the inbuilt Category or create a new one and select it.

- Choose the given Authority type or create a new one and select it.

- Choose from the given list of Provision/citation or create a new one and select it.

- Choose to specify whether data should be retained forever or for a specific period if it is edited or deleted by users.
- Alternatively, we can configure the label to delete the content automatically and permanently after a specified period if it has not already been deleted.
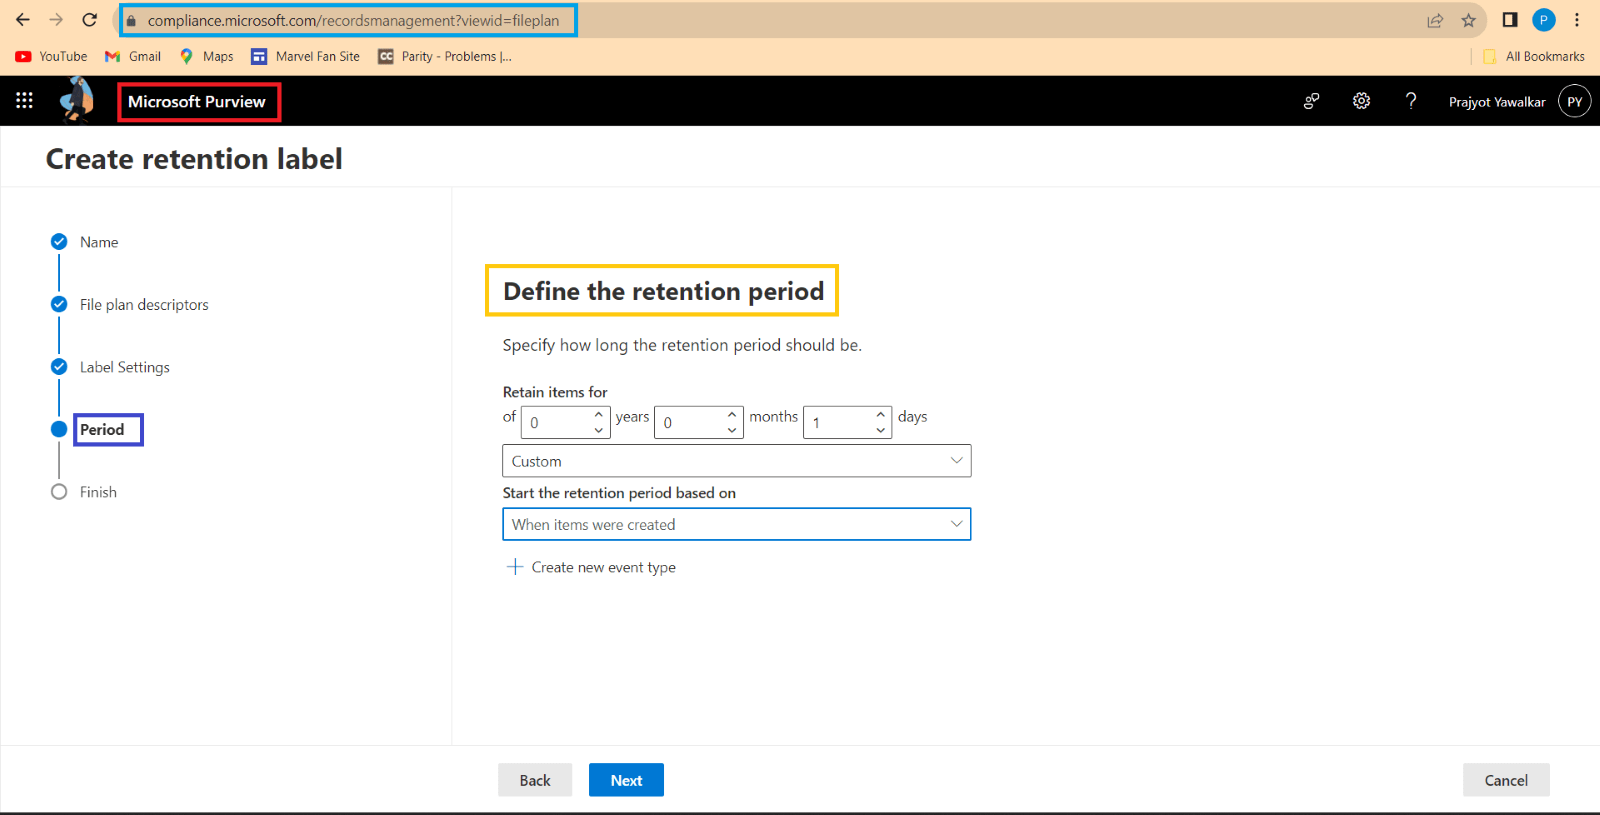
- Here, we select the retention period for how long the item should be retained for.

- As we can see, there are several settings available that we can use to customize the labels to fit our organization needs during the configuration stage.

- We have two option here we have the option to Retain items even if users delete or Mark items as a record

- Selecting Mark items as a record in this case, users will not be able to edit or delete items; only admins can change or remove the labels.
- For SharePoint and all OneDrive files actions are blocked or allowed based on whether the item’s record status is locked or unlocked
- By Choosing the Mark items as a record we can select the option to unlock this record by default and we should choose this option if we want to allow users to edit items before locking the record
- While the record is unlocked users will not be able to move items across OneDrive accounts or SharePoint document libraries

- After we select the Start a disposition review option, select + Create stages and assign reviewers. On the next page of the configuration, we’ll specify how many consecutive stages of disposition you want and the disposition reviewers for each stage:

- Select + Add a stage and name your stage for identification purposes. Then specify the reviewers for that stage.

- If we need more than one person to review an item at the end of its retention period, select Add another stage and repeat the configuration process for the number of stages that we need, with a maximum of five stages.
- After we have specified for our reviewers, remember to grant them the Disposition Management role permission.

- We can rename it, reorder it, or remove it by selecting Edit stages and reviewers that now display for the Start a disposition review option.
- Any of the users we specify for that stage are authorized to take the next action for the item at the end of its retention period. These users can also add other users to their disposition review stage.

- On the Review and finish page, Select Edit in the appropriate section. When all the settings are correct, select Create label to create the retention label.
Publishing the Retention Label
- Open Microsoft Purview compliance portal > Records management > Label policies tab > Publish labels


- Use the link to select the retention labels to publish, and then select Next.

- Next is to Assign Admin Units: If any organization is using Administrative Units in Azure Active Directory, a retention label policy that does not include SharePoint sites can be automatically restricted to specific users by selecting Administrative Units.
- If we do not want to restrict the policy by using Administrative Units, or your organization hasn’t configured Administrative Units, keep the default of Full directory.

- In the Choose the type of retention policy to create page, we are given two options i.e., Select Adaptive or Static
- By Selecting Adaptive Scope which allows you to create more dynamic scope for our label and retention policy.
- If we chose Static Scope:

- On the Choose locations page, we can toggle on or off any of the locations. For each location, you can leave it at the default to apply the policy to the entire location or specify includes and excludes.

- Giving the name and description of the policy (Note: Be careful what name you choose for the policy, because this can’t be changed after the policy is saved.)

- On the finish page, Select Edit in the appropriate section. When everything is correct, select Submit to Publish the label.
Apply the Retention label to the SharePoint
If you want to know about SharePoint Online, then you can read the previous article link for following is given below – https://knowledge-junction.in/2022/02/20/m365-sharepoint-online-my-first-experience/
- When we apply a retention label to all content in a SharePoint library, folder, or document set. Documents in that location then inherit our selected retention label.

- For a document library, the default label configuration is done on the library settings page for a document library.

- When you choose the default retention label, you can also choose to apply it to existing items in the library.
- For example, if you have a retention label for marketing materials, and you know a specific document library contains only that type of content, you can make the Marketing Materials retention label the default label for all documents in that library.
Viewing and disposing of content
- After the specified period of retention label is over, the reviewer is notified by email that content is ready to review

- Click a link in the email that takes them directly to the Disposition page from Records management in the Microsoft Purview compliance portal.
- The reviewers can see how many items for each retention label are waiting for disposition with the Type displaying Pending disposition. They then select a retention label, and Open in new window to see all content with that label:

- In the Pending dispositions page, we can see all pending dispositions for that label. When one or more items are selected, we can use the mini-preview pane and the Source, Details, and History tab to inspect the content before acting on it:

- With the use of horizontal scroll bar or by closing the mini-review pane, we can see more columns that include the expiry date and the name of the disposition review stage.
Following are actions performed by Reviewer
- Approve disposal: When this action is selected for the final stage of disposition review, or there is only one stage of disposition: The item is marked as eligible for permanent deletion, which happens within 15 days (about 2 weeks).
- Relabel: When this action is selected, the item exits the disposition review process for the original label. The item is then subject to the retention settings of the newly selected retention label.
- Extend: When this action is selected, disposition review is effectively suspended until the end of the extended period and then disposition review is triggered again from the first stage.
- Add reviewers: When this action is selected, the user is prompted to specify and add other users for review.
I hope this article will help you to know about Records management and how we can manage the document of SharePoint using Records management retention label.
Also get my article updates on my social media handles.
Linkedin – https://www.linkedin.com/in/prajyot-yawalkar-093716224/
Twitter – https://twitter.com/PrajyotYawalkar?t=oovP0r9FnDtz5nNSJGKO0Q&s=09
Have a wonderful day.
Thanks for reading.


You must be logged in to post a comment.