Microsoft Azure Storage and Database Part 18 – Azure File Service – Upload And Copy Files In File Share Using Power Shell

Hello Friends,
Hope you all are doing good !!! 🙂 .
In our previous articles we have discussed, how to create Azure File Share using PowerShell. Today in this article we will discuss how to upload, download and copy files in Azure File Share using PowerShell.
Tool Installation Articles :
- Configure Azure Command Line Interface ( Azure CLI) On Windows
- Configure PowerShell For Microsoft Azure Az Module On Windows
Previous Azure series :
- Learn Basics Of Azure Networking In 60 Hours
- Learn Basic Of Azure Active Directory And Azure Identity And Access Management
- Azure DevOps – Learn at one place
If you have missed our previous articles on Azure Storage and Database Series, please check it in following links.
Part 1 – Overview Of Azure Storage and Database
Part 2 – Azure Storage Account
Part 4 – Work With Azure Blob Storage
Part 5 – Storage Explorer For Azure Storage
- .
- .
- .
- .
Part 15 – Azure File Service – Mount File Share On Window Server Using PowerShell
Part 16 – Azure File Service – Mount File Share On Window Server Using File Share URL
Part 17 – Azure File Service – Create File Share Using Power Shell
Next Article : Part 19 – Azure File Service – BackUp And Restore Azure Files From Recovery Services Vault
In our last article we have successfully created a File Share using PowerShell. There are many such operations can be achievable using PowerShell. In today’s demo/lab exercise we will use the file share, which we have created yesterday during our demo. So let’s start one by one.
Gather Required Resources
There are different approaches to work with Azure File Share and PowerShell one of them. So let’s start with our demo.
Step 1 – Open Window Powershell, hopping you have already configured the PowerShell on your machine. If not configured yet please see our post Configure PowerShell For Microsoft Azure Az Module On Windows.
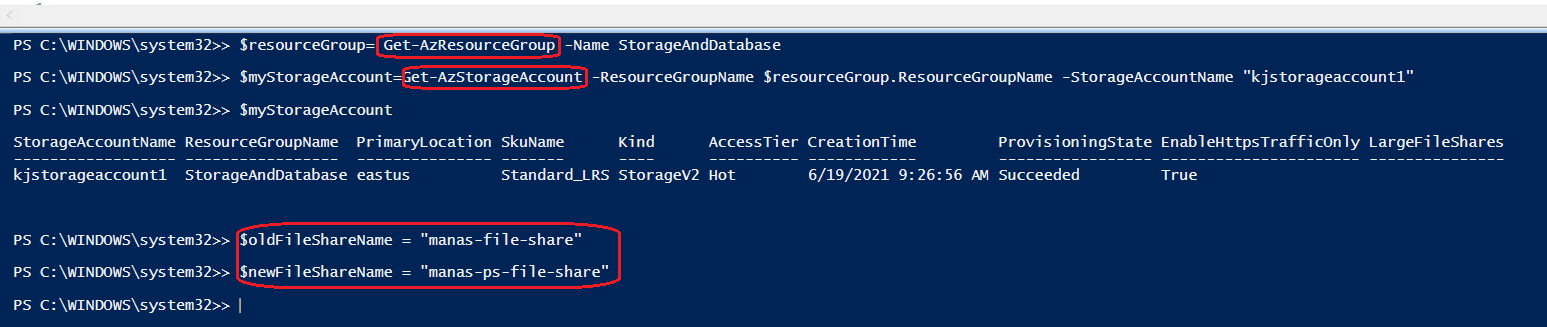
Step 2 – Get all Azure resources and variables required for our operations like Resource Group, Storage Account , File Share name where we want to upload our files. Use following commands to get all those information.
$resourceGroup= Get-AzResourceGroup -Name StorageAndDatabase
$myStorageAccount=Get-AzStorageAccount -ResourceGroupName $resourceGroup.ResourceGroupName -StorageAccountName "kjstorageaccount1"
$oldFileShareName = "manas-file-share"
$newFileShareName = "manas-ps-file-share"
Create Directory Using PowerShell
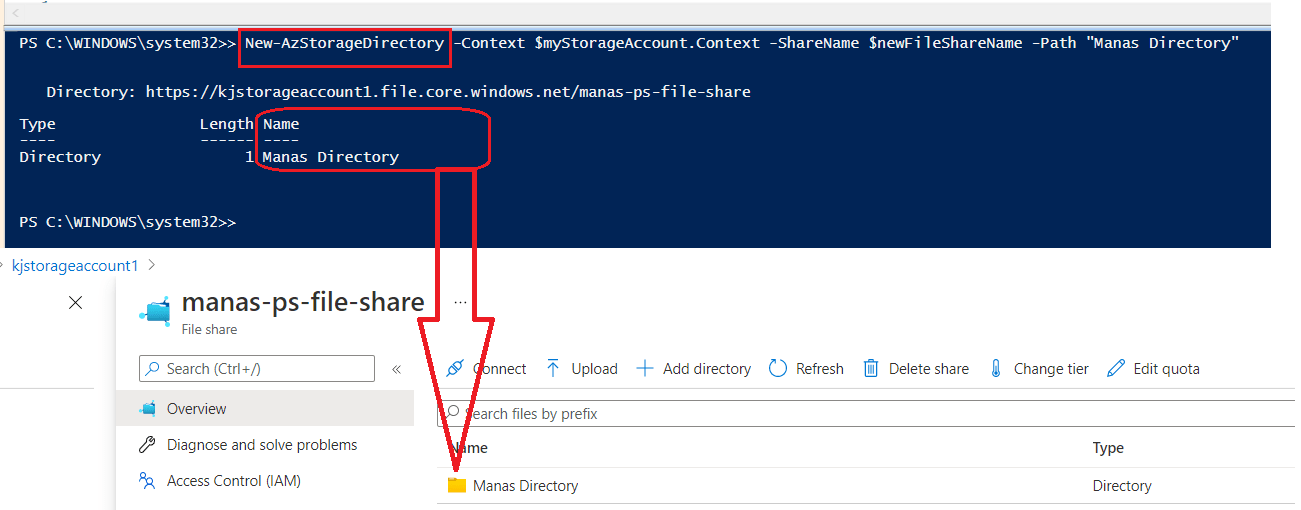
As we can see in the following figure, at the moment there is nothing in file share which we have created in our last demo.
Now we will first create one folder/directory in our file share using New-AzStorageDirectory cmdlet. Following example showing how to create Manas Directory in our file share.
New-AzStorageDirectory -Context $myStorageAccount.Context -ShareName $newFileShareName -Path "Manas Directory"
Upload File Into A Directory Using PowerShell
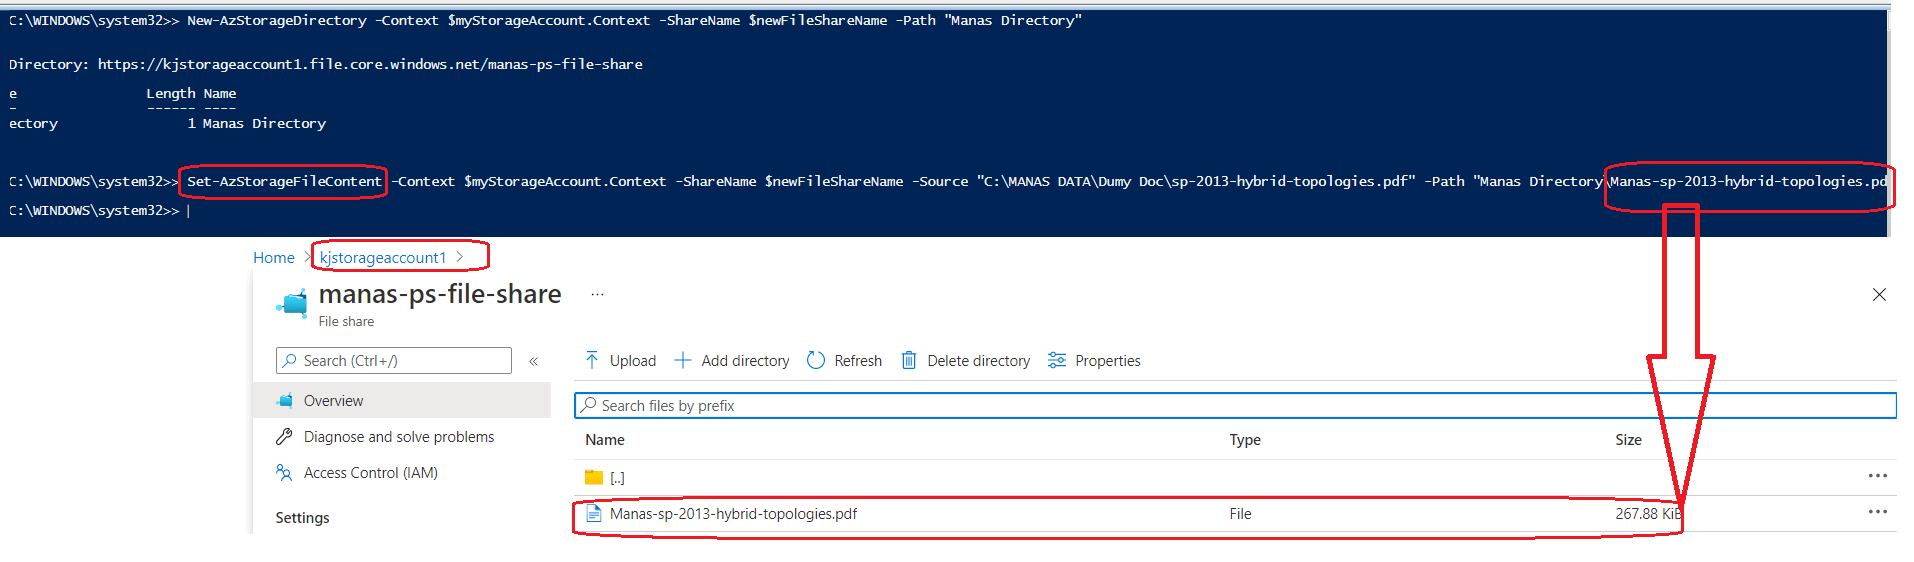
In our above example, we have created a directory “Manas Directory”. Now we will upload a file into that directory using Set-AzStorageFileContent cmdlet. Following example will upload the file into the directory of our Azure file share.
Set-AzStorageFileContent -Context $myStorageAccount.Context -ShareName $newFileShareName -Source "C:\MANAS DATA\Dumy Doc\sp-2013-hybrid-topologies.pdf" -Path "Manas Directory\Manas-sp-2013-hybrid-topologies.pdf"
Download A File Using PowerShell
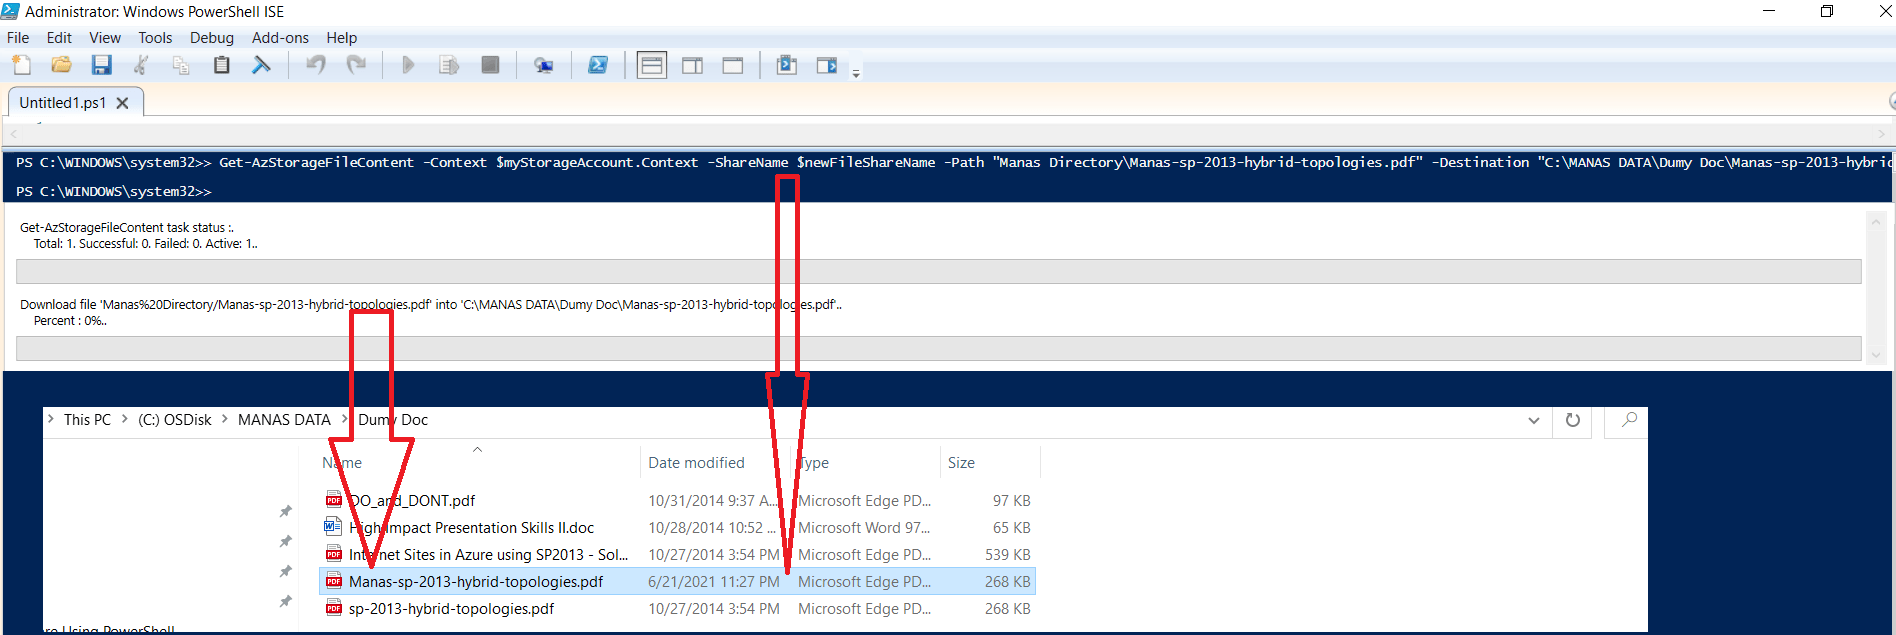
Now we will see how can we download a file from our file share. We can use the Get-AzStorageFileContent cmdlet to download a copy of the file we just uploaded. Following example will download the recently uploaded file to our local machine.
Get-AzStorageFileContent -Context $myStorageAccount.Context -ShareName $newFileShareName -Path "Manas Directory\Manas-sp-2013-hybrid-topologies.pdf" -Destination "C:\MANAS DATA\Dumy Doc\Manas-sp-2013-hybrid-topologies.pdf"
Copy File From one File Share To Other File Share Using PowerShell
Among other operation one important operation is to copy files from one file share to another file share. Using the Start-AzStorageFileCopy cmdlet we can copy a file from one file share to another. To demonstrate this we will use the file share we have created in our previous article and one of my old file share. Let’s first get both the file share name as showing below.
$oldFileShareName = "manas-file-share"
$newFileShareName = "manas-ps-file-share"
As we can see in the following figure, the file needs to be copied from my old file share to my new file share.

Following example will copy the file as explained in above figure.
Start-AzStorageFileCopy -Context $myStorageAccount.Context -SrcShareName $oldFileShareName -SrcFilePath "High Impact Presentation Skills II.doc" -DestShareName $newFileShareName -DestFilePath "High Impact Presentation Skills II.doc" -DestContext $myStorageAccount.Context

At the end, if we see in the above figure, the file has been copied successfully to the specified location.
I hope this is informative to you. Please let me know if I missed anything important or if my understanding is not up to the mark. Keep reading, share your thoughts, experiences. Feel free to contact us to discuss more.
Next Article : Part 19 – Azure File Service – BackUp And Restore Azure Files From Recovery Services Vault
If you have any suggestion / feedback / doubt, you are most welcome. Stay tuned on Knowledge-Junction, will come up with more such articles.
Thanks for reading 🙂 .
![New-ExoPSSession : Processing data from remote server outlook.office365.com failed with the following error message: [AuthZRequestId=9ff0b2ed-63de-4871-987a-7a608bc135cc][FailureCategory=AuthZ-AuthorizationException] Fail to create a runspace because you have exceeded the maximum number of connections allowed : 3 for the policy](https://i0.wp.com/knowledge-junction.in/wp-content/uploads/2022/06/fig1.png?resize=520%2C245&ssl=1)


13 Responses
[…] our previous articles we have discussed how to upload, download and copy files in Azure File Share using PowerShell. Today in this article we will discuss How to configure Recovery Service Vault and BackUp and […]
[…] Part 18 – Azure File Service – Upload And Copy Files In File Share Using Power Shell […]
[…] Part 18 – Azure File Service – Upload And Copy Files In File Share Using Power Shell […]
[…] Part 18 – Azure File Service – Upload And Copy Files In File Share Using Power Shell […]
[…] Part 18 – Azure File Service – Upload And Copy Files In File Share Using Power Shell […]
[…] Part 18 – Azure File Service – Upload And Copy Files In File Share Using Power Shell […]
[…] Part 18 – Azure File Service – Upload And Copy Files In File Share Using Power Shell […]
[…] Part 18 – Azure File Service – Upload And Copy Files In File Share Using Power Shell […]
[…] Part 18 – Azure File Service – Upload And Copy Files In File Share Using Power Shell […]
[…] Part 18 – Azure File Service – Upload And Copy Files In File Share Using Power Shell […]
[…] Part 18 – Azure File Service – Upload And Copy Files In File Share Using Power Shell […]
[…] Part 18 – Azure File Service – Upload And Copy Files In File Share Using Power Shell […]
[…] Chapter 18 – Azure File Service – Upload And Copy Files In File Share Using Power Shell […]