Microsoft Azure Storage and Database Part 21 – Azure File Service – Create And Manage File Share Snapshots Using PowerShell

Hello Friends,
Hope you all are doing good !!! 🙂 .
In our previous articles we have discussed How to BackUp And Restore Azure files From The File Share Pane. Today in this article we will discuss How To Create and Manage File Share Snapshots Using PowerShell.
Tool Installation Articles :
- Configure Azure Command Line Interface ( Azure CLI) On Windows
- Configure PowerShell For Microsoft Azure Az Module On Windows
Previous Azure series :
- Learn Basics Of Azure Networking In 60 Hours
- Learn Basic Of Azure Active Directory And Azure Identity And Access Management
- Azure DevOps – Learn at one place
If you have missed our previous articles on Azure Storage and Database Series, please check it in following links.
Part 1 – Overview Of Azure Storage and Database
Part 2 – Azure Storage Account
Part 4 – Work With Azure Blob Storage
Part 5 – Storage Explorer For Azure Storage
- .
- .
- .
- .
Part 16 – Azure File Service – Mount File Share On Window Server Using File Share URL
Part 17 – Azure File Service – Create File Share Using Power Shell
Part 18 – Azure File Service – Upload And Copy Files In File Share Using Power Shell
Part 19 – Azure File Service – BackUp And Restore Azure Files From Recovery Services Vault
Part 20 – Azure File Service – BackUp And Restore Azure Files From The File Share Pane
Next Article : Part 22 – Azure File Service – Configure Azure File Share Back Up Using PowerShell
File Share snapshots
Azure Files provides the capability to take share snapshots of file shares.
- File Share snapshots capture the share state at that point in time.
- A file share snapshot is a point-in-time, read-only copy of our data.
- After a file share snapshot is created, it can be read, copied, or deleted, but not modified.
- A file share snapshot of a file share is identical to its base file share only a Date Time value is appended to each share URI to indicate the time at which the share snapshot was taken and make it a different snapshot.
- File Share snapshots persist until they are explicitly deleted.
- We cannot delete a file share that has share snapshots unless you delete all the share snapshots first.
- Share snapshots are incremental in nature. Only the data that has changed after your most recent share snapshot is saved.
- The maximum number of share snapshots that Azure Files allows today is 200.
Common Use Cases Of File Share Snapshots
- Protection against application error and data corruption
- Protection against accidental deletions or unintended changes
- General backup purposes
Create Snapshots :
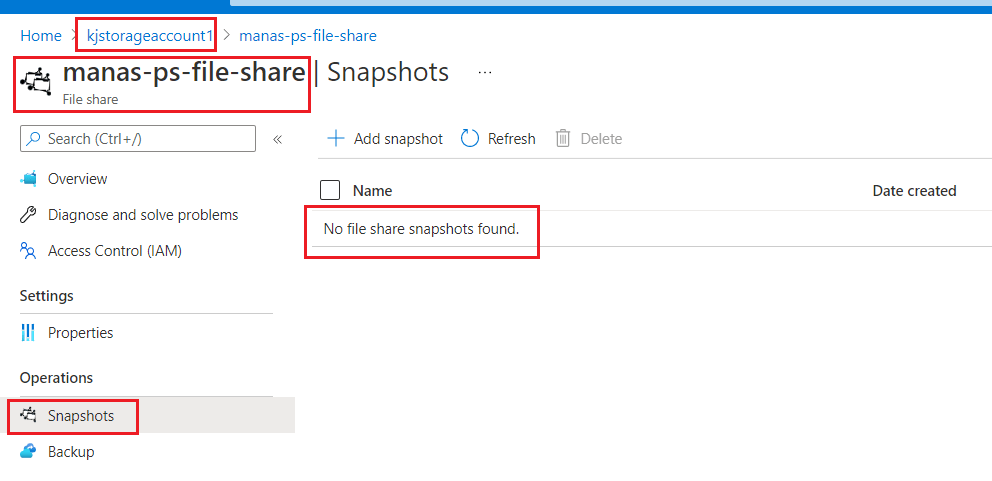
Azure file share allow us to create a share snapshots. A snapshot preserves a point in time for an Azure file share. Let’s play with Snapshot using PowerShell but before that let’s check, if there is any snapshot exists for our selected File Share. As showing in the following figure there is no snapshot exist.
There is no direct command in PowerShell to create a file share snapshot. We can create a share snapshot for a file share by the Snapshot method on PowerShell object for a file share. Let’s go through the steps.
Step 1 – Open Window Powershell, hopping you have already configured the PowerShell on your machine. If not configured yet please see our post Configure PowerShell For Microsoft Azure Az Module On Windows.
Step 2 – Get all Azure resources and variables required for our operations like Resource Group, Storage Account , File Share name where we want to create our snapshot. Use following commands to get all those information.
$resourceGroup= Get-AzResourceGroup -Name StorageAndDatabase
$myStorageAccount=Get-AzStorageAccount -ResourceGroupName $resourceGroup.ResourceGroupName -StorageAccountName "kjstorageaccount1"
$newFileShareName = "manas-ps-file-share"
Step 3 – Now t create a new snapshot for the file share we need to first get the File Share object using Get-AzStorageShare command as showing in the following example and then use Snapshot method.
$manas_ps_file_share = Get-AzStorageShare -Context $myStorageAccount.Context -Name $newFileShareName
$My1Stsnapshot = $manas_ps_file_share.CloudFileShare.Snapshot()
$My1Stsnapshot
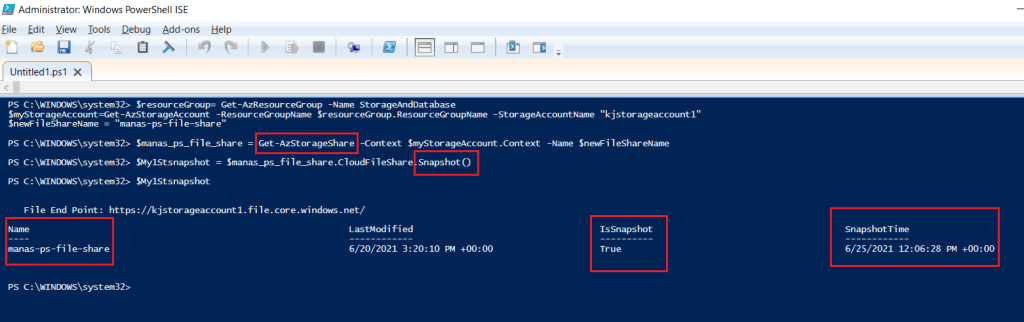
As we can see in the above figure, our command executed successfully. Now let’s check in portal if the new snapshot visible there.

As we can see in the above figure, our new snapshot is visible under our selected file share.
We can browse the contents of the file share snapshot by passing the snapshot reference ($snapshot) to the -Share parameter of the Get-AzStorageFile cmdlet as showing in the following example.
Get-AzStorageFile -Share $My1Stsnapshot

List File Share Snapshots
Now I am going to execute the below command 2 times more, so that it will create 2-3 snapshot with different time slot and we can list them using PowerShell command.
$My1Stsnapshot = $manas_ps_file_share.CloudFileShare.Snapshot()


We can see the list of snapshots you’ve taken for a file share using the following command.
Get-AzStorageShare -Context $myStorageAccount.Context | Where-Object { $_.Name -eq $newFileShareName -and $_.IsSnapshot -eq $true }

In the above figure we can see there are 3 snapshots exist under our selected Azure File Share.
Restore File From A Share Snapshot
In this section we will see how to restore our files from a snapshot using powershell. Suppose by mistake we have deleted files from our share file and we want them back, in that case we can restore them from latest snapshot. In our case I have deleted all files from our selected File Share except one. In this demo we will restore them from snapshot.

We can restore a file by using the Start-AzStorageFileCopy command.
$listOfFiles=Get-AzStorageFile -Share $My1Stsnapshot
foreach($file in $listOfFiles)
{
Start-AzStorageFileCopy -SrcShare $My1Stsnapshot -SrcFilePath $file.name -DestContext $myStorageAccount.Context -DestShareName $newFileShareName -DestFilePath $file.name
$file.name + "-- Restored"
}

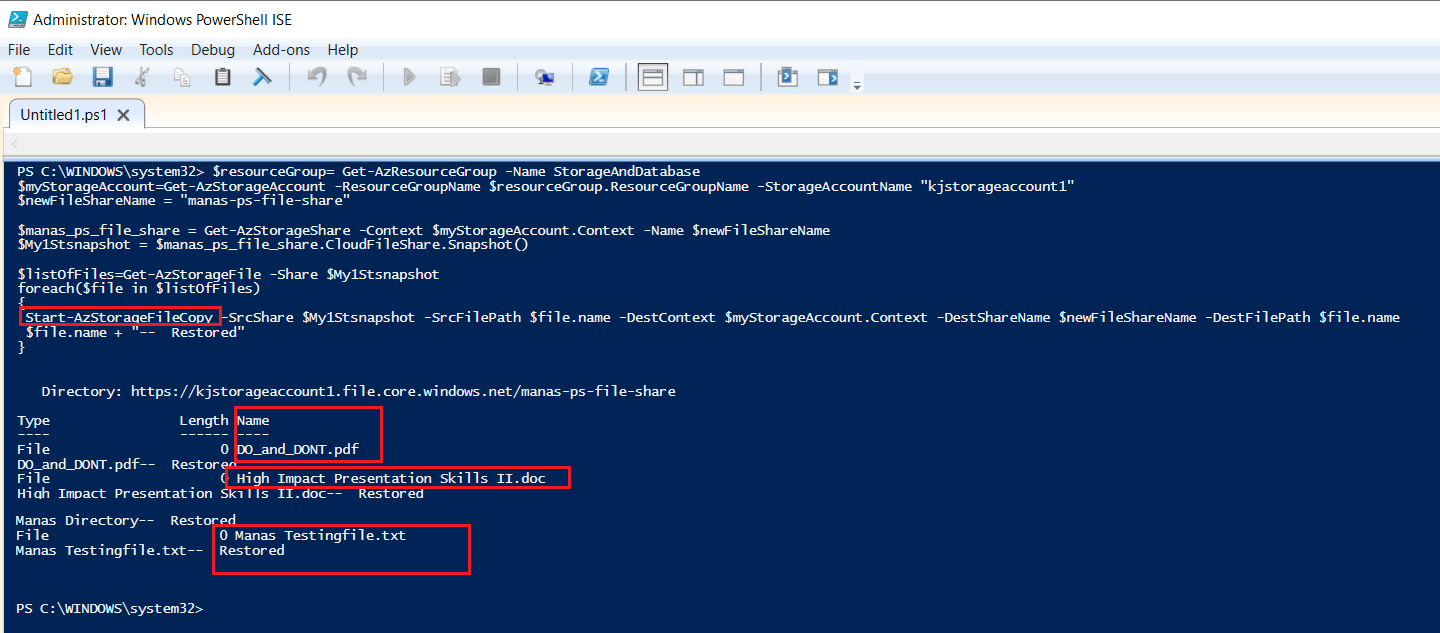
All files are restored to the destination file share. As we can see in the above image, if it found the existance of any file, then it will ask to confirm if we would like to overwrite the existing file or not. Let’s see in the portal if the files are visible there.
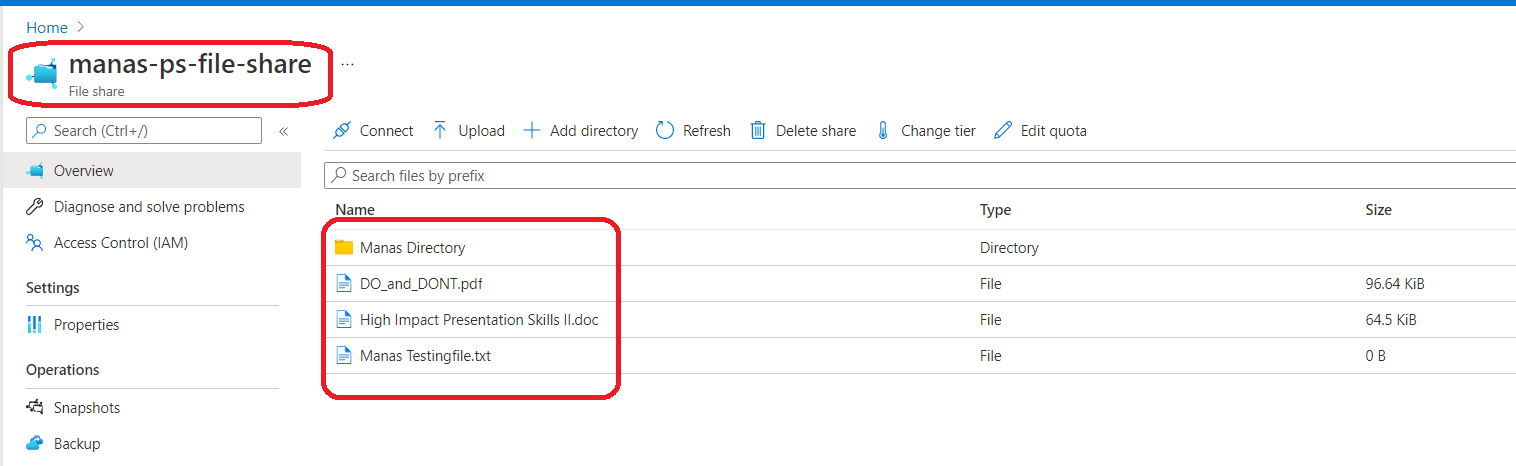
As we can see in the above figure, all required files are restored successfully 🙂 .
I hope this is informative to you. Please let me know if I missed anything important or if my understanding is not up to the mark. Keep reading, share your thoughts, experiences. Feel free to contact us to discuss more.
Next Article : Part 22 – Azure File Service – Configure Azure File Share Back Up Using PowerShell
If you have any suggestion / feedback / doubt, you are most welcome. Stay tuned on Knowledge-Junction, will come up with more such articles.
Thanks for reading 🙂 .


11 Responses
[…] Next Article : Part 21 – Azure File Service – Create And Manage File Share Snapshots Using PowerShell […]
[…] our previous articles we have discussed How To Create and Manage File Share Snapshots Using PowerShell. Today in this article we will discuss How To Configure Azure File Share Back Up Using […]
[…] Part 21 – Azure File Service – Create And Manage File Share Snapshots Using PowerShell […]
[…] Part 21 – Azure File Service – Create And Manage File Share Snapshots Using PowerShell […]
[…] Part 21 – Azure File Service – Create And Manage File Share Snapshots Using PowerShell […]
[…] Part 21 – Azure File Service – Create And Manage File Share Snapshots Using PowerShell […]
[…] Part 21 – Azure File Service – Create And Manage File Share Snapshots Using PowerShell […]
[…] Part 21 – Azure File Service – Create And Manage File Share Snapshots Using PowerShell […]
[…] Part 21 – Azure File Service – Create And Manage File Share Snapshots Using PowerShell […]
[…] Part 21 – Azure File Service – Create And Manage File Share Snapshots Using PowerShell […]
[…] Chapter 21 – Azure File Service – Create And Manage File Share Snapshots Using PowerShell […]