Microsoft Azure Storage and Database Part 22 – Azure File Service – Configure Azure File Share Back Up Using PowerShell

Hello Friends,
Hope you all are doing good !!! 🙂 .
In our previous articles we have discussed How To Create and Manage File Share Snapshots Using PowerShell. Today in this article we will discuss How To Configure Azure File Share Back Up Using PowerShell.
Tool Installation Articles :
- Configure Azure Command Line Interface ( Azure CLI) On Windows
- Configure PowerShell For Microsoft Azure Az Module On Windows
Previous Azure series :
- Learn Basics Of Azure Networking In 60 Hours
- Learn Basic Of Azure Active Directory And Azure Identity And Access Management
- Azure DevOps – Learn at one place
If you have missed our previous articles on Azure Storage and Database Series, please check it in following links.
Part 1 – Overview Of Azure Storage and Database
Part 2 – Azure Storage Account
Part 4 – Work With Azure Blob Storage
Part 5 – Storage Explorer For Azure Storage
- .
- .
- .
- .
Part 17 – Azure File Service – Create File Share Using Power Shell
Part 18 – Azure File Service – Upload And Copy Files In File Share Using Power Shell
Part 19 – Azure File Service – BackUp And Restore Azure Files From Recovery Services Vault
Part 20 – Azure File Service – BackUp And Restore Azure Files From The File Share Pane
Part 21 – Azure File Service – Create And Manage File Share Snapshots Using PowerShell
Next Article : Part 23 – Azure File Service – Restore Azure Files From Back Up Using PowerShell
Configure File Share Back Up
In our of our last article, we have discussed how to configure backup of a file share through Azure Portal. In this article we will discuss, how to achieve this using Azure Az module of PowerShell.
Before we configure the backup for file share, we need need to configure Recovery Services Vault. In one of our article we have configured it through Azure portal, Let’s go through the following steps to create and configure the Vault using PowerShell.
Configure Service Provider
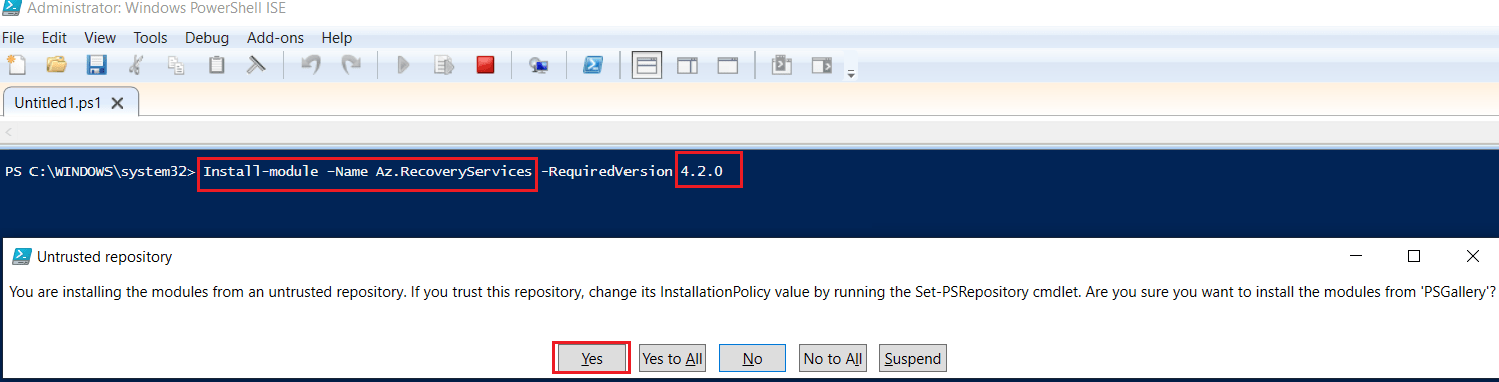
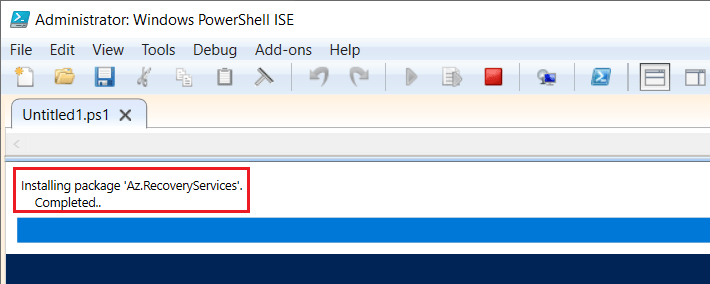
Step 1 – In one of our article we have discussed, how to install or configure Window PowerShell for Az module. Today we are going to use one of it’s sub-module Az.RecoveryServices. To make sure that we have latest version of the module, let’s execute the following command to install it’s latest version.
Install-module -Name Az.RecoveryServices -RequiredVersion 4.2.0
Step 2 – Connect to our Azure account by using Connect-AzAccount.
Connect-AzAccount
Step 3 – If we have only one subscription associated with this account, it is ok, it will associate the subscription here as showing in above figure. If we have multiple subscription associated with this account then we have to associate the subscription on which we are goin to work using following command.

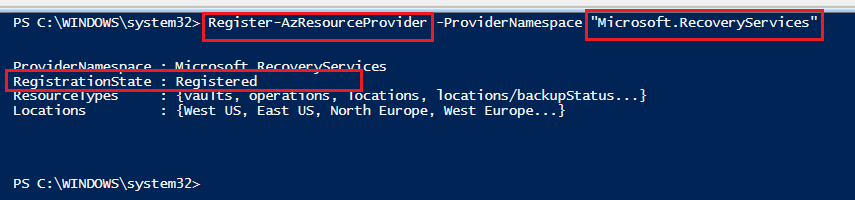
Step 4 – As we know there are many Service Provider in Azure and they are providing different set of services. Microsoft.RecoveryServices is one of the service provider provides Azure backup related services.

If we are using this BackUp service first time using PowerShell, we need to register the Microsoft.RecoveryServices service provider by using following cmdlet.
Register-AzResourceProvider -ProviderNamespace "Microsoft.RecoveryServices"
Create Recovery Services Vault Using PowerShell
A Recovery Services vault is a management entity that stores recovery points created over time and provides an interface to perform backup related operations. These include taking on-demand backups, performing restores, and creating backup policies.
Let’s go through the following steps to create and configure one Recovery Services Vault because this is the starting point for all types of back and restore operations.
Step 1 – When we will create Recovery Services Vault using PowerShell, we need to provide resource group name as parameter. If we don’t have our Resource Group with us, we can create a new resource group using following cmdlet.
New-AzResourceGroup -Name "StorageAndDatabase" -Location "East US"
We have our resource group ready with me so using following command, we can get it.
$resourceGroup= Get-AzResourceGroup -Name StorageAndDatabase
Step 2 – We can create a new Vault using New-AzRecoveryServicesVault command by providing the resource group and location as it’s parameters. Location should be the same as the location of our Storage Account for which we are going to take back up.
New-AzRecoveryServicesVault -Name "Manas-Storage-RSV-PS" -ResourceGroupName $resourceGroup.ResourceGroupName -Location "East US"
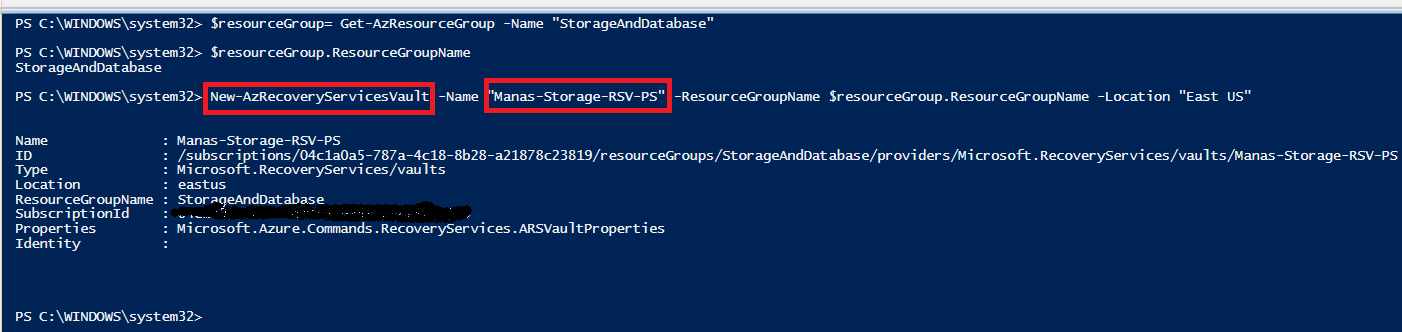
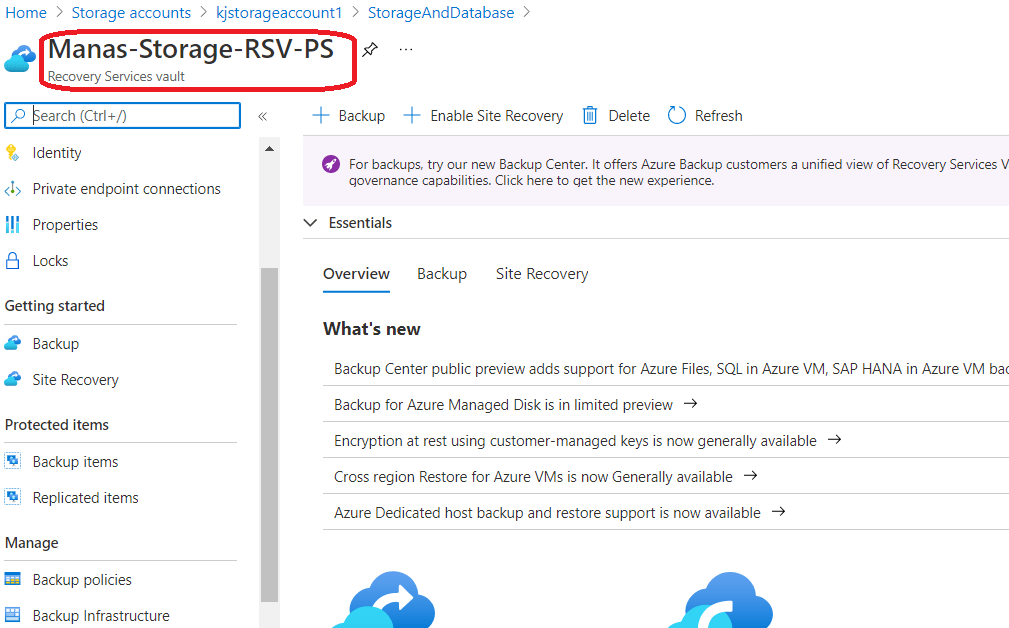
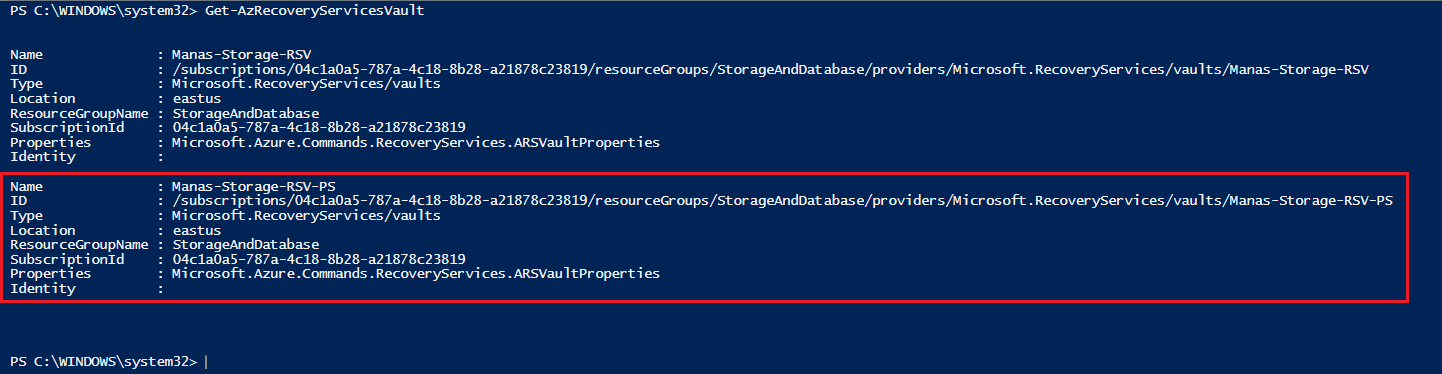
Step 3 – As we can see in the above figure, our Vault is successfully created. We can also check it using Get-AzRecoveryServicesVault PowerShell command. In the following figure we can see two vault. One we have created through Azure portal and the second one we have just created using PowerShell.
Step 4 – The next step is to store the vault object in a variable, and set the vault context by using Set-AzRecoveryServicesVaultContext as showing in the example.
Get-AzRecoveryServicesVault -Name "Manas-Storage-RSV-PS" | Set-AzRecoveryServicesVaultContext
Step 5 – When we are working for a particular Vault, no need to set the vault context we can use Vault ID in that case. By the way the setting of Vault context is going to be deprecate. So for our subsequent commands, we should store the Vault ID in a variable and use that variable when ever we need it. Using following command, we can get our Vault’s ID.
$MyvaultID = Get-AzRecoveryServicesVault -ResourceGroupName $resourceGroup.ResourceGroupName -Name "Manas-Storage-RSV-PS" | select -ExpandProperty ID
Configure Backup Policy And Enable backup Using PowerShell
As per Microsoft Documentation, a backup policy specifies the schedule for backups, and how long backup recovery points should be kept. A backup policy is associated with at least one retention policy. A retention policy defines how long a recovery point is kept before it’s deleted. We can configure backups with daily, weekly, monthly, or yearly retention. By default, a start time is defined in the schedule policy object. If we want, we can change the start time to the desired start time using powershell script. The desired start time should be in Universal Coordinated Time (UTC).
Step 1 – Get the default BackUp Schedule Policy using following PowerShell Command.
$MyschPol = Get-AzRecoveryServicesBackupSchedulePolicyObject -WorkloadType "AzureFiles"
If required, we can change the start time as showing in the following example.
$UtcTime = Get-Date -Date "2021-06-26 01:30:00Z"
$UtcTime = $UtcTime.ToUniversalTime()
$MyschPol.ScheduleRunTimes[0] = $UtcTime
Step 3 – Get the Retention Policy using following PowerShell Command.
$MyretPol = Get-AzRecoveryServicesBackupRetentionPolicyObject -WorkloadType "AzureFiles"
Step 4 – Now let’s create a new back up protection policy using following PowerShell command.
New-AzRecoveryServicesBackupProtectionPolicy -Name "MyAFSPolicy" -WorkloadType "AzureFiles" -RetentionPolicy $MyretPol -SchedulePolicy $schPol -VaultID $MyvaultID

Step 5 – Get the newly created backup policy to an variable.
$ManasafsPol = Get-AzRecoveryServicesBackupProtectionPolicy -Name "Manas-AFSPolicy"
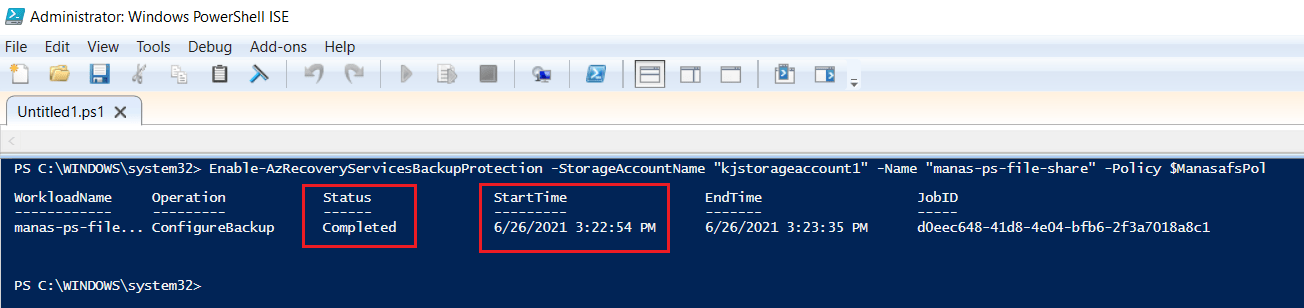
Step 6 – The Enable-AzRecoveryServicesBackupProtection cmdlet enables the backup by associating a protection policy with the item. The following example enables protection for the Azure file share manas-ps-file-share in storage account kjstorageaccount1, with the policy Manas-AFSPolicy.
Enable-AzRecoveryServicesBackupProtection -StorageAccountName "kjstorageaccount1" -Name "manas-ps-file-share" -Policy $ManasafsPol
When we execute the above command, we got one error in our powershell window. In our following article we have resolved that error and execute the above command again and as we can see in the following figure we completed successfully.
Error and Solution Link: Issue In Azure BackUp – Enable-AzRecoveryServicesBackupProtection : ‘containerName’ cannot be null
Trigger On-Demand BackUp Using PowerShell
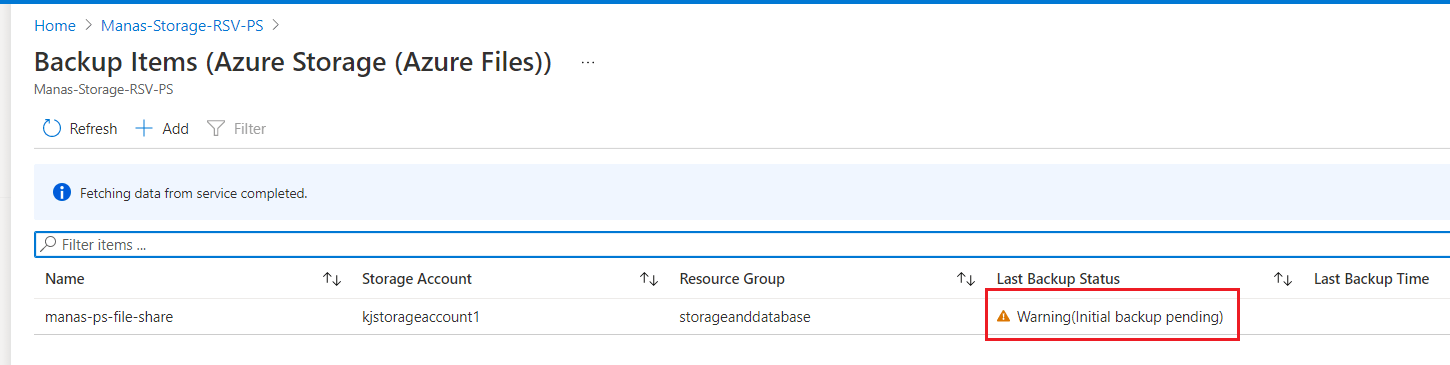
We have enabled the backup. Now the next step is to trigger the initial backup. Using Backup-AzRecoveryServicesBackupItem we can trigger an on-demand backup for a protected Azure file share. Let’s go through the following steps to trigger Backup.
Step 1 – Retrieve the storage account from the container in the vault that holds our backup data by using Get-AzRecoveryServicesBackupContainer as showing in the following example.
$ManasafsContainer = Get-AzRecoveryServicesBackupContainer -FriendlyName "kjstorageaccount1" -ContainerType AzureStorage
Step 2 – To start a backup job, we need to get information about the Azure file share. By using Get-AzRecoveryServicesBackupItem command we can get it as showing in the following example.
$ManasafsBkpItem = Get-AzRecoveryServicesBackupItem -Container $ManasafsContainer -WorkloadType "AzureFiles" -FriendlyName "manas-ps-file-share"
Step 3 – Run an on-demand backup by using Backup-AzRecoveryServicesBackupItem as showing in the following figure.
$Manasjob = Backup-AzRecoveryServicesBackupItem -Item $ManasafsBkpItem
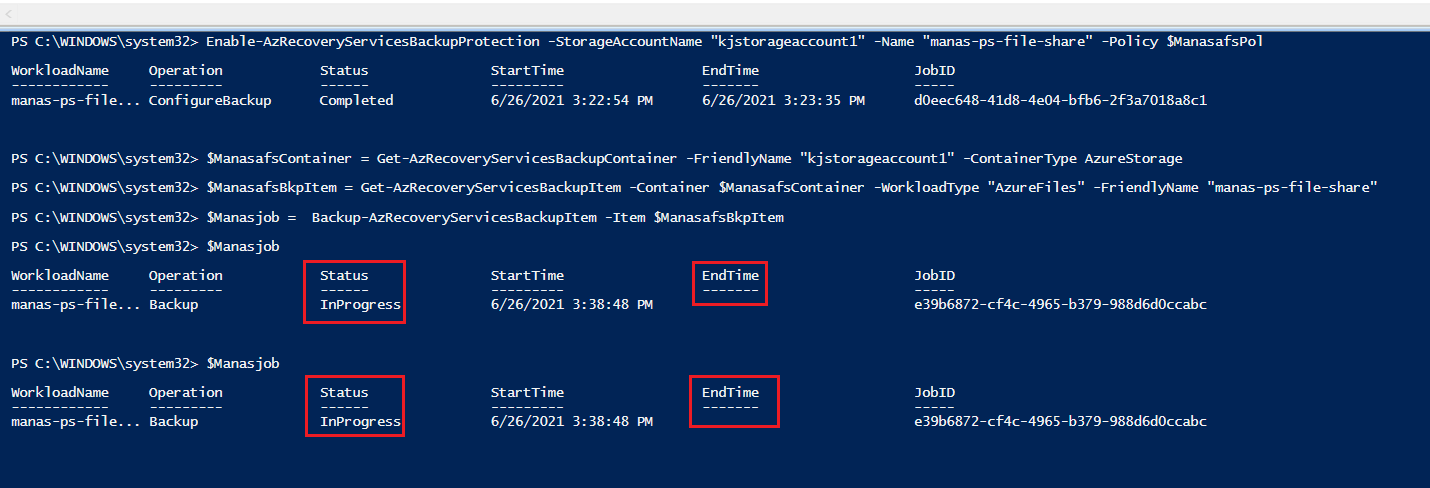
As we can see in the above figure it took some time to complete the backup job as it’s status is still InProgress. let’s check the job status in Azure portal.
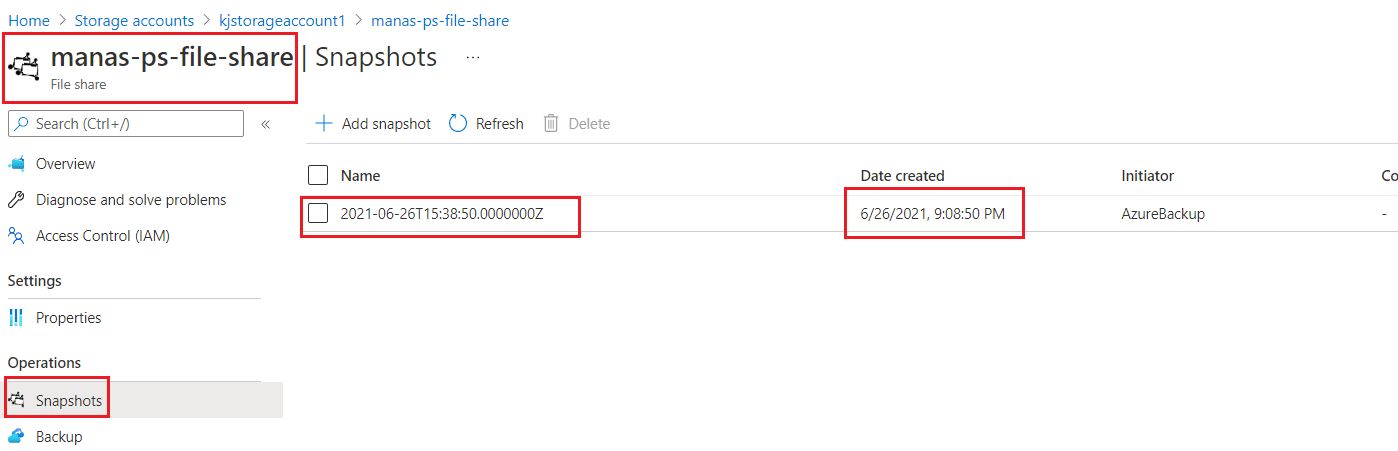
As we can see in the above figure, it successfully executed the backup job and the back up created as a snapshot in the File Share.
I hope this is informative to you. Please let me know if I missed anything important or if my understanding is not up to the mark. Keep reading, share your thoughts, experiences. Feel free to contact us to discuss more.
Next Article : Part 23 – Azure File Service – Restore Azure Files From Back Up Using PowerShell
If you have any suggestion / feedback / doubt, you are most welcome. Stay tuned on Knowledge-Junction, will come up with more such articles.
Thanks for reading 🙂 .


1 Response
[…] our previous articles we have discussed How To Configure Azure File Share Back Up Using PowerShell. Today in this article we will discuss How To Restore Azure Files From Back Up Using […]