Microsoft 365 – Power Platform – Empowering your Learning Journey: A Comprehensive Guide to Power Platform for Beginners – exploring Power Platform Admin Center: A Beginner’s Adventure – Part 9

“Real change, enduring change, happens one step at a time.”
Welcome to the captivating universe of Microsoft’s Power Platform – a digital adventure playground where technology meets magic! Join me as we embark on a journey through the intricate steps of environment creation, administration, and the art of shaping digital landscapes. In this article, we’ll unravel the secrets behind controlling developer spaces, transitioning between environment types, creating databases, and even mastering the mystical act of bringing back deleted workspaces. Whether you’re a tech enthusiast or a curious explorer, let the magic of the Power Platform unfold as we celebrate the joy of digital creation and discovery. Buckle up for an exciting ride into the heart of Microsoft’s powerful toolkit!
Empower your learning journey with Power Apps!
- Foundations: Master Power Apps and the Power Platform dynamics. Read Part 1.
- Exploration: Navigate Power Apps’ enchanting features. Explore Part 2.
- No Code Magic: Unleash creativity with Canvas Apps. Discover Part 3.
- Business Decisions: SPFx vs Power Apps insights. Decide with Part 4.
- Hands-On Creation: Team-guided Canvas App creation. Create with Part 5.
- App Mobility: Learn Power Apps basics – Moving Your Apps Around. Explore Part 6.
- Navigating Environments: A Beginner’s Guide. Dive into Part 7.
- Creating and Managing Environments: Part 8 – A Comprehensive Guide for Beginners. Read Part 8 Here
Key takeaways from this article
At the end of this article, you will have a better understanding of
- Learn to navigate the Power Platform Admin Center for tasks like environment creation and database management.
- Understand how to make environment creation choices, limiting access to specific admins for better control.
- Explore PowerShell commands to control developer environments and restrict non-admin users from creating special spaces.
- Discover steps to change environment types, convert between production and sandbox, and manage Microsoft Dataverse databases.
- Learn how to delete environments, recover accidentally deleted workspaces, and use PowerShell for workspace recovery.
- Gain insights into tweaking environment settings, including changes to name, URL, and security groups.
- Understand the implications of URL changes on Power Automate flows and communication with users.
- Celebrate the progress made in exploring and managing the Microsoft Power Platform, with tips for ongoing learning and discovery.
Setting the Stage for Environment Creation
Finding our Way to the Admin Center

- To kick off our adventure, let’s enter the Power Platform admin center. Once inside, look for the Gear icon in the top-right and click on “Power Platform settings.”
Making Choices about Environment Creation

- Now, let’s make some decisions. Choose “Only specific admins” and pick these admin roles:
- Global admins
- Dynamics 365 admins
- Power Platform admins
By doing this, only these chosen admins will have the power to create and manage environments. Keep in mind, this only affects new environments, not the ones already there.
Navigating Developer Environments
Controlling Developer Environments
If we want to limit regular users from creating developer spaces, there’s a handy PowerShell command. This ensures only admins can create these special environments.
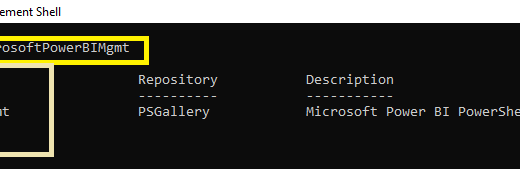
For a comprehensive guide on PowerShell, check out the tutorial article available here. It’s a valuable resource to enhance your PowerShell skills.
Powershell
$requestBody = @{

    powerPlatform = @{

        governance = @{

            disableDeveloperEnvironmentCreationByNonAdminUsers  = $True

        }

    }

}

Set-TenantSettings -RequestBody $requestBody- $requestBody: This is like a note that contains specific instructions. In our case, it’s telling the system how to handle creating developer environments.
- powerPlatform: Think of this as the category of settings related to the Power Platform, Microsoft’s toolset for building apps.
- governance: Inside the Power Platform, governance is like the rules and control measures to keep things organized.
- disableDeveloperEnvironmentCreationByNonAdminUsers = $True: This part is saying, “Turn off the ability for regular users to create special developer environments unless they are admins.”
- Set-TenantSettings -RequestBody $requestBody: Now, we’re telling the system to apply these settings. It’s like submitting the note to make sure these rules are in place.
In a Fun Analogy:

Think of it like giving a set of rules to a wizard (the system). The rules say, “Only let the head wizards (admins) create magical practice spaces (developer environments), and everyone else should not be able to create them.” Then, we send these rules to the wizard, asking them to make sure everyone follows them.
For a more permanent solution, there are extra steps explained in the article.
Changing Environment Types
Switching Environment Roles
When our work is ready to go live, we might need to change the environment type. Here’s how:
- Go to the Power Platform admin center.

- Click on “Environments” on the left.

- Pick the environment we want to change.

- Click “Convert to production” or “Convert to sandbox” as needed.
- Confirm the changes.
Creating a Microsoft Dataverse Database
Adding a Database in the Admin Center
- To create a database using Dataverse, follow these steps in the admin center:
- Go to “Environments” on the left.

- Choose the environment we want.

- Click “+ Add database” and fill in the details.
- Finish by clicking “Add.”
Creating a Database in Power Apps
As an alternative, we can create a database directly in Power Apps:
- Log in to Power Apps.

- Look for “Solutions” on the left and click on “Solutions.”

- Choose “Create a database” to start the process.
Delete environment
Deleting an environment is like cleaning up and making space. It helps get rid of extra information and personal details. Just remember, we can’t delete the default environment.
Here’s how we can do it:


- Pick the environment we want to delete.

- Click on “Delete” for that environment.

- Confirm our choice by giving the needed details.
After we delete an environment, we can’t use its web address again for a new environment until at least 24 hours later. So, be patient if we plan to reuse the same web address after deleting an environment. It’s like making sure everything is tidy and ready for something new!
Getting Back a Deleted Place: Easy Steps
Oops, did we accidentally delete a working space? No worries, we can bring it back within a week of deleting it. It’s like hitting the undo button for our digital workspace. Here’s how we can do it, and we have two ways to choose from:
Using the Power Platform Admin Center
Sign In:
- Go to the Power Platform admin center.

- Log in as someone in charge (like a Dynamics 365 admin or a Global admin).
Find the Recovery Spot:

- Click on “Environments” in the menu.
- Look for “Recently deleted environments.”
Pick and Restore:

- Choose the workspace we want back.
- Hit the “Recover” button.
Confirm It’s Back:

- Click “Continue” to make sure it comes back.

It might take a few hours, but once it’s done, we’ll see it back where it belongs.
Using PowerShell (a bit like magic words for our computer)
If we’re into tech wizardry, try these magical words in PowerShell:
Powershell
# See which places got deleted

Get-AdminPowerAppSoftDeletedEnvironment

# Bring one back to life

Recover-AdminPowerAppEnvironment -EnvironmentName $environmentName -WaitUntilFinished $true
Get-AdminPowerAppSoftDeletedEnvironment
- What it does: Imagine checking a list of places we accidentally threw away.
- In other words: It shows us which workspaces got deleted recently.
Recover-AdminPowerAppEnvironment -EnvironmentName $environmentName -WaitUntilFinished $true
- What it does: Think of this as bringing a deleted workspace back to life.
- In other words: If we know the name of the workspace ($environmentName), this command makes sure it’s recovered and ready to use again.
- Bonus: The -WaitUntilFinished $true part just means it waits until the recovery is done before moving on. It’s like making sure the job is finished before doing anything else.
And that’s it! Our workspace will be back, and we can continue working like nothing happened. Easy, right?
Tweaking Our Environment: A Simple How-To Guide
As admins, we can make changes to our environment settings, such as its name, web address, and purpose. However, it’s essential to remember that we can’t edit environments still in the setup phase, and we need to enable disabled ones first.
Here’s the Easy Process:
- Go to the Power Platform admin center and log in using our admin credentials.

- Click on “Environments” in the menu, then choose the one we want to tweak.
- Hit “Edit.”

What We Can Change:
- Name: Our organization’s name, shown in apps.
- URL: The web address for users to log in. Be careful; this affects Power Automate flows.
Things to Keep in Mind:
- After changing the URL, Power Automate flows turn off. We’ll need to fix connections and turn them back on.
- When the URL changes, our users need a heads-up, especially those using web apps or Dynamics 365 for Outlook.
Switching Environment Type or Purpose:
- Type: Swap between production and sandbox.
- Purpose: Tell everyone the environment’s main goal.
Managing Security Groups:
- If no security group is set, all licensed users get added automatically.
Saving Our Changes:
- After we’ve made our tweaks, click “Save.”
What to Watch Out For:
- Changing the URL affects Power Automate flows, so let’s be cautious.
- Tell users right away after a URL change, especially Outlook users.
- Understand the rules for the first 24-48 hours after a URL change.
In a Nutshell:
Editing our environment is handy, but it comes with responsibilities. Let’s always keep our team informed about changes and be mindful of the effects, especially when dealing with URLs and Power Automate flows. Happy tweaking!
Conclusion: Celebrating Our Progress
Our journey through Microsoft Power Platform has been a whirlwind! We tackled creating environments, controlling spaces with PowerShell, and managing databases with ease. From transforming digital playgrounds to bringing back deleted spaces, we’ve got the basics covered.
Whether you’re a tech newbie or a pro, the Power Platform is your digital adventure playground. Keep exploring, keep learning, and let the magic unfold in your tech endeavors! Cheers to more discoveries in the world of Microsoft’s Power Platform!
Also get my article updates on my social media handles.
Twitter – https://twitter.com/PrajyotYawalkar?t=oovP0r9FnDtz5nNSJGKO0Q&s=09
LinkedIn – https://www.linkedin.com/in/prajyot-yawalkar-093716224/
Have a wonderful day.
Thanks for reading.


You must be logged in to post a comment.